Step-by-Step Instructions
To guide your project, explore these seven statement ceiling trends and review the comprehensive four-phase installation framework below.
1. High-Contrast Paint and Color-Blocking: Paint the ceiling two shades darker than your walls, or apply a bold satin navy or deep forest green to create an intimate atmosphere. High-gloss finishes reflect ambient light, turning low ceilings into glossy reflective planes.
2. Exposed Faux Box Beams: Install lightweight hollow U-shaped wood beams directly to ceiling joists using internal 2×4 mounting cleats. This method creates rustic, timber-framed warmth without structural strain.
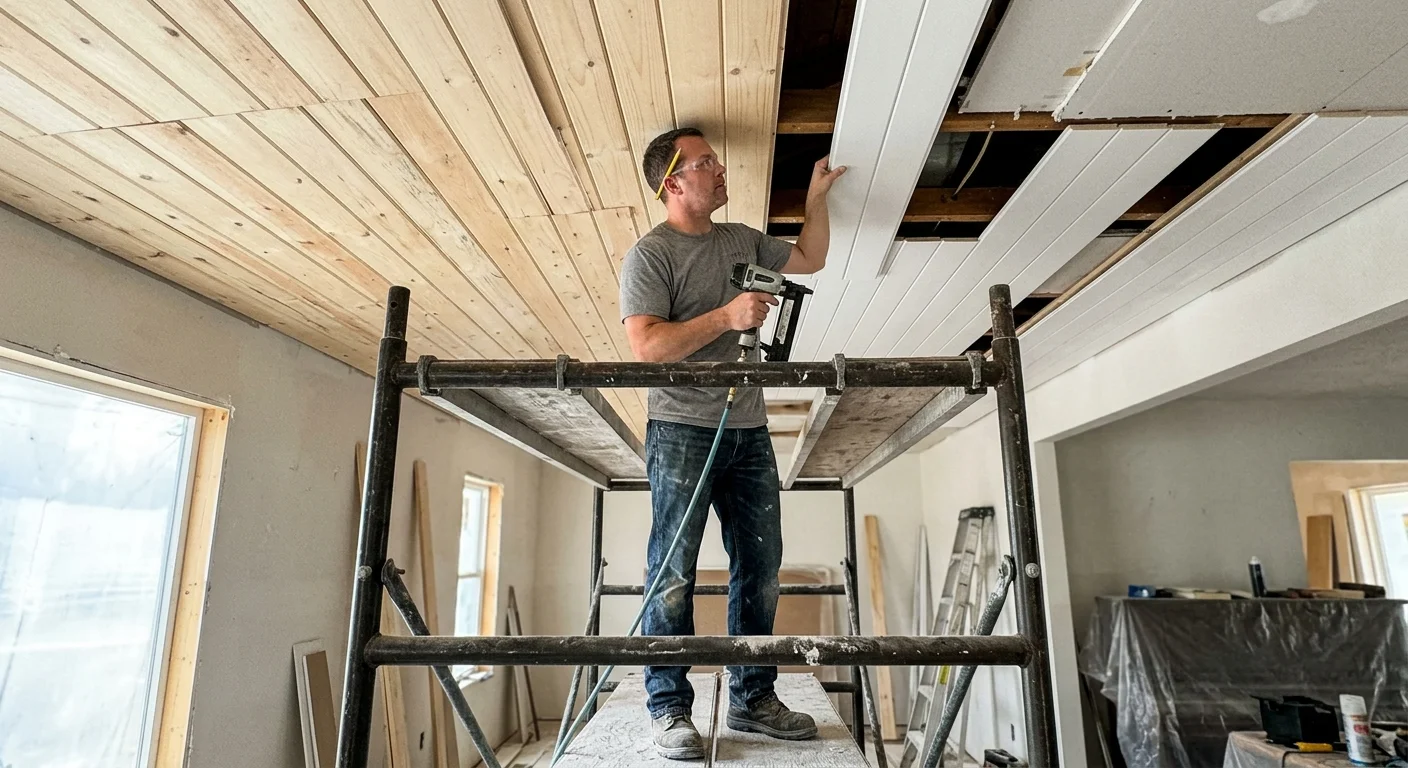
3. Tongue-and-Groove Wood Planking: Fasten pine or cedar planks perpendicular to ceiling joists. This classic shiplap texture brings natural warmth and vertical linear perspective to living rooms and porches.
4. Tray Ceiling Enhancements: Elevate existing recessed ceilings by applying crown molding along interior soffit edges, inserting metallic leafing, or adding concealed LED strip lighting inside tray ceiling ideas.
5. Vintage Pressed Metal or PVC Tiles: Snap grid lines across the ceiling and mount decorative metal or lightweight PVC tiles using panel adhesive and brad nails, creating an antique architectural look.
6. Overhead Statement Wallpaper: Apply high-impact geometric or botanical wallpaper above eye level. Using heavy-duty wallcovering adhesive on primed, smooth drywall creates an eye-catching focal plane.
7. Architectural Coffered Grids: Construct a square or rectangular grid of timber box beams trimmed with crown molding. Coffered structures add sophisticated depth and historic character to high ceilings.
Phase 1: Layout, Mapping, and Reference Lines: Mount your laser level to a tripod or wall clamp set roughly 6 inches below the ceiling. Project a level reference line around the entire perimeter of the room. Use your stud finder to locate framing joists, which typically run 16 or 24 inches on center. Mark each joist centerline on opposing walls using painter’s tape and snap chalk lines across the ceiling between corresponding marks.
Phase 2: Surface Preparation and Fixture Adjustment: Patch major drywall gouges with fast-setting joint compound. Sand smooth once dry. Shut off the electrical breaker servicing the room. Remove existing light fixtures and ceiling fan canopy plates. Install plastic electrical box extenders onto existing ceiling boxes so that fixture mounting screws align flush with your planned paneling or beam thickness.
Phase 3: Material Installation and Fastening: When installing planking or faux beams, begin along the longest straight wall. Apply a continuous zig-zag bead of heavy-duty construction adhesive along the back of each board or beam cleat. Lift the board into position, press firmly against the drywall, and drive 18-gauge brad nails at a 45-degree angle through the tongue side of the plank directly into the ceiling joists. Maintain a 1/4-inch expansion gap along room perimeters to allow natural seasonal wood movement.
Phase 4: Trim Work, Caulking, and Finishing: Conceal expansion gaps along the wall-ceiling intersection by installing 3.5-inch crown molding or simple square trim. Fill all visible nail holes with color-matched wood putty or painter’s spackle. Apply a paintable acrylic latex caulk along trim joints to create seamless transitions. Sand filled holes flush once dry, then apply your topcoat paint or wood stain using a short-nap microfiber roller or paint sprayer.
Troubleshooting Overhead Obstacles: Ceiling joists are rarely perfectly flat. If you encounter bowed framing while installing wood planks or beams, use thin plastic shims between the framing and material to level out low spots before driving brad nails. If installing wallpaper over textured ceiling surfaces, knock down high spots with a drywall scraper and apply a skim coat of joint compound to create a flat, sound substrate.