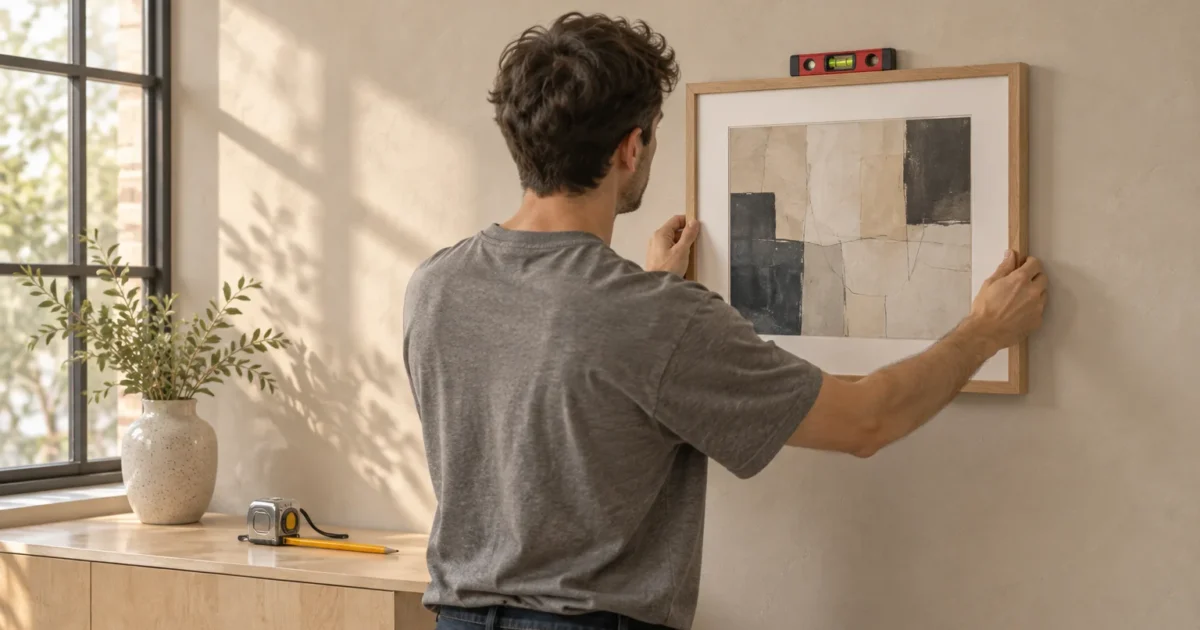
Hanging artwork a few inches too high throws off an entire room, making ceilings look lower and furniture feel disconnected. Mastering the exact art height designers rely on transforms blank drywall into a balanced, intentional focal point.
You do not need an art degree or expensive laser gear to get museum-grade placement on your first try. With one simple center-point formula and the right wall anchors, your frames will sit level, secure, and visually grounded.
Whether you are mounting a single canvas above a sofa or planning a multi-frame gallery wall, these measurements take the guesswork out of every nail hole. Grab your tape measure and pencil to hang your collection with confidence.
Project Overview & Why It Matters
Most homeowners instinctively mount frames too high because they eyeball the empty wall space instead of measuring from the floor. Learning how to hang art properly anchors your furniture, improves sightlines, and makes modest rooms feel thoughtfully curated.
The 57-Inch Eye-Level Standard
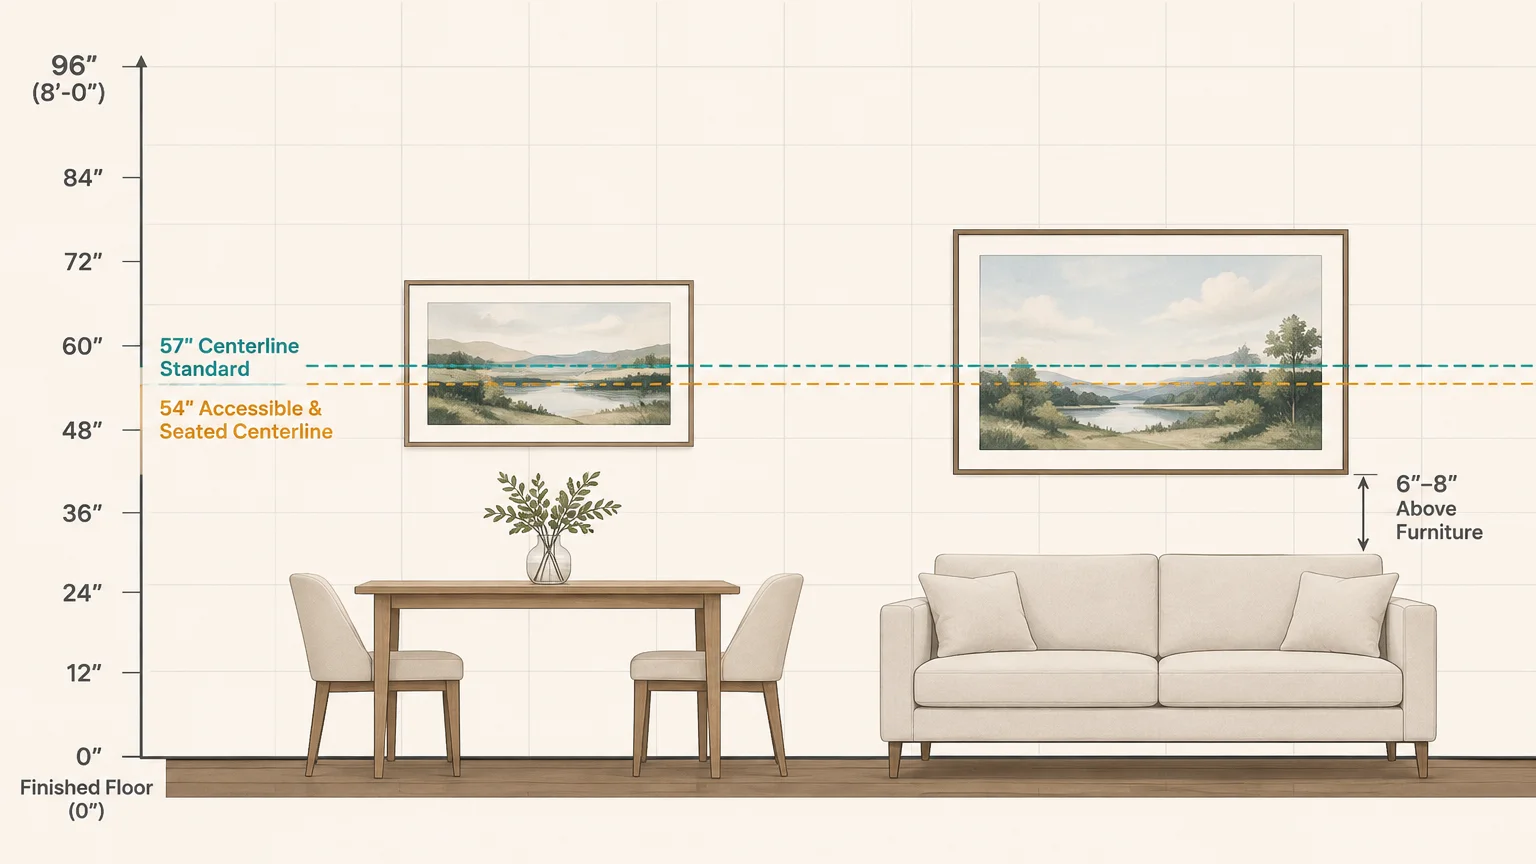
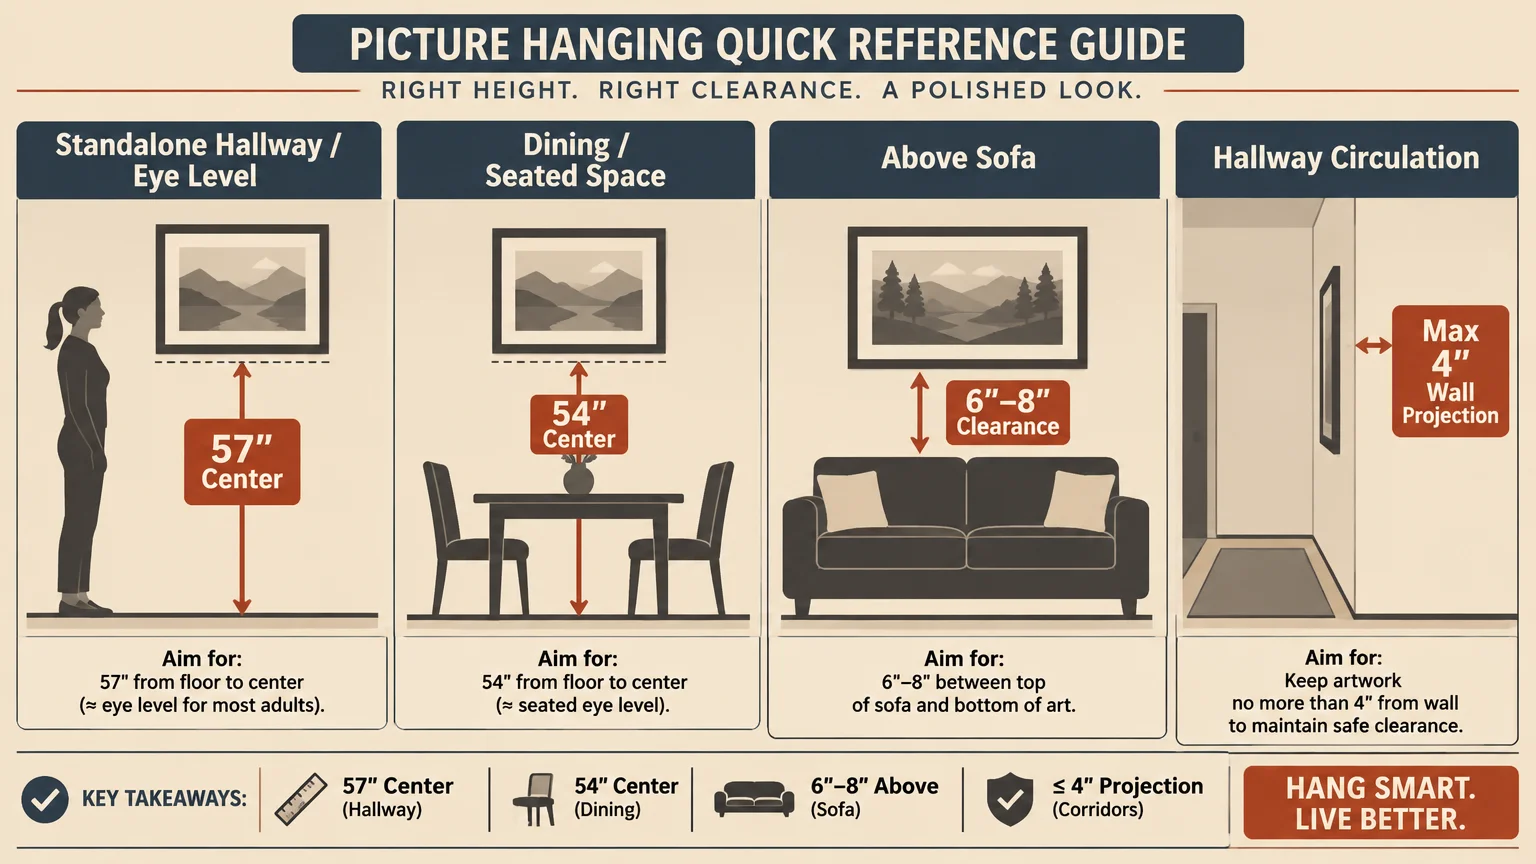
Museums, framing pros, and publications like Architectural Digest and Better Homes & Gardens consistently recommend centering artwork at 57 inches above the finished floor. Most designers treat 57 to 60 inches as the reliable sweet spot for average residential eye level.
That 57-inch mark measures to the vertical center of your piece, not its top frame edge or nail hook. Keeping every focal piece along this consistent horizontal centerline creates natural visual flow from one room to the next.
Even if your home has tall ceilings, you should still anchor standalone hallway and living room art near eye level. Floating a small frame near the ceiling breaks its connection to the rest of your decor.
Adjusting for Seated Rooms and Accessibility
Standing eye level works great in entryways and corridors, yet bedrooms and dining areas demand a slightly lower perspective. Design guides like Chairish and Framky note that hanging art about 2 to 4 inches lower improves comfort where people mostly sit.
Universal design standards follow a similar principle for mixed viewing heights. The Smithsonian Guidelines for Accessible Exhibition Design place comfortable viewing for both seated and standing guests between 48 and 67 inches, with an optimal centerline at 54 inches.
Hallways and walkways also require attention to frame depth so nobody clips a corner while walking past. Under U.S. Access Board ADA Standards, wall-mounted items between 27 and 80 inches off the floor in public circulation paths cannot protrude more than 4 inches.
Applying that 4-inch clearance rule in narrow residential hallways prevents bumped shoulders and knocked frames. Reserve deep shadow boxes and sculptural wall hangings for wider walls outside busy traffic lanes.
Anchoring Art Above Furniture and Mantels
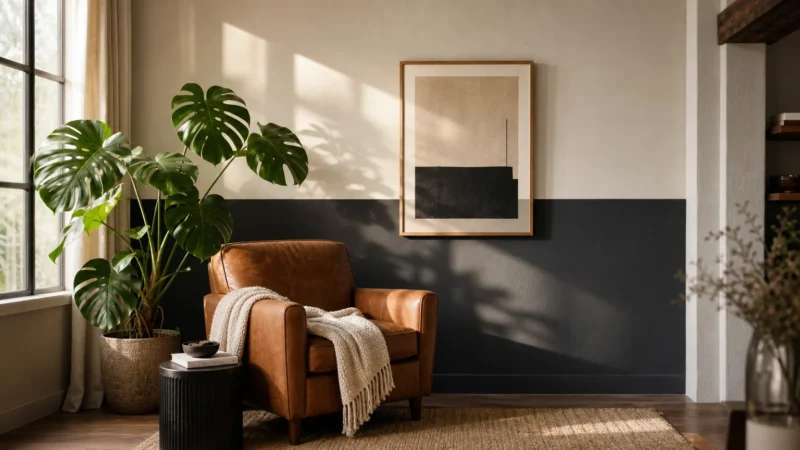
When a wall includes a sofa, console table, or bed, the furniture dictates your vertical placement more than the 57-inch rule. Leaving too much blank drywall between a couch back and a frame makes the artwork look adrift.
Better Homes & Gardens recommends positioning the bottom frame edge 6 to 8 inches above furniture tops, while Framebridge favors 7 to 10 inches. Chairish allows a 6 to 12 inch range, often using 10 to 12 inches over tall headboards.
Fireplace mantels call for an even tighter visual bond so the frame feels connected to the hearth. Interior guides such as Stellas wardrobe advise leaving just 4 to 8 inches between the mantel surface and the bottom of your frame.
Horizontal width matters just as much as vertical height when pairing art with furniture. Guides from Frameology, Fab Art, and The Spruce recommend the two-thirds rule, sizing your piece or grouping to span 50% to 75% of the furniture width below.
For an 84-inch sofa, Frameology calculates an ideal artwork or arrangement width of 56 to 63 inches. Undersized single prints look lost over wide couches unless you group them into a cohesive layout.
The DIY Payoff Versus Hiring a Pro
Measuring and hanging your own collection saves substantial money compared to calling in outside help. According to Angi, hiring a general handyman typically runs $40 to $140 per hour depending on your local market.
Specialized picture-hanging pros on Thumbtack commonly charge $50 to $112 or more per hour, often paired with a $100 to $150 first-hour minimum. Major metro markets run higher, with TaskRabbit NYC rates starting near $62 per hour or flat rates of $175 to $300.
Tackling straightforward drywall installations yourself keeps those labor fees in your decorating budget. You can reserve professional installers for massive mirrors, tall stairwell ladders, or two-person lifts exceeding 50 pounds.
Tools, Materials, and Prep Checklist
Gathering reliable measuring gear and matching wall hardware before lifting a hammer eliminates crooked holes and mid-project hardware store runs. Owning a few basic reusable tools costs far less than a single professional minimum service call.
Measuring and Layout Supplies
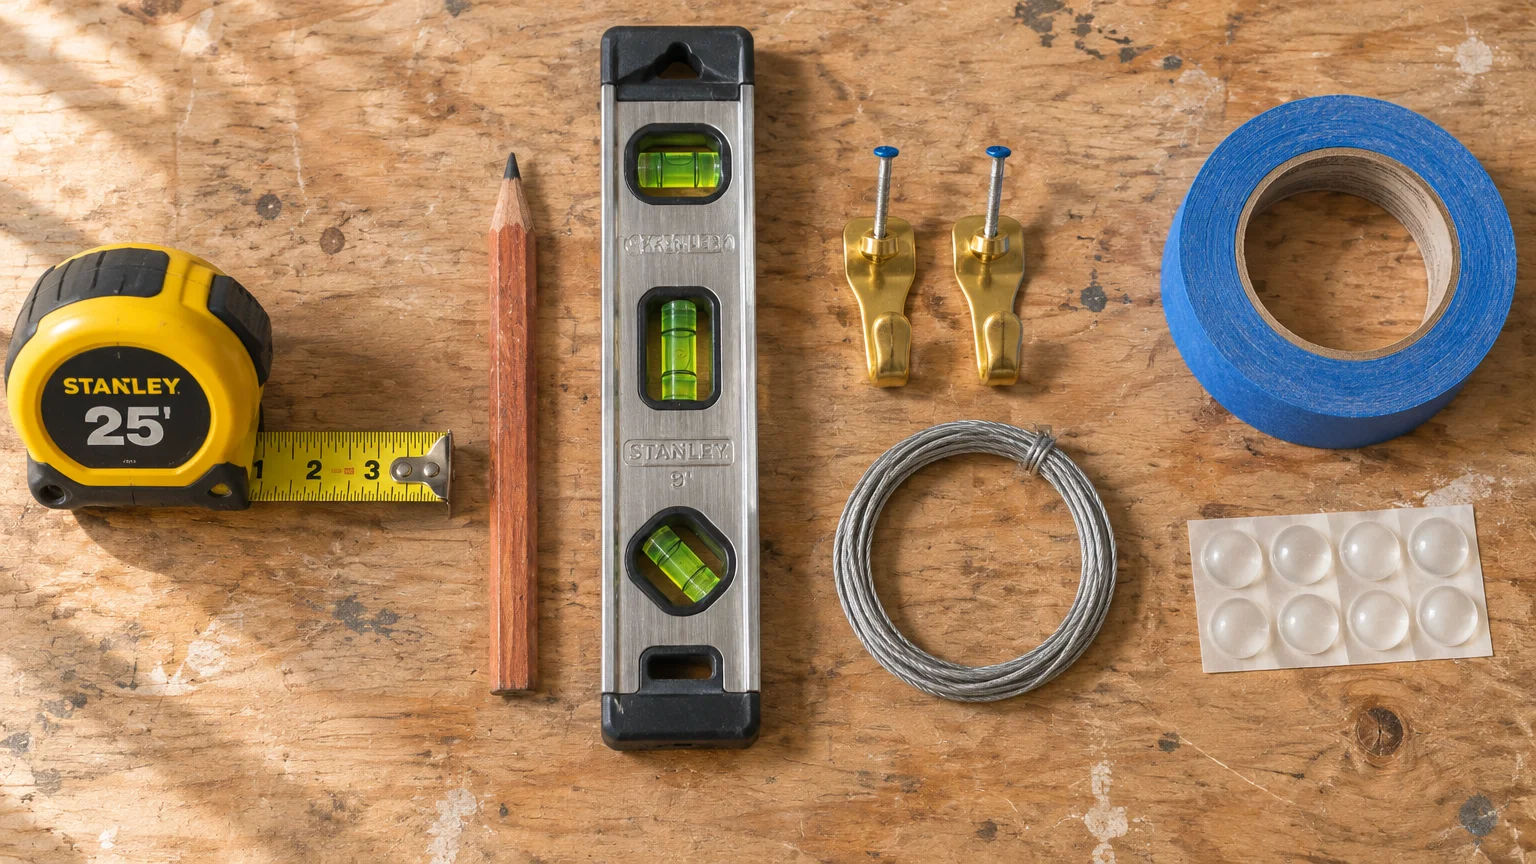
Start with one rigid tape measure, a sharp pencil, and a standard bubble level to keep every mark crisp. Grab one roll of low-tack painter’s tape and some leftover kraft paper or newspaper to mock up frames directly on the wall.
Add an electronic stud finder to locate wood framing behind drywall, along with a cordless drill or screwdriver for driving anchors. Keep a small towel and microfiber cloth nearby to protect floors and wipe frames before hanging.
Drywall Anchors, Stud Screws, and Weight Limits
Never guess whether a tiny picture nail can hold a heavy glass-framed print. Check the weight on a bathroom scale first, then match your hardware to the verified capacity of standard 1/2-inch drywall.
Bare nails or screws driven straight into 1/2-inch drywall only support about 5 to 10 pounds, per Reno Materials. Standard plastic expansion anchors step up to roughly 10 to 25 pounds, while heavy-duty anchor styles reach 30 to 50 pounds.
When frames climb higher, metal toggle bolts or Molly bolts spread the load behind the drywall to hold 25 to 50 pounds, with heavy-duty toggles supporting up to 100 pounds. Driving screws directly into wood studs supports 50 to 100 pounds or more.
Under the 2021 and 2024 International Residential Code, standard U.S. wood wall studs sit 16 or 24 inches on center. For oversized mirrors or frames exceeding 100 pounds, the Canadian Conservation Institute recommends anchoring French cleats directly into studs.
Renter-Friendly Adhesive Strips
Renters and gallery wall experimenters often prefer 3M Command Picture Hanging Strips to avoid patching nail holes. Always verify the package weight rating and frame dimensions before sticking anything to painted drywall.
Two pairs of Medium strips handle up to 5 pounds, while four pairs of Large strips hold up to 15 pounds and frames up to 24 by 36 inches. Heavyweight strips deliver 40% more adhesive to support 20 pounds across that same 24 by 36 inch size.
Adhesive strips also carry strict environmental and surface rules that you cannot skip. Wait 7 days after painting fresh walls, clean exclusively with isopropyl rubbing alcohol, and use strips only indoors between 50°F and 105°F.
Never apply Command strips on wallpaper, delicate surfaces, or textured plaster. Crucially, 3M warns against using adhesive strips to hang irreplaceable items or any artwork over beds.
Wire Safety and Hidden Hazard Checks
Inspect the hardware on the back of every frame during prep rather than right before mounting. If a frame uses hanging wire, verify that the wire is secure and frayed nowhere along its D-rings.
According to Canadian Conservation Institute safety guidance, you should never double up picture-hanging wire to boost capacity. One strand inevitably stretches tighter and bears the entire load, which can trigger sequential snapping.
Before drilling into any wall, scan above outlets, switches, and plumbing fixtures where pipes or electrical wiring often travel. Avoid driving deep fasteners directly above breaker panels or light switches unless you have confirmed clear drywall depth.
Step-by-Step Instructions
Follow these sequential phases to turn guesswork into repeatable accuracy on every wall. Taking ten extra minutes during layout saves hours of spackling and touch-up paint later.
Phase 1: Calculate Your Exact Nail Height
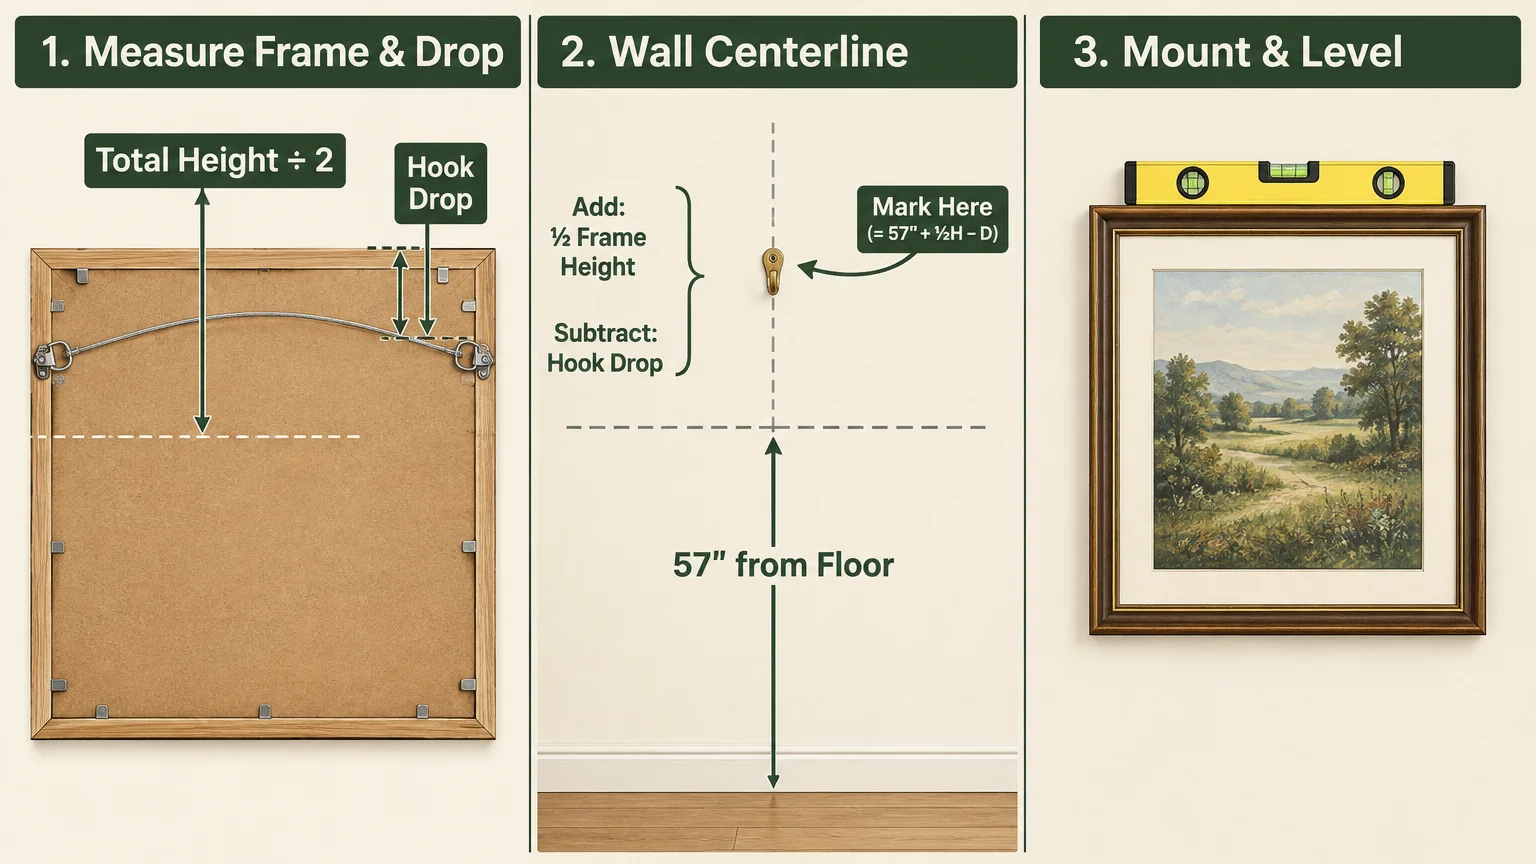
Measure the total height of your frame from its bottom edge to its top edge. Next, pull the hanging wire taut upward toward the top edge with one finger and measure the distance from the top edge down to that taut wire peak.
Use the proven placement formula cited by Park West Gallery and Mr. Handyman to locate your nail mark. Take half the frame height, subtract the wire drop distance, and add 57 inches to find your measurement from the finished floor.
Suppose you are hanging a 24-inch-tall frame whose taut wire sits 3 inches below the top molding. Divide 24 in half to get 12, subtract 3 to get 9, and add 57 to land cleanly at 66 inches up from the floor.
Measure 66 inches straight up from the baseboard, then hold your tape perpendicular to confirm horizontal centering on the wall. Lightly mark that exact nail intersection with a sharp pencil before picking up a drill.
Phase 2: Map Furniture Clearances and Gallery Walls
When hanging above a sofa, console, or headboard, skip the floor measurement and measure upward from the top of the furniture instead. Place a small piece of painter’s tape 6 to 10 inches above the backrest or tabletop to mark your bottom frame line.
If your piece is exceptionally tall, double-check that the artwork does not crowd the ceiling crown molding. Keep heavy visual weight anchored close to the furniture so the pairing reads as one unified vignette.
For a multi-frame gallery wall, trace every frame onto kraft paper and cut out full-size paper templates. Mark the exact hook or wire hanging points directly onto the paper cutouts so you can transfer marks cleanly.
Arrange your paper templates on the wall using painter’s tape, keeping 2 to 3 inches between frames per Frameology and DIY Playbook, or up to 3 to 6 inches for airier grids. Treat the entire grouping as one rectangle centered at 57 to 60 inches.
Step back across the room and live with the taped layout for an evening to test sightlines under changing light. Adjusting painter’s tape takes seconds, whereas patching misplaced toggle-bolt holes slows down your whole weekend.
Phase 3: Locate Studs and Match Hardware
Sweep your electronic stud finder horizontally across your pencil marks to check whether wood framing sits behind the spot. Remember that residential studs typically repeat every 16 or 24 inches on center, giving you predictable anchor points for heavy frames.
If your mark misses a stud and your frame weighs under 10 pounds, a standard angled picture hanger or small drywall nail works reliably. For frames between 10 and 25 pounds in hollow drywall, pre-drill the specified pilot hole and tap a plastic expansion anchor flush.
Heavy framed prints and mirrors between 25 and 50 pounds deserve metal toggle bolts or Molly bolts in hollow drywall, or direct stud screws when framing aligns. Use heavy-duty toggles or stud-mounted French cleats for oversized pieces pushing 50 to 100 pounds or more.
Wear safety glasses whenever drilling into drywall, plaster, or masonry to shield your eyes from falling dust. If your drill bit hits unexpected metal resistance, stop immediately because you may have struck a nail plate protecting pipes or wiring.
Phase 4: Install Hooks or Adhesive Strips Properly
Drive your chosen stud screw or drywall anchor until the fastener head sits snug, leaving roughly a quarter-inch exposed for wire hooks or D-rings. For two-point D-ring frames without a wire, measure the horizontal spacing between both rings and transfer two level marks.
Check your two marks with a bubble level before drilling so you never end up chasing a crooked tilt. Even a quarter-inch height difference across wide frames shows up immediately to the naked eye.
If you are using 3M Command strips on lightweight frames, wipe the painted wall cleanly with isopropyl rubbing alcohol and let it dry completely. Skip household glass sprays or wipes because invisible soap residue weakens adhesive bonds.
Press each strip firmly against the wall for a full 30 seconds, then walk away and wait 1 hour before mounting the frame. Skipping that one-hour curing window causes strips to peel away under load overnight.
Phase 5: Hang, Level, and Troubleshoot
Lower your frame carefully onto the hooks, keeping both hands supporting the bottom corners until you feel the wire or D-rings seat solidly. Step back several paces and inspect the horizon line against nearby door frames or window trim.
Wide frames hung on a single nail frequently rock out of level whenever someone shuts a nearby door. Swap that single center nail for two spaced wall hooks along the taut wire to lock large frames horizontally flat.
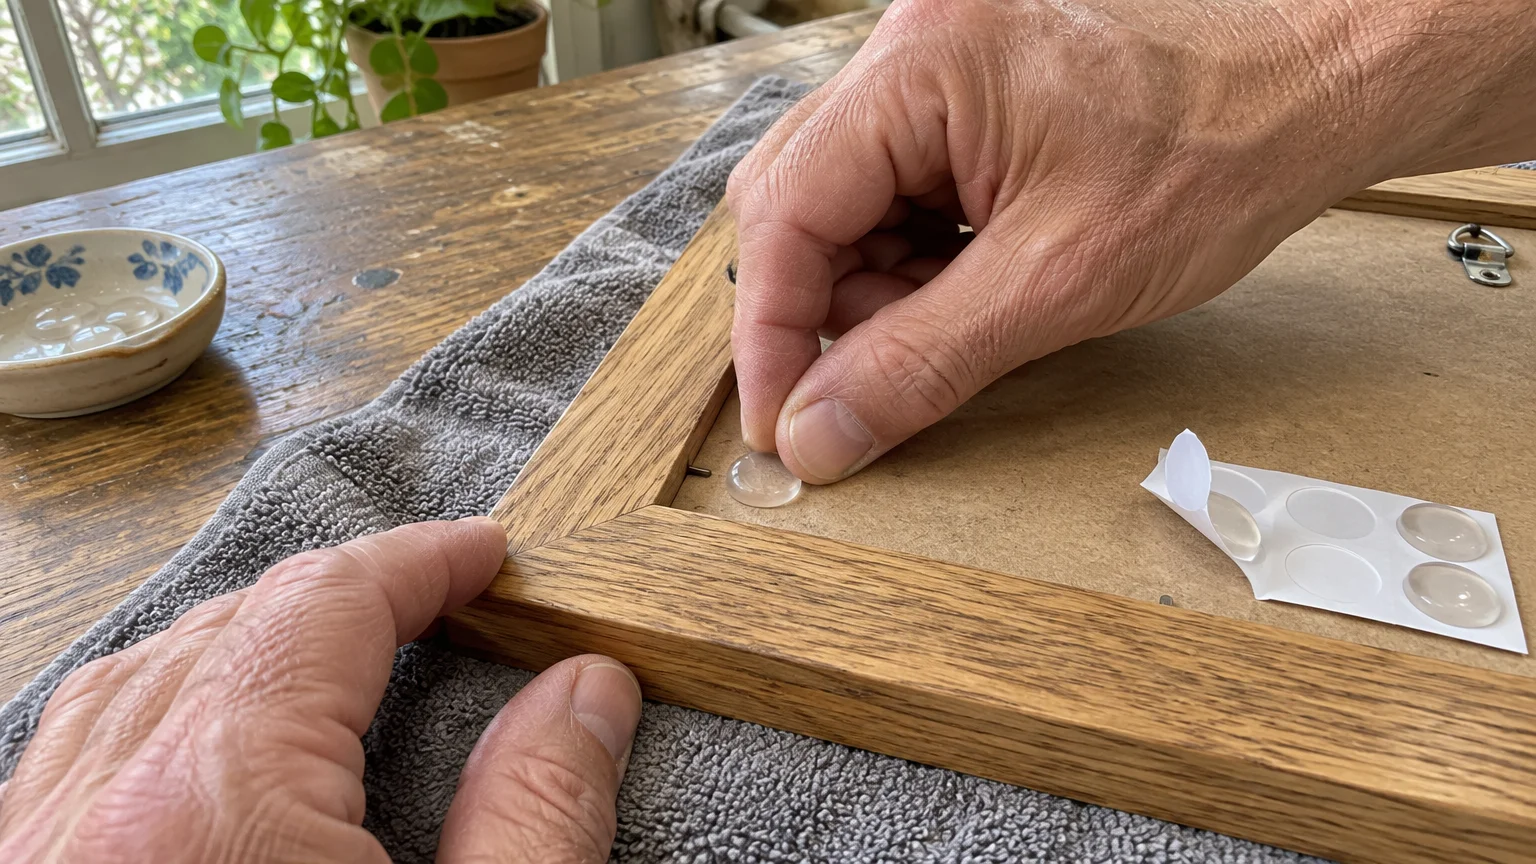
If your frame tilts outward from the wall at the top, attach small felt or rubber bumpers to the bottom rear corners. Those subtle pads stop frames from scraping paint and keep gallery walls neatly aligned.
Call in professional art installers if you face steep stairwells, high ceilings requiring tall extension ladders, or fragile heirloom frames over 50 pounds. Paying for safe two-person handling protects both your back and your investment.
Style & Finishing Touches
Once your height math is locked in, smart styling choices elevate everyday prints into cohesive interior design statements. Small tweaks to frame spacing, matting, and lighting deliver dramatic visual polish across every price point.
Grid Versus Salon-Style Gallery Walls
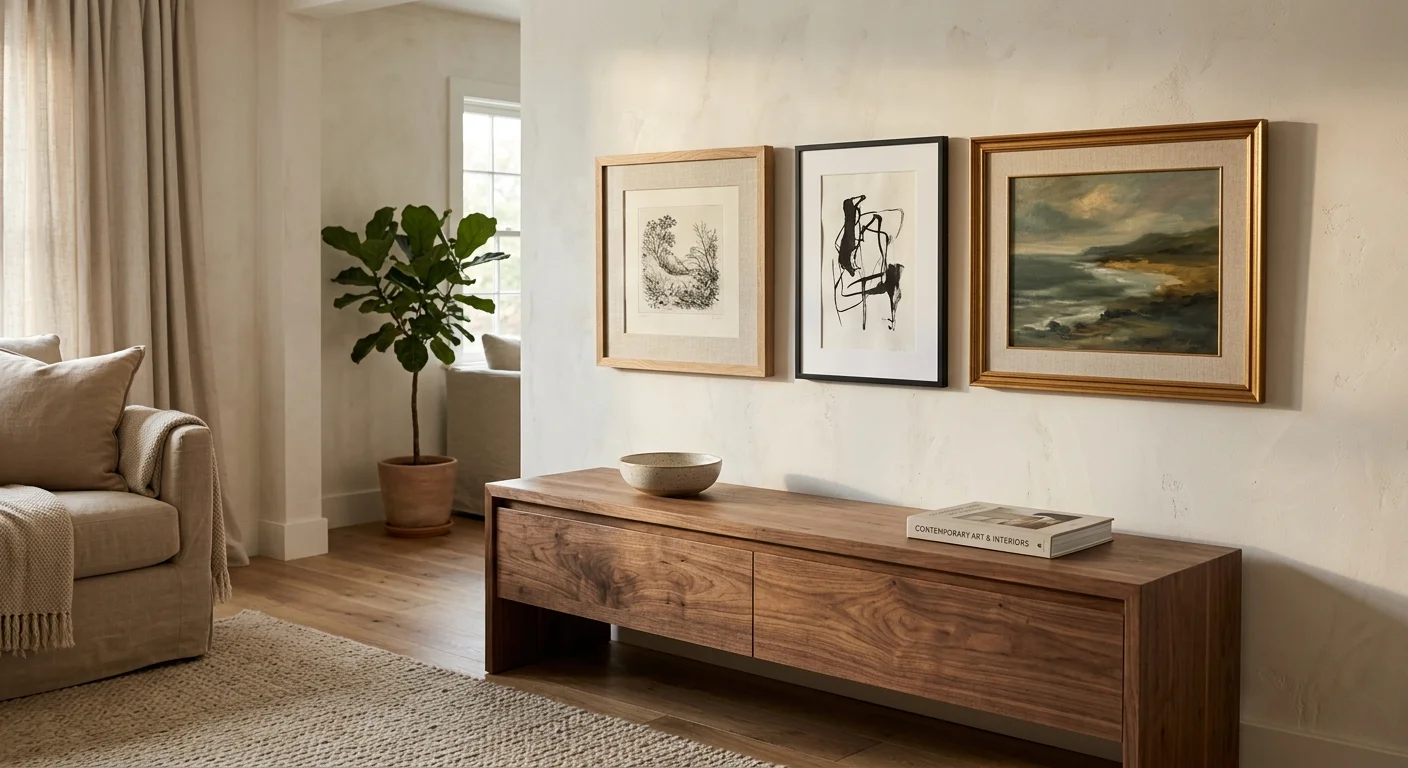
Choose a symmetrical grid with matching frame sizes and crisp 2 to 3 inch gaps when you want calm, tailored order. Grids shine above modern sofas, dining room buffets, and long hallway walls where repetition feels soothing.
Opt for an organic salon-style grouping when mixing family photos, thrift-store canvases, and varied frame depths. Keep your tightest inner gaps near 2 to 3 inches, expanding selectively toward 3 to 6 inches around bolder anchor pieces.
Regardless of layout style, keep the outer visual footprint aligned with the two-thirds rule over furniture. Balancing heavy dark frames diagonally across the grouping prevents one corner from feeling visually lopsided.
Coordinating Mats, Finishes, and Color Palettes
You do not need identical frames to achieve designer cohesion, yet sharing one unifying element ties disparate artwork together. Link varied frame profiles through a shared warm brass finish, matte black borders, or natural white oak grain.
Oversized white or off-white mats instantly upgrade affordable digital prints and vintage postcards by adding generous breathing room around the image. Pulling one secondary accent hue from your artwork into throw pillows or rugs connects the wall effortlessly to the room.
Smart Upgrades for Every Budget
On a tight budget, pair secondhand wooden frames with uniform spray paint, fresh kraft-paper layouts, and Command strips for flexible lightweight displays. Mid-range upgrades include swapping standard glass for low-glare acrylic and upgrading flimsy sawtooth hangers to sturdy D-rings.
For a high-end custom finish, install heavy pieces on aluminum French cleats so frames sit razor-flat against drywall with zero visible hardware. Adding dedicated battery-operated picture lights or warm museum-style tracks casts soft focus without harsh shadows.
Handling Hallways, Corners, and Stairwells
Treat stairwells like angled hallways by keeping the visual center of each frame roughly 57 to 60 inches above the stair tread directly beneath it. Measure upward from the front nose of every third or fourth step to create a clean diagonal stair-step rhythm.
Along narrow corridors, monitor frame depth carefully so thick canvases do not snag passersby or violate the 4-inch protrusion guideline. Group smaller flat-profile prints in pairs on tight corner walls to turn awkward dead space into intimate vignettes.
Maintenance & Long-Term Care
Properly placed art stays vibrant and secure far longer when you shield it from hidden environmental wear. Seasonal checks take only minutes and protect both your frames and your drywall.
Light, Heat, and Exterior Wall Protection
Follow conservation standards from the National Park Service Museum Handbook by keeping paintings well away from radiators, heating vents, fireplaces, and hot spotlights. Rapid temperature swings cause canvas, wood panels, and paint layers to expand, contract, and flake.
Eliminate direct UV exposure whenever possible and keep visible light levels below 200 lux to slow fading on watercolors, textiles, and photographs. Draw sheer curtains during peak afternoon sun or hang delicate works on shaded interior walls.
Think twice before mounting prized wood panels or antique canvases on uninsulated exterior walls. Research by the Getty Conservation Institute found exterior walls can create a 3°C temperature difference and a 10% to 15% relative humidity difference between a painting’s front and back, encouraging warping.
Routine Cleaning and Hardware Checks
Dust frames weekly using a clean, dry microfiber cloth rather than feather dusters that snag delicate gilt edges. When cleaning glass, spray gentle ammonia-free cleaner onto your cloth instead of the pane so liquid never seeps behind the mat.
Once a year, run a gentle hand behind each heavy frame to check that hanging wires remain taut and toggle bolts have not loosened from door vibrations. Tighten loose D-ring screws immediately before wood threads strip.
Safe Adhesive Removal for Renters
When moving out or refreshing a gallery wall held by Command strips, resist the urge to yank the frame straight out toward your chest. Pulling outward tears fresh drywall paper and leaves expensive patching work behind.
Hold the frame lightly in place, lift it off the hook tabs, and pull each adhesive release tab straight down slowly against the wall. Stretch the tab steadily at least 12 to 15 inches until the adhesive releases cleanly without stripping paint.
FAQ
How high should I hang art above a sofa or headboard?
Hang the bottom edge of your frame 6 to 8 inches above a sofa backrest, or up to 7 to 10 inches if your wall is unusually tall. Above tall headboards, aim for 10 to 12 inches of clearance while keeping total artwork width near two-thirds of the furniture width.
Always use mechanical wall anchors or stud screws rather than adhesive strips above beds. Sleeping beneath heavy glass or wood calls for permanent mechanical fastening.
Should I still use the 57-inch rule with very high ceilings?
Yes, centering art at 57 to 60 inches keeps artwork anchored to human sightlines even inside vaulted or two-story rooms. Hanging small prints higher makes people crane their necks and breaks the room’s visual balance.
If tall walls look bare above eye level, choose larger vertical canvases or stack a multi-piece gallery arrangement upward while keeping its visual center near eye height.
Can I use Command strips for heavy frames or textured walls?
No, 3M Command Picture Hanging Strips cap out at 15 pounds for Large packs and 20 pounds for Heavyweight packs, both limited to frames up to 24 by 36 inches. They also fail to bond reliably on textured drywall, brick, or wallpaper.
Switch to plastic expansion anchors, toggle bolts, or wood stud screws for anything heavier, valuable, or mounted on uneven wall textures.
How do I measure nail height for two D-rings without a wire?
Measure the total height of the frame, divide by two, and subtract the vertical distance from the top frame edge down to the center of the D-ring hanger openings. Add 57 inches to find your finished floor height.
Measure the exact horizontal distance between the left and right D-ring openings and transfer two perfectly level pencil marks onto your wall. Never tie a loose wire between D-rings designed specifically for dual-point mounting.
When should I hire a professional picture hanger?
Consider hiring a pro when mounting oversized mirrors, heavy pieces over 50 pounds needing two-person lifts, or tall stairwell clusters requiring multi-story ladders. Tricky masonry, tile, and antique plaster walls also benefit from experienced drill control.
Expect to budget around $40 to $140 per hour for a general handyman or $50 to $112+ per hour for specialized installers, often with first-hour minimums or flat grouping rates.
Takeaway & Next Steps
Great interior design tips always come down to disciplined proportion rather than expensive artwork. Center standalone pieces at 57 to 60 inches, tuck frames 6 to 10 inches above furniture, span roughly two-thirds of your sofa width, and match every fastener to your frame weight.
Ready to transform your walls today? First, grab your tape measure and bathroom scale to weigh your frames and confirm whether studs or hollow drywall anchors fit your wall.
Second, cut simple kraft-paper templates and tape your favorite layout onto one focal wall tonight to test sightlines at standing and seated eye level. Third, clean your wall or drill your pilot holes cleanly once the proportions feel effortlessly balanced.
Have you finished hanging your living room focal piece or a weekend gallery wall? Share your project photos with our community or subscribe to TheAmericanHouse.com for practical weekly renovation ideas delivered straight to your inbox.