
You can transform your home for the holidays in one weekend afternoon without blowing your budget. These 15 practical projects use basic hand tools, exact measurements, and affordable supplies from local craft or hardware aisles.
Every build focuses on clean execution and strict home safety for families, renters, and pets. You will find step-by-step guidance on fire clearances, non-toxic materials, and damage-free hanging strips for delicate walls.
Grab a tape measure, clear off your dining table, and gather a few everyday staples. Within a few hours, you can display custom holiday pieces that easily outlast store-bought plastic.
Project Overview & Why It Matters
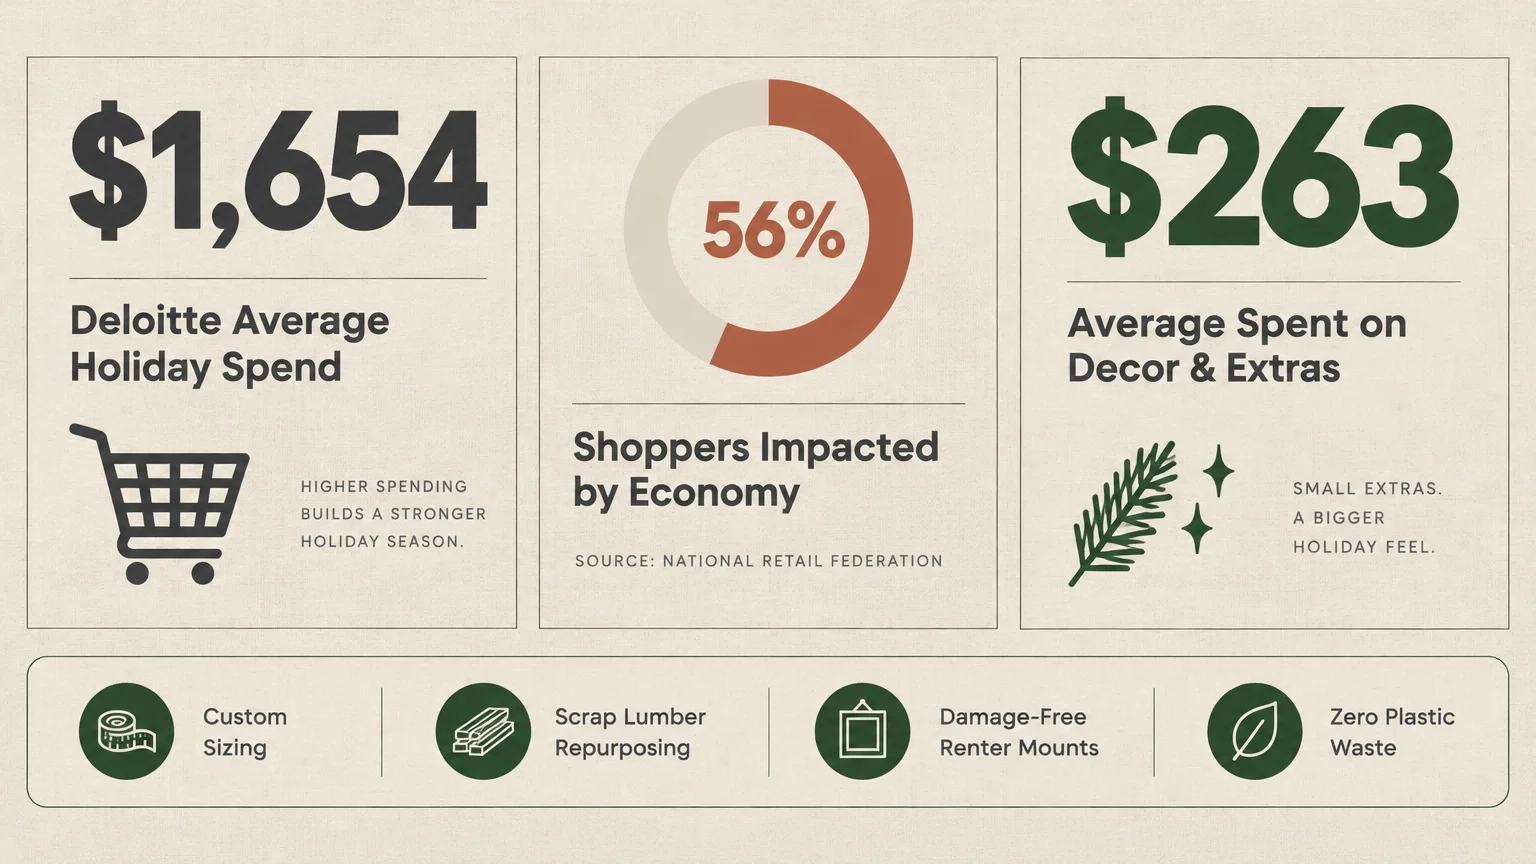
Store-bought holiday accents eat through household budgets fast. The National Retail Federation forecasts 2026 holiday retail sales will climb 4.2% to $1.013 trillion, yet 56% of shoppers say the economy will affect their holiday spending.
Most families already spend heavily on seasonal goods, averaging $263 per person on decorations, food, and holiday extras according to 2025 survey benchmarks. Meanwhile, Deloitte reports shoppers expect total 2026 holiday spending to average $1,654.
Building your own diy christmas decor puts cash back in your pocket while matching your exact room dimensions. Instead of settling for generic colors, you control the wood tones, ribbon widths, and light warmth across your living room, entryway, and dining table.
Afternoon builds also work well for renters who cannot drill holes into plaster or brick. You can mount lightweight wreaths, swags, and window lights cleanly using rated adhesive strips and battery-powered LED strands.
Best of all, hands-on easy christmas crafts reduce waste by turning scrap lumber, thrift-store glass, and kitchen staples into heirloom accents. When you build with durable materials, you pack away sturdy pieces each January instead of tossing broken foam.
Tools, Materials, and Prep Checklist
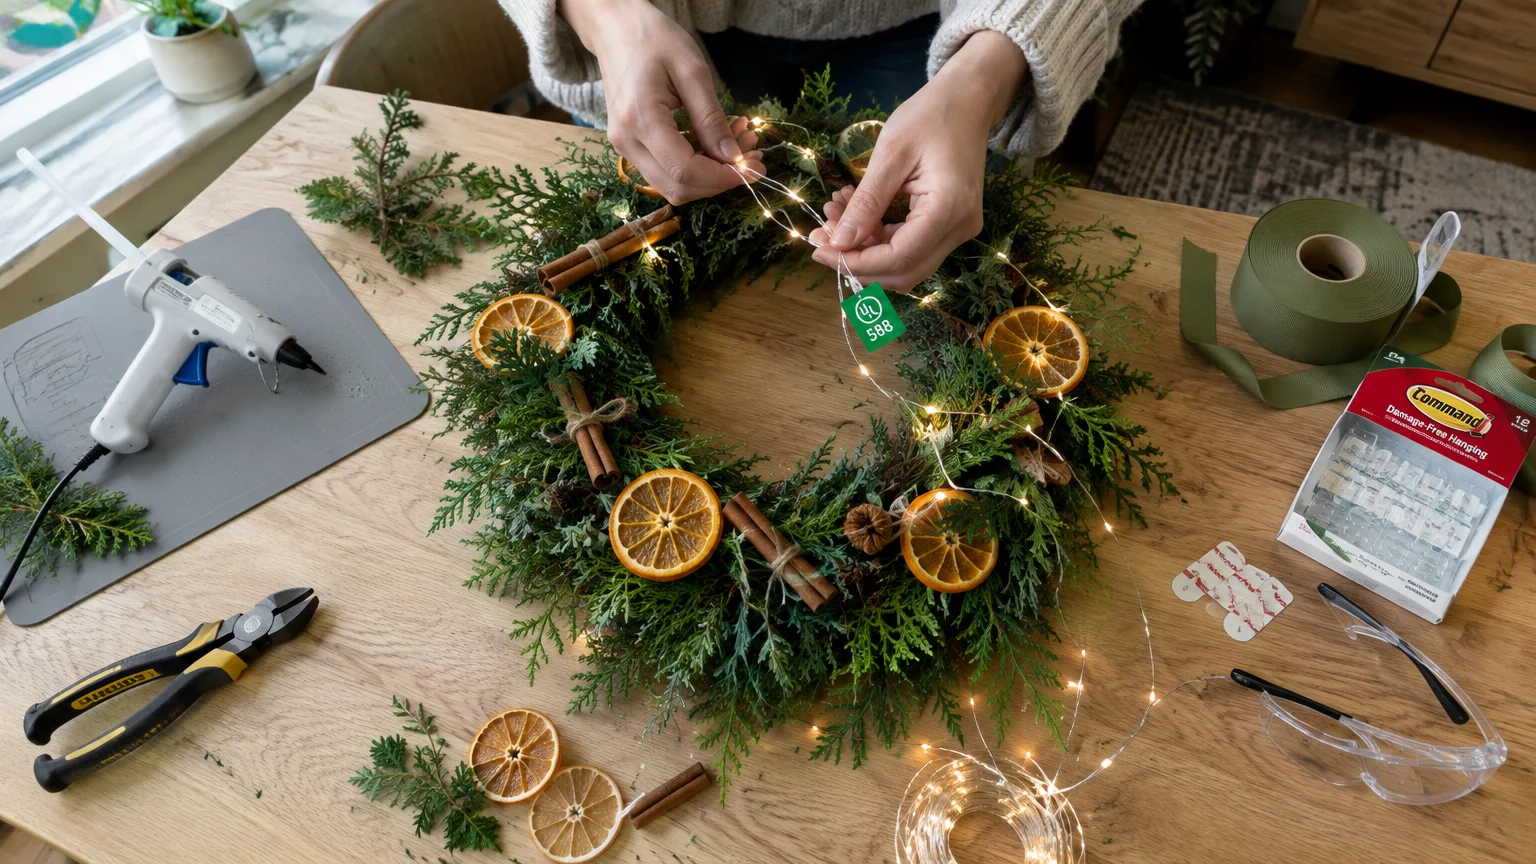
Gather your core tools before opening any craft packaging so you stay organized and safe. Keep a 12-foot tape measure, sharp utility knife, wire cutters, carpenter pencil, and low-temperature hot glue gun within reach.
For light woodworking builds, add a miter box with a fine-tooth hand saw, 120-grit sandpaper, and spring clamps. Wear safety glasses whenever you cut wire, trim stiff evergreen stems, or saw lumber offcuts.
Check your local supply aisle for reliable budget staples before ordering specialty items online. At Michaels, a 1-quart Ball Mason jar costs about $5.29, natural jute twine runs $4.49, and a green floral foam brick costs $5.99.
You can also pick up reindeer moss for $7.99, a 12-by-5.75-by-4-inch pallet wood bin for $12.99, and 40-count silver-wire LED lights for $19.99. For even steeper savings on budget christmas decor, check big-box and dollar stores.
Walmart carries 200-count warm white LED curtain lights for roughly $9.88, with smaller strip lights starting around $2.99. Dollar Tree stocks seasonal pillar candles and battery-operated LED string lights for $1.50 or less.
Always inspect paint and adhesive labels before bringing craft supplies into a home with kids or pets. The ASPCA recommends selecting paints, glues, and glitter stamped with the Art and Creative Materials Institute (ACMI) AP non-toxic seal rather than CL cautionary labels.
Electrical prep matters just as much as glue selection when planning lighted christmas decorations diy. Inspect every light strand under UL Solutions UL 588 standards, checking for green holographic tags (indoor only) or red tags (indoor and outdoor).
Follow the UL 588 end-to-end connection cap: never exceed 210 watts on 22-gauge wire or 420 watts on 20-gauge wire. Because 100-bulb LED strands draw just 5 to 10 watts versus 40 to 50 watts for incandescent strands, LEDs let you link strings safely.
Switching to LEDs also trims your winter electric bill. The U.S. Department of Energy notes that LED holiday strands use 70% less energy, costing roughly $0.27 to light a 6-foot tree for 40 days compared to $10 for incandescent bulbs.
Never overload wall receptacles when plugging in multiple displays across one living room wall. A standard 15-amp household circuit tops out at 1,800 watts, making 1,440 watts your safe continuous-load ceiling.
Finally, prep painted drywall properly if you hang crafts with 3M Command adhesive strips. Wipe smooth drywall, glass, or tile with isopropyl rubbing alcohol instead of household spray cleaners, which leave slippery residue behind.
Wait at least 7 to 28 days after painting a room before applying adhesive strips, and avoid brick, wallpaper, vinyl, or textured surfaces. Press each strip firmly and wait a full 1 hour before hanging any weight.
Step-by-Step Instructions
Break your afternoon into three focused work blocks so drying times overlap efficiently. Start kitchen oven bakes first, move to wall and doorway builds while items dry, and wrap up with fabric, wood, and lighting assemblies.
Phase 1: Kitchen & Tabletop Crafts (Projects 1–5)
1. Oven-Dried Orange Slice Garland: Slice three firm navel oranges uniformly between 1/8 inch and 1/4 inch thick using a sharp chef knife or mandoline. Blot both sides thoroughly with clean paper towels to remove surface juice.
Arrange slices in a single layer on parchment-lined baking racks and bake at 170°F to 200°F for 2 to 6 hours, flipping every 30 to 60 minutes. Alternatively, run a food dehydrator at 130°F to 135°F for 3 to 14 hours until non-sticky.
Thread cooled slices onto a 6-foot length of natural jute twine using a blunt tapestry needle. Troubleshoot curling edges by pressing slightly warm slices flat under a cool baking sheet for ten minutes.
Safety Note: Keep finished twine garlands elevated because pets that swallow long strings risk dangerous intestinal bunching.
2. Mason Jar Snow Globes and Candle Luminaries: Clean a 1-quart Ball Mason jar inside and out with rubbing alcohol so faux snow will not cling to glass oils. Pour 1.5 inches of coarse Epsom salt into the base.
Nestle a mini bottle-brush tree and a waterproof battery-operated LED tea light inside the salt bed. Wrap natural jute twine six times around the threaded glass neck and tie a square knot.
Troubleshoot tipping trees by anchoring their wooden bases to the jar bottom with a dime-sized dot of hot glue. Never drop real flame candles inside narrow jars covered with flammable ribbons or moss.
Safety Note: According to the National Fire Protection Association (NFPA), candles cause 45% of home decoration fires in December, so keep real flames at least 12 inches away from flammables or choose battery LEDs.
3. Pallet Wood Tabletop Tree Box: Pick up a 12-by-5.75-by-4-inch pallet wood bin and trim two blocks of green floral foam to fit snugly inside. Press the foam down 1/2 inch below the wood rim.
Tuck handfuls of reindeer moss across the foam top to hide every green corner. Push freshly clipped fir or cedar sprigs vertically into the foam at varied heights between 6 and 12 inches, then weave in red faux berries.
Troubleshoot wobbly branches by dipping stem ends in hot glue before inserting them into the foam. Mist real cuttings lightly with water every third day away from electronics.
Safety Note: Place real greenery arrangements at least 3 feet from fireplaces, radiators, and space heaters.
4. Painted Salt Dough Ornaments (With Pet-Safe Swap): Whisk 2 cups all-purpose flour and 1 cup table salt in a large bowl, then gradually stir in 3/4 to 1 cup water. Knead five minutes until smooth, and roll out to 1/8-inch or 1/4-inch thickness.
Cut shapes with metal cookie cutters and poke a hanging hole 1/4 inch from the top edge using a drinking straw. Bake at 200°F to 250°F for 1.5 to 4 hours until rock-hard.
Once cooled, brush ornaments with ACMI AP non-toxic acrylic paint and seal every side with clear polyurethane. Troubleshoot puffed surfaces by keeping dough thinner than 1/2 inch and lowering oven heat so indoor humidity cannot soften them later.
Safety Note: Skip salt dough if you own dogs; the ASPCA and Pet Poison Helpline warn that eating just 1 or 2 ornaments can trigger fatal salt toxicosis. Swap to air-dry clay or applesauce-cinnamon dough and hang pieces high.
5. Ribbon-Wrapped Embroidery Hoop Wreaths: Separate a 12-inch wooden embroidery hoop and discard the outer screw ring, or keep both rings to double your project count. Wrap 1.5-inch velvet ribbon tightly around the wood, overlapping edges by 1/4 inch.
Secure both ribbon ends on the back side using hot glue and a 12-inch hanging loop. Wire three faux pine sprigs and two mini brass bells along the bottom right quadrant using 24-gauge floral wire.
Troubleshoot slipping ribbon by applying a tiny glue dot every 4 inches along the hoop perimeter.
Phase 2: Wall, Doorway & Window Displays (Projects 6–10)
6. Twine-Wrapped Wine Bottle Light Trees: Soak labels off three empty clear or green glass bottles in warm soapy water, then dry completely. Run a thin spiral bead of ACMI AP craft glue from the bottle base upward.
Press natural jute twine tightly into the glue row by row, keeping strands flush so zero glass peeks through. Drop a 20-count battery-operated micro LED cork string inside the neck, letting the warm glow shine around the top rim.
Troubleshoot glue seepage on dark twine by switching to clear-drying tacky craft adhesive.
7. Command-Strip Garland Swag for Doorways: Measure your interior doorway trim and drape a fire-resistant faux pine garland across the header to map natural swoops. Mark your center peak and two corner anchor points lightly with painter’s tape.
Clean the painted trim with rubbing alcohol, let it dry, and apply medium or large Command hooks rated between 3 and 5 pounds—or use 16-pound jumbo strip sets for heavier cedar swags. Wait 1 hour before hanging the garland on the hooks.
Troubleshoot sagging center loops by adding a small 0.5-pound wire toggle hook every 24 inches along the top casing. Never drive nails, tacks, or metal staples through light wires, which pierces insulation and sparks electrical fires.
Safety Note: Stick strictly to Command indoor ratings between 50°F and 104°F and check exact weight limits on the package.
8. Window LED Curtain Light Frame: Hang 200-count warm white LED curtain lights cleanly inside a living room window without scratching vinyl casings. Clean the upper window glass or finished wood trim with isopropyl alcohol.
Because direct south- or west-facing sunlight heats glass past 104°F, install UV-resistant Command Outdoor light clips rather than indoor strips. Space clips every 10 inches across the window header and wait 1 hour before clipping the main horizontal cord.
Troubleshoot tangled vertical drops by hanging the header cord first before cutting individual strand ties. Verify your light string carries a UL 588 tag and keep cords tucked clear of pet chewing zones.
9. Cinnamon Stick and Pine Cone Bundle Ornaments: Gather six dry 3-inch pinecones and bundle three 4-inch cinnamon sticks alongside them. Wrap a 14-inch strip of gingham ribbon twice around the center waist and tie a double knot.
Add a drop of hot glue behind the knot to lock the bundle tight, then tie a 6-inch twine hanging loop at the top. Tuck one small sprig of dried eucalyptus or faux cedar behind the ribbon for fresh contrast.
Troubleshoot sap residue on collected yard pinecones by baking them on foil at 200°F for 30 minutes before gluing.
Safety Note: Keep toxic seasonal greens like mistletoe, holly berries, and true lilies out of all DIY crafts if pets or toddlers live in your home.
10. Scrap-Wood Gift Tag Signs: Cut three 1×4 pine boards (actual thickness 3/4 inch by 3.5 inches) into 6-inch lengths using a miter box and hand saw. Clip the top two corners of each board at 45-degree angles, measuring 1 inch inward from the edges.
Sand cut faces smooth with 120-grit sandpaper and drill a 3/8-inch hole centered 1 inch below the top edge. Brush on two coats of matte white or forest green acrylic paint, stencil bold holiday words, and thread thick buffalo-check ribbon through the hole.
Troubleshoot splintering drill exits by clamping a scrap backer board tightly behind your wood piece before drilling.
Phase 3: Upcycled Fabrics, Wood & Lighting (Projects 11–15)
11. Upcycled Sweater Throw Pillow Covers: Lay a thrifted cable-knit wool or cotton sweater flat and slide an 18-inch pillow insert inside the torso to check fit. Trim off the sleeves and cut a 19-inch square from the sweater body.
Flip the fabric inside out and seal three sides cleanly using permanent fabric glue or a quick 1/2-inch running stitch. Turn the cover right-side out, stuff the insert inside, and hand-stitch the bottom seam closed or add three large wooden buttons.
Troubleshoot unraveling knit edges by running a thin line of fray-check liquid along raw scissor cuts before gluing.
12. Faux-Mercury Glass Thrift Store Vases: Wash three clear glass cylinder vases from a thrift store and dry them thoroughly. Mix equal parts white vinegar and tap water inside a fine-mist spray bottle.
Work outdoors or inside an open garage while wearing a mask, and mist the inside wall of each vase lightly with the vinegar mix.
Immediately spray one light coat of mirror-effect metallic paint inside the glass, wait two minutes, and gently blot excess droplets with a paper towel. Troubleshoot cloudy paint streaks by holding the spray nozzle 10 inches away from the glass opening.
Drop battery-powered fairy lights inside once the paint cures completely dry after two hours.
13. Hanging Paper Star Lanterns: Stack seven plain brown kraft lunch bags flat with all folded bottom flaps facing the same direction. Run an inverted T-shape bead of glue stick down the center and across the bottom flap of each bag, stacking them squarely.
Cut a sharp V-point across the open top end using heavy craft scissors, plus two small side notches along each edge. Gently fan the stack open 360 degrees, glue the outer pages together, punch a hole at the tip, and hang with twine.
Troubleshoot torn paper seams by letting glue dry 15 minutes before pulling the star open.
Safety Note: Never place open flames inside paper lanterns; illuminate them solely with cool-running battery LEDs.
14. Pinecone and Brass Bell Entryway Cluster: Tie three sturdy 18-inch, 24-inch, and 30-inch lengths of 1-inch grosgrain ribbon onto a single 2-inch brass ring. Hot-glue one large pinecone or vintage-style brass bell onto the bottom tail of each ribbon.
Hang the brass ring on a single Command designer hook rated for 5 pounds on your front entry door or hallway mirror. Adjust the staggered lengths so the bells chime softly without knocking into drywall when the door opens.
Troubleshoot sliding bells by threading ribbon through the bell loop twice before tying a tight overhand knot.
15. Tabletop Birch Log LED Centerpiece: Arrange three split birch logs—or three sanded 10-inch 2×4 pine offcuts stained walnut—down the center of a dining table runner. Tuck 40-count silver-wire warm white LEDs tightly around the bark crevices, hiding the battery pack beneath the center log.
Scatter leftover dried orange slices, pinecones, and faux evergreen sprigs into the gaps between logs for rich texture. Keep every flammable piece clear of real taper candles if you add wax lighting nearby.
Troubleshoot harsh glare on glossy dining tables by nesting logs on a matte burlap or linen runner first. This setup delivers warm holiday decorating ideas you can rearrange in seconds for Christmas dinner.
Style & Finishing Touches
Cohesive color palettes turn simple afternoon builds into designer-looking rooms. Pick two anchor neutrals—such as raw pine, birch bark, or galvanized metal—and repeat just one accent color like deep cranberry, forest green, or brushed brass across every project.
Repeat your chosen textures across multiple eye levels so the room feels balanced. Pair the dried orange garlands on your mantel with matching orange slices tucked into the tabletop birch centerpiece and mason jar luminaries.
Smart material swaps let you stretch a tight budget without looking cheap. Buy $1.50 battery fairy lights from Dollar Tree for opaque wine bottles and inside mason jars, then spend $19.99 on Michaels silver-wire LEDs where the delicate wire stays visible.
Upgrade basic wood tags and pallet boxes with 10 minutes of dry-brush distressing or dark wax polish. Adding real velvet ribbon instead of shiny curling ribbon immediately elevates dollar-store bells and embroidery hoops.
Before climbing a step stool to hang final doorway swags or upper window stars, check your footing carefully. The U.S. Consumer Product Safety Commission (CPSC) reports roughly 160 decorating-related injuries each day during the holiday season, with nearly half caused by falls.
Maintenance & Long-Term Care
Good upkeep keeps your DIY displays fresh through New Year’s Day and safe all winter. Water real evergreen arrangements and live Christmas trees daily, because 35% to 36% of Christmas tree fires happen in January after needles dry out.
Always keep real trees at least 3 feet from heat vents, radiators, and fireplaces, and inspect artificial greenery labels for fire-resistant certification. When you leave a room or head to bed, switch off plug-in lights and blow out every wax candle.
Protect drywall and paint when dismantling decorations in January. Never yank Command strips outward toward yourself; pull the release tab straight down slowly along the wall at a 180-degree angle so the adhesive stretches cleanly off paint.
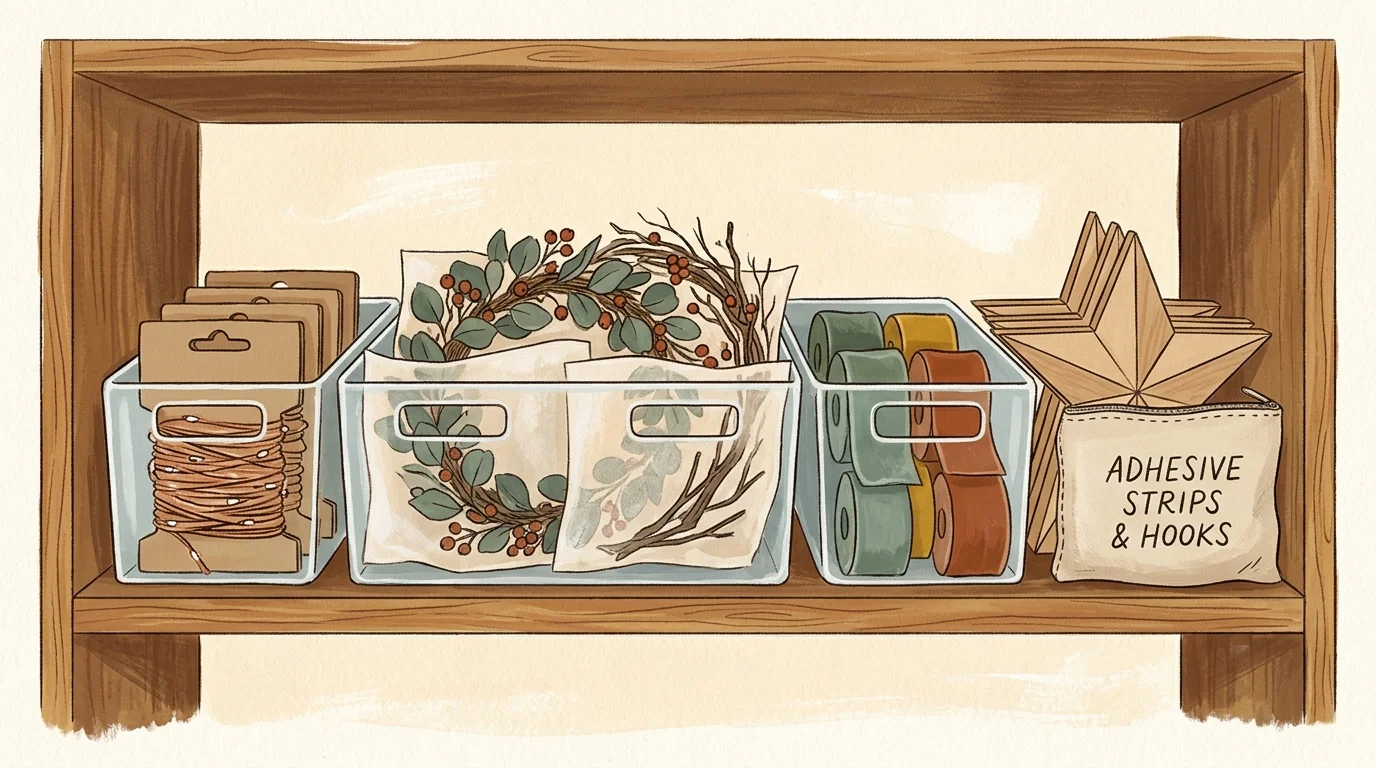
Store dried orange garlands and salt dough ornaments inside airtight plastic totes with two silica desiccant packets to block basement humidity. Wrap LED light strands around flat cardboard squares rather than balled knots so thin copper wires never snap.
Inspect every plug, battery compartment, and hot-glue seam before packing your totes into the attic. Remove AA and AAA batteries from all luminaries and micro LED strings so corrosive acid never ruins battery terminals before next December.
FAQ
How do I hang garlands cleanly without damaging rental drywall?
Wipe smooth painted drywall with rubbing alcohol, apply rated Command hooks, and wait 1 hour before hanging any weight. Avoid textured walls, wallpaper, or brick, wait 7 to 28 days after fresh paint, and pull tabs straight down at 180 degrees during removal.
Which holiday craft materials are dangerous for dogs and cats?
The ASPCA warns that eating just 1 or 2 salt dough ornaments can cause fatal sodium toxicosis in dogs. Keep mistletoe, holly berries, amaryllis, and true lilies away from pets, avoid expandable polyurethane wood glues, and elevate ribbon or twine that pets might swallow.
How many LED light strands can I safely link together?
Check your UL 588 cord tag and never exceed 210 watts on 22-gauge wire or 420 watts on 20-gauge wire. Because 100-bulb LED strands draw just 5 to 10 watts, you can chain more LEDs safely while staying under your circuit’s 1,440-watt limit.
Can I dry salt dough ornaments without using an oven?
You can air-dry thin ornaments on wire racks, though baking at 200°F to 250°F for 1.5 to 4 hours produces harder results. Always seal every side with clear polyurethane varnish afterward so indoor humidity cannot soften the salt.
What is the safest way to light paper lanterns and greenery crafts?
Use cool-touch, battery-operated LED tea lights or micro fairy strings inside paper stars, mason jars, and evergreen boxes. NFPA data shows more than 2 in 5 home decoration fires begin when items sit too close to heat sources, making flameless LEDs your smartest swap.
Takeaway & Next Steps
Afternoon builds deliver custom diy christmas decor for a fraction of retail prices while keeping your home safer and better organized. By following exact measurements, electrical limits, and pet-safe swaps, you finish projects once and reuse them for years.
Take your first three steps today to get started. Pick three projects from one phase above and inventory the hand tools you already own.
Next, grab rubbing alcohol, ACMI AP adhesives, and UL-listed LED strands on one quick supply run. Finally, clear your dining table and start baking your orange slices or ornaments.
Which afternoon project are you building first this weekend? Share photos of your finished mantel or entryway displays with our community, and subscribe to our newsletter for weekly step-by-step home improvement guides.