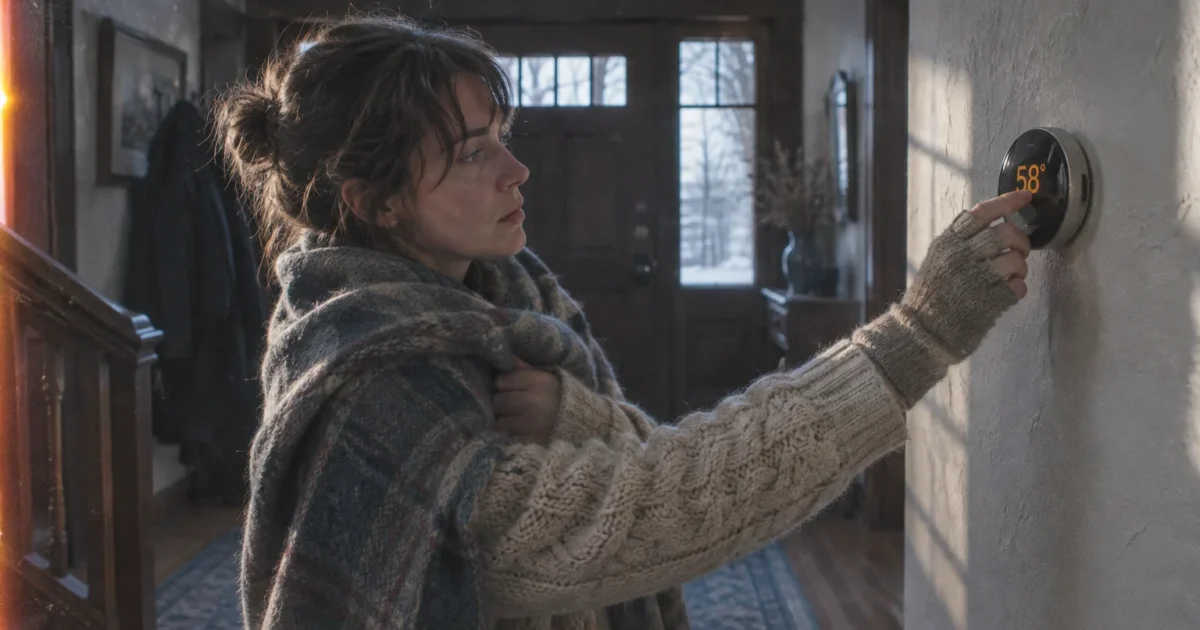
Cranking your thermostat way down can trigger burst pipes, mold, and health emergencies. Smart setbacks deliver real heating costs savings only when you respect strict indoor temperature floors.
Lowering thermostat to save money works best when paired with targeted air sealing rather than freezing rooms. You will learn exact temperature targets, safe setback routines, and low-cost upgrades that slash winter heating bills without turning your living space into an icebox.
Follow these proven energy saving tips winter after winter to protect vulnerable family members, avoid denied insurance claims, and keep every dollar you save.
Project Overview & Why It Matters
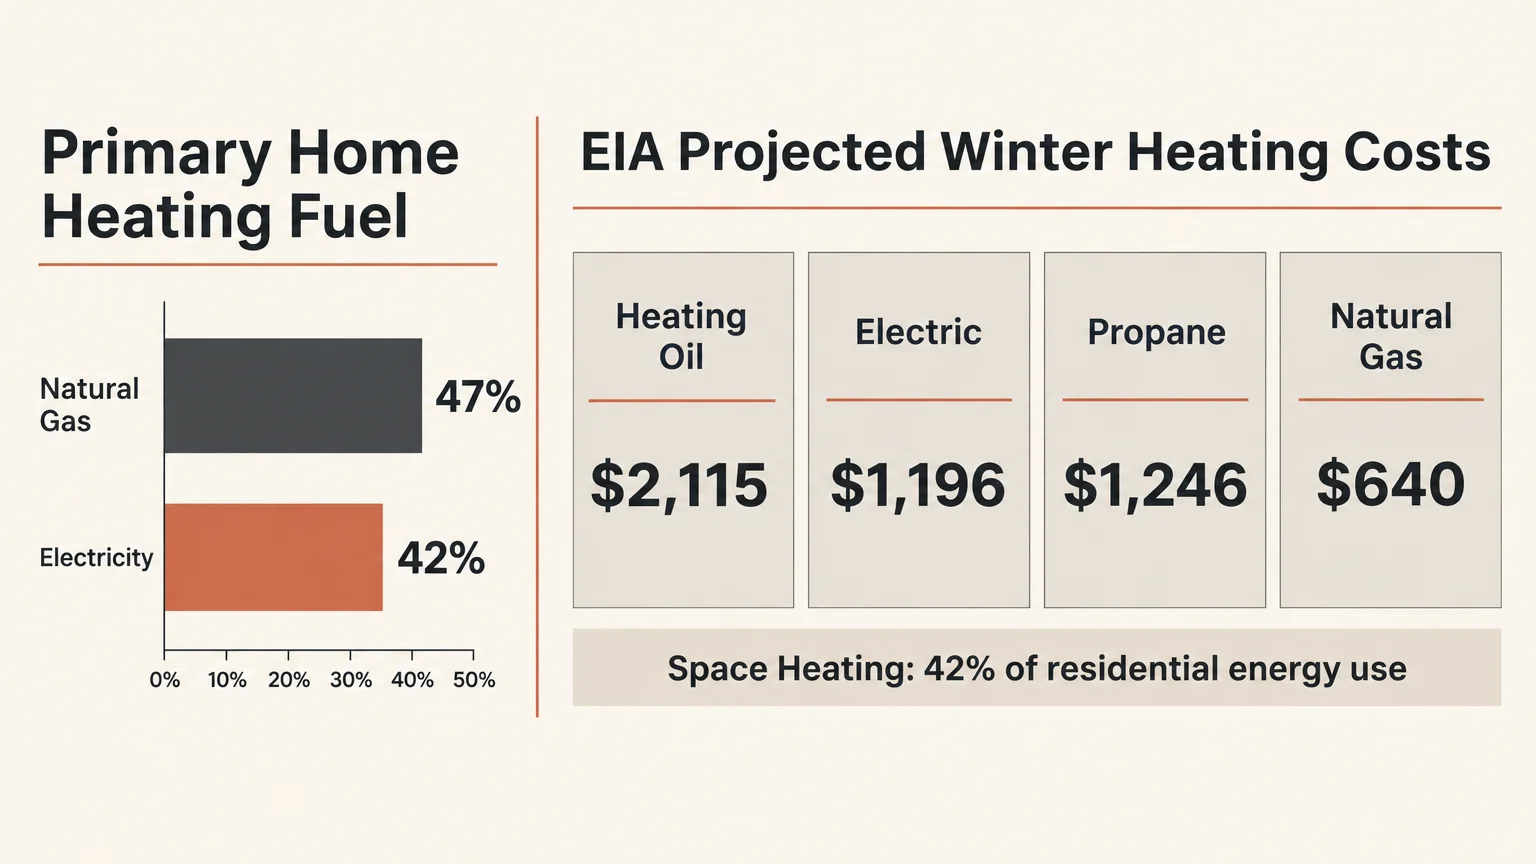
Winter heating dominates your utility budget more than any other home system. According to the U.S. Energy Information Administration (EIA) Residential Energy Consumption Survey, space heating accounts for 42% of residential energy use—and 52% when combined with cooling.
Most American households rely heavily on either utility gas or grid power to stay warm. Census figures cited by the EIA show 47% of U.S. homes heat primarily with natural gas, while 42% depend on electricity.
Climbing fuel expenses make every degree on your dial feel expensive during cold snaps. In its October 6, 2026 Winter Fuels Outlook covering November 2026 through March 2027, the EIA projects households burning heating oil will spend an average of $2,115, up 21% from the prior winter.
That same EIA outlook estimates electric heating costs will average $1,196, rising 4% year over year. Propane users face an average bill near $1,246, down 3%, while natural gas households are projected at $640 in the base case—or $679 under colder weather.
Independent consumer advocates warn that overall household budgets face even steeper strain. On September 14, 2026, the National Energy Assistance Directors Association (NEADA) projected an average winter heating bill of $1,030, marking an $82 or 8.7% jump over the previous season.
NEADA notes that average heating costs sit 23.9% higher than during winter 2021–2022 due to electricity rate increases and oil spikes linked to conflict around Iran and the Strait of Hormuz. The group projects rising bills across all fuels—31.3% for oil, 9.0% for electricity, 8.7% for propane, and 5.8% for natural gas—while urging Congress to raise federal LIHEAP aid from $4 billion to $7 billion.
Where Extreme Thermostat Cuts Backfire
Faced with rising winter heating bills, many homeowners shut off vents or slash indoor temperatures into the fifties. That aggressive move often triggers expensive collateral damage that wipes out years of utility savings in a single weekend.
Water expands roughly 9% when it freezes at 32°F, generating enough force to split copper or plastic supply lines. State Farm reports that even a tiny crack in a burst pipe can flood your home with more than 250 gallons of water per day.
Frozen plumbing strikes roughly 250,000 U.S. homes each year, and about 1 in 50 insured properties files a water damage or freezing claim annually, according to the Insurance Information Institute. Between 2024 and June 2025, State Farm handled more than 20,000 frozen-pipe claims totaling over $628 million, with payouts averaging above $30,000.
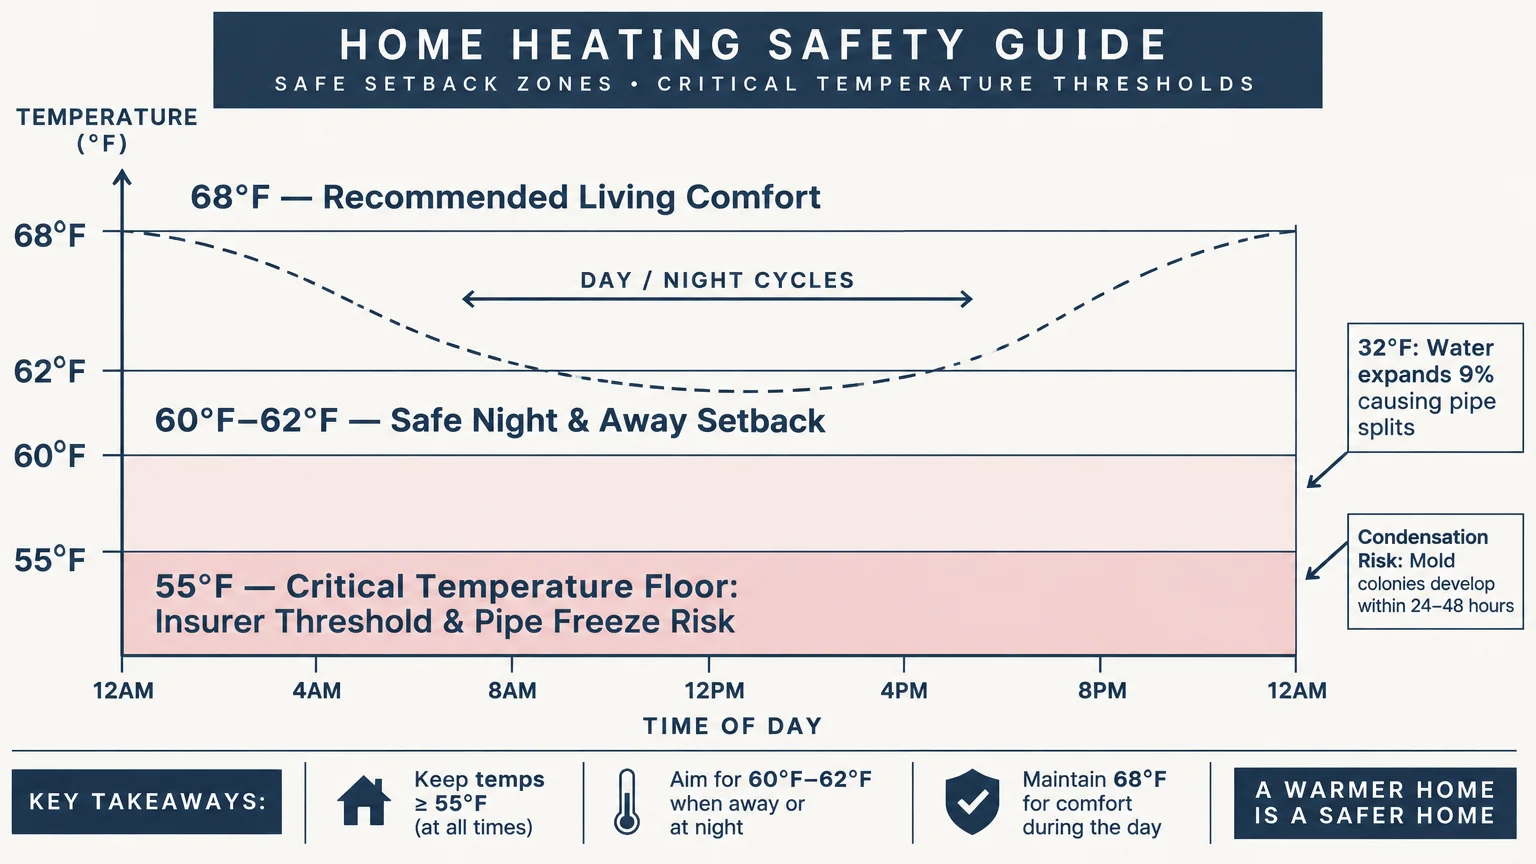
Even worse, dropping your heat below 55°F while away can jeopardize your financial safety net. Major insurers including State Farm and Amica, alongside regulators like the D.C. Department of Insurance, Securities and Banking, advise keeping thermostats at 55°F or higher because policies require reasonable care to maintain heat.
Cold indoor air also turns exterior walls and window glass into condensation magnets. Once warm indoor moisture from showers and cooking settles onto chilled surfaces, mold colonies can begin growing within 24 to 48 hours.
The Hidden Medical Danger Inside Cold Rooms
Freezing at home creates an even graver risk when older relatives share your space. The National Institute on Aging (NIA) warns that indoor temperatures between 60°F and 65°F can trigger hypothermia in older adults, occurring when core body temperature falls below 95°F.
Aging reduces insulating body fat, slows blood circulation, and dulls both shivering and cold awareness. Chronic illnesses such as diabetes, arthritis, thyroid disorders, Parkinson’s disease, and dementia—along with many common medications—further block the body from regulating heat.
National mortality data underscores why hypothermia risk seniors face deserves serious attention. CDC records counted 1,024 cold-related deaths across all ages in 2023, peaking in January, while a 2024 JAMA research letter showed U.S. cold death rates more than doubled from 1999 to 2022, hitting adults 75 and older hardest.
To prevent indoor cold injuries, the World Health Organization recommends at least 64.4°F for healthy adults and 68°F for vulnerable residents, including seniors and young children. Keeping living areas safe while cutting waste elsewhere lets you capture genuine heating costs savings without putting anyone at risk.
Ideal Spaces and Project Goals
This weekend maintenance project targets the exact leaks and thermostat habits draining your heating budget. You will focus on bedrooms, exterior walls, attics, basements, crawl spaces, and entry doors rather than forcing your living room below comfortable limits.
Your goal is simple: combine disciplined thermostat schedules with fast air sealing so your furnace runs less often. Instead of enduring miserable indoor temperatures, you trap paid warmth inside while protecting pipes, drywall, and household health.
Tools, Materials, and Prep Checklist
Before adjusting schedules or sealing drafts, gather a few straightforward DIY supplies. Most items cost far less than a single winter water damage repair and install cleanly in an afternoon.
Thermostat and Monitoring Tools
Programmable or Smart Thermostat: Pick one unit matched to your specific HVAC wiring, whether gas furnace, boiler, or heat pump. According to ENERGY STAR, certified smart thermostats save an average of 8% annually, or roughly $50 per year.
Digital Hygrometer and Thermometer: Grab two inexpensive battery-powered meters to track indoor temperature and relative humidity accurately. Place one in your main living room and another near basement plumbing or a senior’s bedroom.
Non-Contact Infrared Thermometer: Use one handheld scanner if you want quick surface checks along cold baseboards, rim joists, and window frames. Point-and-click readings reveal hidden insulation gaps within seconds.
Air-Sealing and Insulation Supplies
Silicone or Acrylic Latex Caulk and Caulk Gun: Keep two tubes of paintable interior caulk ready for stationary window trim and baseboard cracks. Choose clear or color-matched formulas for finished woodwork.
Expanding Spray Foam Sealant: Buy one or two cans of low-expansion window-and-door foam plus one standard gap filler for plumbing penetrations. Always wear disposable nitrile gloves because uncured foam stains skin stubbornly.
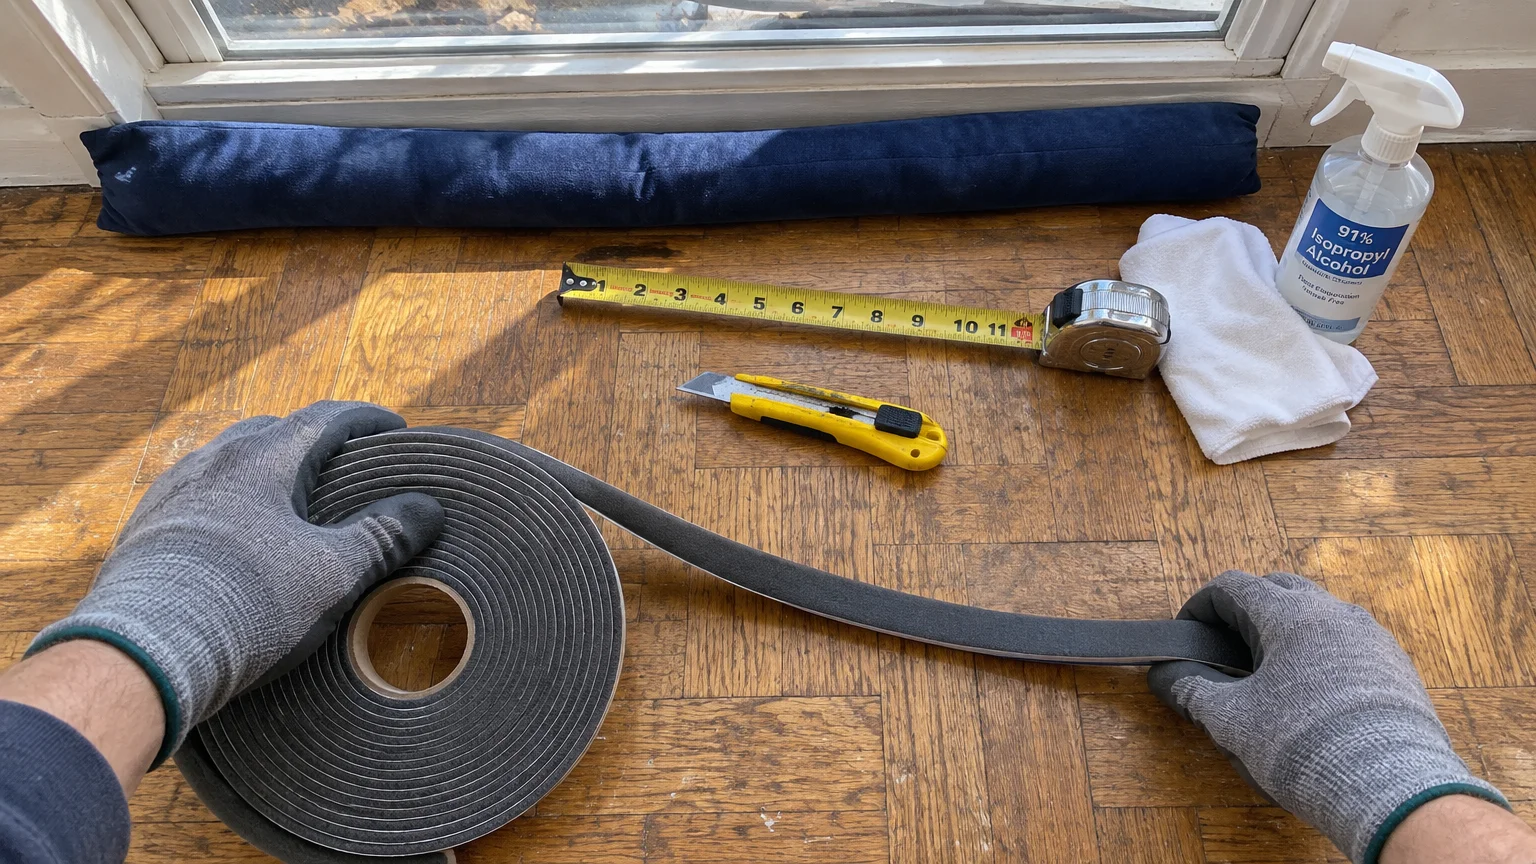
Adhesive Foam Weatherstripping and Door Sweeps: Measure your exterior doors and leaky window sashes before shopping so you buy enough linear footage. Closed-cell EPDM rubber strips last longer than cheap open-cell foam tape.
Foam Outlet Gaskets and Window Film Kits: Pick up one pack of pre-cut switch and outlet sealers for exterior walls. Add clear heat-shrink window film kits for older single-pane glass.
Pre-Slit Pipe Insulation Sleeves: Measure pipe diameters in unheated basements, garages, and crawl spaces before buying foam sleeves. Grab one roll of acrylic pipe-wrap tape to seal mitered corners cleanly.
Safety Gear and Pre-Project Prep
Personal Protective Equipment: Wear safety glasses, work gloves, and a snug dust mask whenever inspecting attics, fiberglass batts, or dusty crawl spaces. Keep a bright headlamp handy so both hands stay free.
Pre-Project Home Walk-Through: Spend fifteen minutes walking every floor with a notepad before opening a single package. Record current thermostat setpoints, feel around door frames for cold drafts, and note any plumbing running along outside walls.
Check your HVAC equipment type before changing any programming rules. Look at the outdoor condenser unit or furnace nameplate so you know immediately whether your home uses a heat pump or conventional combustion heat.
Step-by-Step Instructions
Work through these four phases in order for the safest balance of comfort, structural protection, and monthly bill reductions. You can complete the thermostat setup tonight and tackle air sealing this weekend.
Phase 1: Dial In Safe Thermostat Targets
Start with the daytime baseline recommended by the U.S. Department of Energy (DOE). Set your thermostat between 68°F and 70°F while you are home and awake, then adjust downward only as far as everyone stays comfortable.
If older adults, infants, or people with chronic medical conditions live with you, lock the daytime floor at 68°F or higher. Both the NIA and World Health Organization warn against dipping below 68°F around vulnerable household members.
For conventional gas furnaces, oil boilers, and electric baseboard heat, program an overnight or workday setback. Turning the thermostat down 7°F to 10°F for 8 hours daily trims annual heating and cooling bills by up to 10%—roughly 1% per degree.
Check your equipment carefully before programming deep drops on a heat pump. Both the DOE and ENERGY STAR explain that big temperature recoveries force heat pumps to fire inefficient electric backup strips, erasing your savings.
Limit heat pump setbacks to about 2°F unless your smart thermostat includes adaptive recovery controls built specifically for heat pumps. Let the adaptive algorithm warm rooms slowly using the efficient compressor rather than expensive resistance coils.
Never shut your heating system completely off during winter travel or vacant weekends. Set your away floor to at least 55°F as advised by major insurers so you protect pipes and preserve insurance eligibility.
Troubleshooting Tip: If bedrooms feel chilly during an overnight 7°F setback, warm the bed rather than the whole house. Add flannel sheets or a layered wool quilt while keeping living areas on schedule.
Phase 2: Seal Drafts and Upgrade Weak Insulation
Turning down the dial works twice as well when warm air actually stays indoors. According to the U.S. Environmental Protection Agency (EPA), air sealing combined with added insulation cuts heating and cooling costs by an average of 15%, or 11% on total energy bills.
Most homeowners underestimate how leaky their building shell really is. EPA data shows 9 out of 10 U.S. homes remain under-insulated, letting expensive furnace heat escape straight through the roof and foundation.
Begin in your attic because warm air rises and escapes through top-floor bypasses. Seal gaps around recessed light housings, plumbing vent stacks, chimney chases, and pull-down attic stairs using fire-rated caulk, rigid foam board, and weatherstripping.
Next, inspect your basement rim joists where wooden floor framing meets the concrete foundation. Cut rigid foam panels to fit snugly inside each joist bay and seal perimeter seams with low-expansion spray foam.
Move upstairs to seal drafts around exterior doors and window casings. Peel back worn weatherstripping, wipe frames clean with rubbing alcohol, and press fresh EPDM rubber strips along the door stops.
Install a screw-on aluminum and vinyl door sweep along the bottom edge of every exterior entry door. Check your work at dusk by shining a flashlight outside while someone inspects from inside for light leaks.
Remove cover plates from electrical outlets and light switches mounted on exterior walls after flipping off the breaker at your main panel. Slip foam gaskets behind each cover plate and reinstall screws snugly.
Safety Callout: Never touch electrical wiring inside junction boxes, and keep spray foam well away from hot metal furnace flues. Use metal flashing and high-temperature caulk around chimney or vent clearances.
Phase 3: Protect Vulnerable Plumbing Before Deep Freezes
Even with a 55°F or 60°F setback, pipes hidden inside unheated garages, crawl spaces, and exterior cabinets can drop fast during severe cold snaps. Acute freezing risk spikes whenever outdoor temperatures fall below 20°F for six hours or hold between 20°F and 32°F for twelve hours.
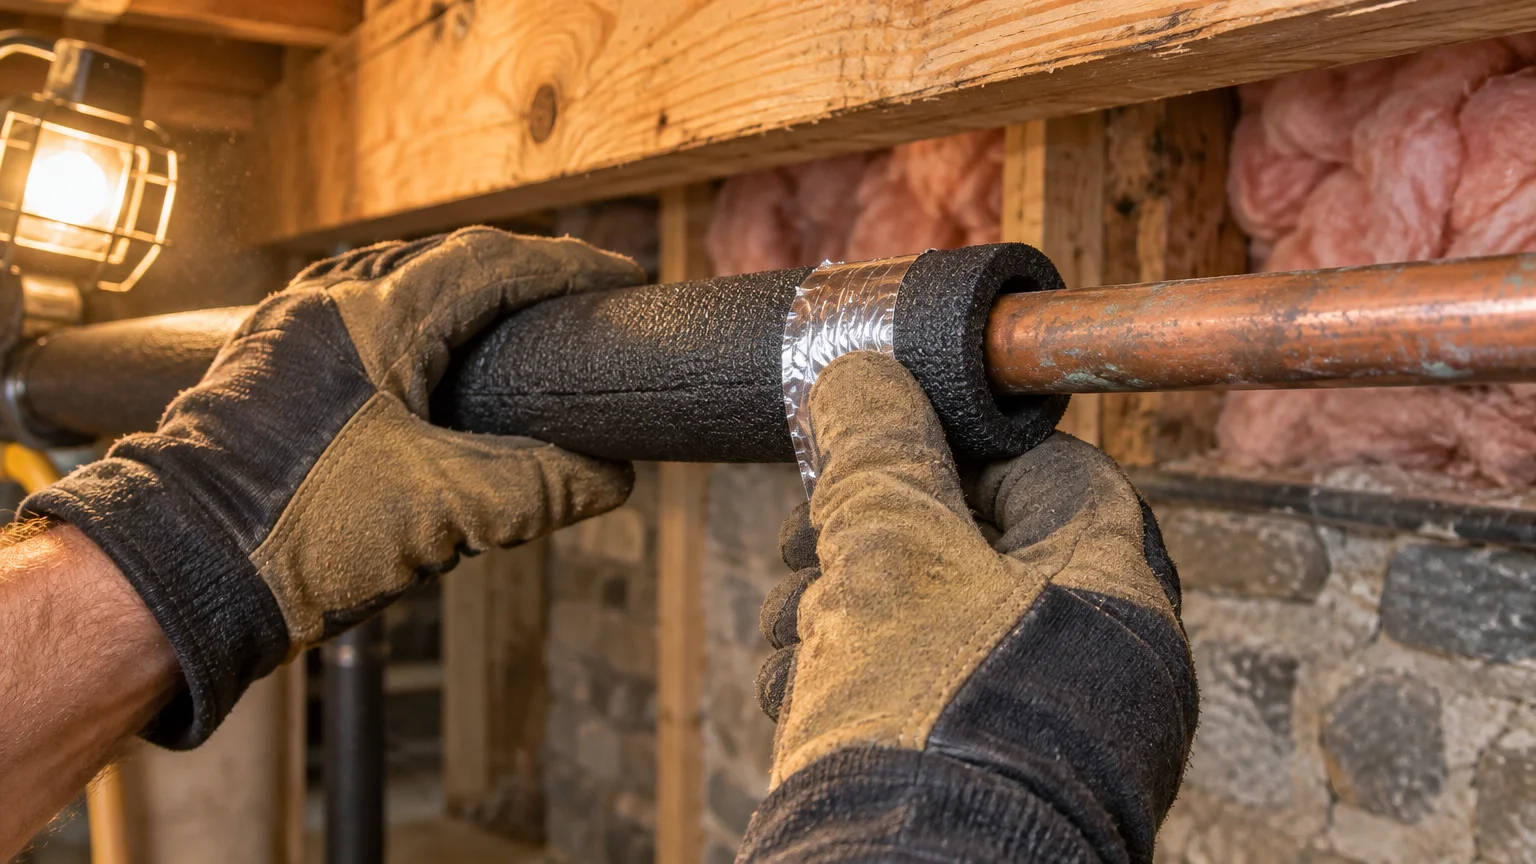
Walk your basement and crawl spaces to spot bare copper, PEX, or galvanized supply lines. Slide pre-slit foam pipe sleeves over every exposed run, pressing adhesive strips firmly shut along the seam.
Miter-cut sleeve corners at 45-degree angles around elbows and wrap joints tightly with pipe tape so zero bare metal peeks through. Pay extra attention to sillcocks and hose bibbs passing through foundation walls.
Disconnect every outdoor garden hose before freezing weather arrives and shut off interior isolation valves feeding exterior spigots. Open the outside faucet briefly to drain trapped water so ice cannot split the valve stem.
When forecasts warn of sub-20°F nights, open kitchen and bathroom vanity cabinet doors located against exterior walls. Allowing warm indoor air to circulate around under-sink supply lines prevents localized cold pockets.
During extreme cold events, let one cold-water faucet served by vulnerable pipes drip slowly overnight. Moving water resists freezing far better than stagnant water standing inside an icy wall cavity.
Troubleshooting Tip: If you turn on a tap and only a weak trickle emerges, leave the faucet open and warm the exposed pipe section gently with a hair dryer. Never use an open-flame torch, which can ignite framing or burst trapped steam.
Phase 4: Manage Indoor Humidity and Space Heater Risks
Lowering thermostat to save money cools interior wall surfaces and window panes, raising indoor relative humidity near cold glass. The U.S. EPA recommends keeping indoor humidity below 60%, ideally between 30% and 50%, or 30% to 40% during cold winter climates.
Check your digital hygrometer each morning, especially after long showers or boiling pasta. Run kitchen and bathroom exhaust fans vented outdoors for twenty minutes after steamy activities to purge excess moisture before condensation forms.
Wipe pooled water off cold window sills right away because damp wood and drywall grow mold within 24 to 48 hours. If condensation persists even at 35% humidity, apply clear window insulation film to create a warmer thermal air pocket.
Be equally careful before plugging in portable electric heaters to compensate for a frigid house. EIA Electric Power Monthly figures for August 2026, released October 23, 2026, place the average U.S. residential electricity rate at 18.16 cents per kilowatt-hour.
At that rate, one standard 1,500-watt space heater burns 1.5 kilowatt-hours every hour at full draw—costing about $0.27 hourly, $2.18 for an 8-hour shift, or roughly $65 per month continuously. Running two or three space heaters to avoid running central gas or heat-pump systems often spikes your bill higher.
Portable heaters also carry severe fire risks when misused. According to National Fire Protection Association (NFPA) averages from 2020 to 2024, U.S. fire departments answered 37,365 home heating fires yearly, resulting in 417 deaths, 1,260 injuries, and $1.2 billion in damage.
Nearly half of those heating fires—46%—struck between December and February. Worse yet, space heaters and heating stoves accounted for 30% of heating fires but caused 73% of deaths and 70% of injuries.
Federal data from the U.S. Consumer Product Safety Commission (CPSC) covering 2019 to 2022 links portable heaters alone to roughly 1,600 fires, 70 deaths, and 150 to 160 injuries annually. Follow strict CPSC and NFPA rules whenever using one temporarily.
Safety Callout: Enforce the 3-foot rule by keeping bedding, curtains, rugs, and furniture at least three feet away from any heater. Plug the unit directly into a wall outlet—never an extension cord or power strip—place it on a flat floor, and shut it off before sleeping or leaving the room.
Style & Finishing Touches
Practical energy saving tips winter homeowners actually stick with look great inside finished rooms. Smart thermal upgrades double as intentional decor changes that make 68°F feel remarkably cozy.
Layered Window Treatments and Color Palettes
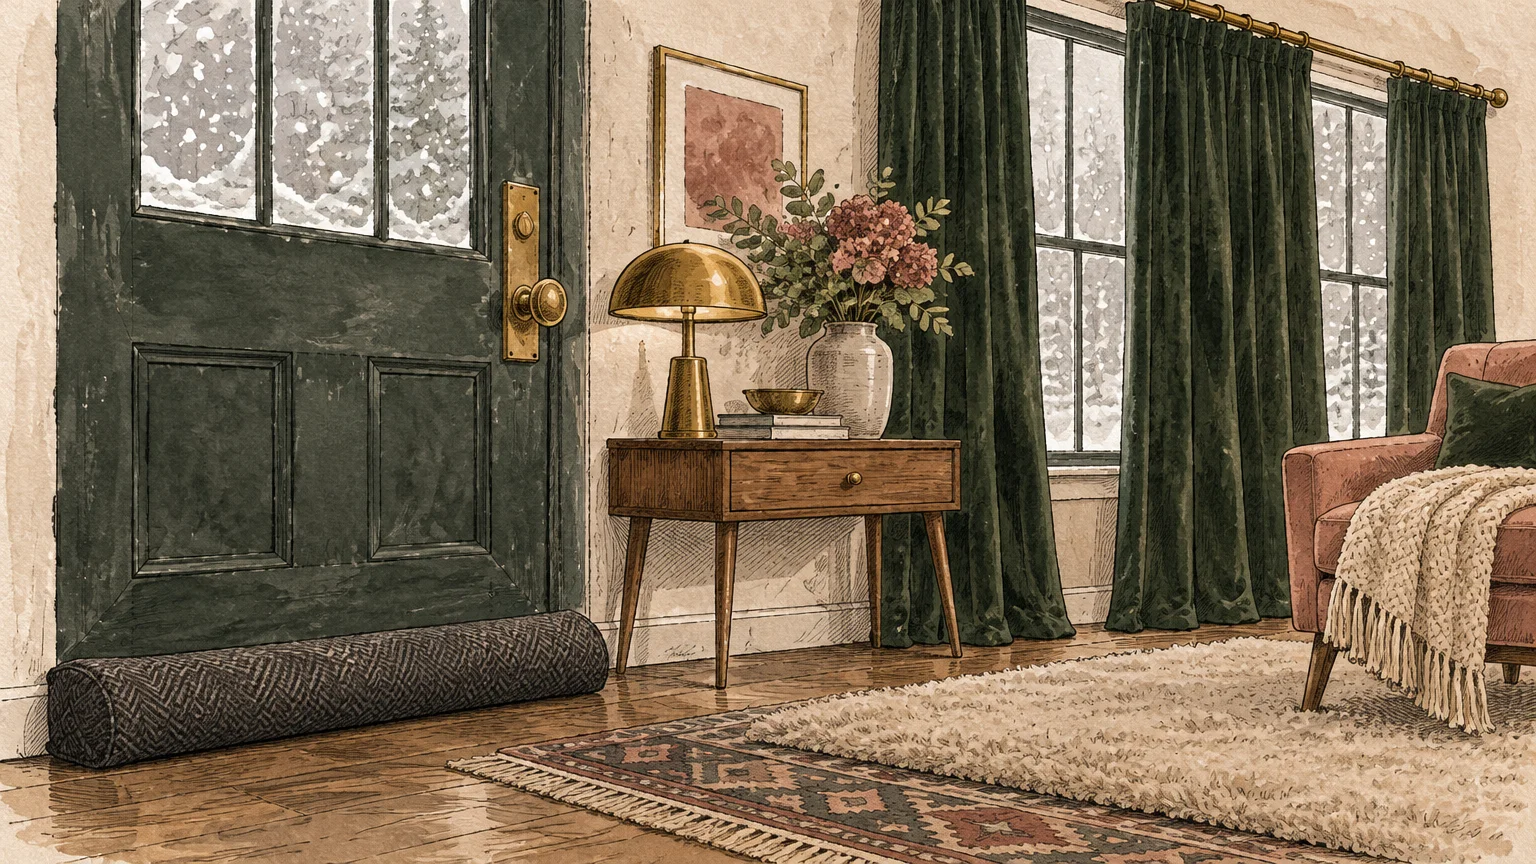
Hang lined thermal blackout drapes over drafty windows, extending rods wider than the trim so fabric seals side gaps cleanly. Choose warm oatmeal, soft taupe, slate blue, or deep forest green woven textiles to anchor bright winter light.
Open south-facing curtains every sunny morning to capture free passive solar warmth on dark hardwood or tile floors. Snap panels shut at dusk to trap daytime heat behind a thick fabric barrier.
Cozy Floor Textiles and Draft Stoppers
Bare wood and tile floors pull warmth straight out of bare feet, tempting you to bump the thermostat higher. Lay dense wool or woven flat-weave area rugs with thick felt pads over high-traffic hallways and seating zones.
Swap ugly rolled towels at leaky doorways for weighted fabric draft stoppers upholstered in herringbone or charcoal canvas. They block chilly floor-level air currents while blending naturally with baseboards and rugs.
Budget-Tiered Upgrade Options
Quick Weekend Tier: Combine fresh door weatherstripping, exterior outlet gaskets, pipe sleeves, and clear window film for an immediate comfort boost on a minimal budget. You will notice fewer cold drafts around couches the same evening.
Smart Comfort Tier: Mount an ENERGY STAR certified smart thermostat with remote room sensors in your hallway and primary bedroom. Sleek matte white, brushed steel, or charcoal glass faceplates modernize wall decor while automating safe setbacks.
Whole-Home Envelope Tier: Pair blown-in attic insulation and rim-joist foam sealing with custom cellular honeycomb shades. Cellular pleats trap insulating air pockets invisibly inside clean architectural lines.
Maintenance & Long-Term Care
Treating winter weatherization as simple seasonal upkeep keeps your savings compounding year after year. Small checkups stop minor wear from turning into January emergencies.
Monthly and Seasonal Checkups
Inspect your furnace or air-handler filter every month during peak winter runtime and swap dirty filters promptly. Restricted airflow forces blowers to work harder, wastes electricity, and risks overheating heat exchangers.
Check exterior door weatherstripping and window caulk lines every autumn before the first hard frost. Sunlight, humidity swings, and door slamming flatten foam strips and crack rigid caulk over time.
Vacuum dust off baseboard heaters, radiator fins, and return air grilles each fall so warm air circulates freely without burning dust. Never block supply registers with sofas, long drapes, or pet beds.
Test your digital hygrometer batteries each November and scan cold corners for musty odors or dark spots. Catching early window condensation lets you adjust exhaust fan habits long before mold gains a foothold.
When to Hire a Licensed Professional
Schedule an annual fall inspection with a licensed HVAC technician to clean burners, inspect heat exchangers for carbon monoxide leaks, and verify heat-pump defrost cycles. A tuned system delivers maximum efficiency safely.
Call an HVAC pro right away if your furnace short-cycles frequently, blows cool air, or makes rattling noises during startup. Likewise, contact a licensed electrician if outlets feel warm or circuit breakers trip under normal heating loads.
Hire a licensed plumber if pipes freeze inside enclosed walls where you cannot inspect for pinhole cracks safely. Hidden leaks behind drywall often stay silent until thawing water floods ceilings below.
FAQ
How low can I safely set my thermostat at night?
For healthy adults, the DOE supports turning conventional heating systems down 7°F to 10°F for 8 hours overnight from a 68°F to 70°F daytime baseline. Never let your whole house fall below 55°F, and keep temperatures at 68°F or higher for seniors or infants.
Should I turn down a heat pump overnight to save money?
Avoid deep overnight drops on standard heat pumps because big morning recoveries trigger inefficient electric resistance backup strips. Keep setbacks near 2°F or use an ENERGY STAR smart thermostat programmed with gradual heat-pump recovery.
Why do I get condensation on my windows when I turn the heat down?
Colder indoor temperatures chill window glass below the dew point of moist indoor air from cooking, bathing, and breathing. Keep winter indoor relative humidity around 30% to 40%, run exhaust fans, and add interior window film to prevent 24-to-48-hour mold growth.
Is it cheaper to heat one room with a space heater instead of central heat?
Usually no, especially if you heat with natural gas or a modern heat pump. At the August 2026 average rate of 18.16 cents per kilowatt-hour, one 1,500-watt heater costs roughly $0.27 hourly—about $65 monthly if run continuously—while adding serious fire hazards.
What happens to my homeowners insurance if pipes freeze while the heat is off?
Standard homeowners policies require reasonable care to maintain indoor heat during freezing weather. Dropping your thermostat below 55°F or turning the system completely off can lead insurers to deny water damage claims averaging over $30,000.
Takeaway & Next Steps
Freezing inside your home is never a smart strategy for cutting winter heating bills. True heating costs savings come from respecting safe temperature floors while sealing the hidden leaks letting paid warmth escape.
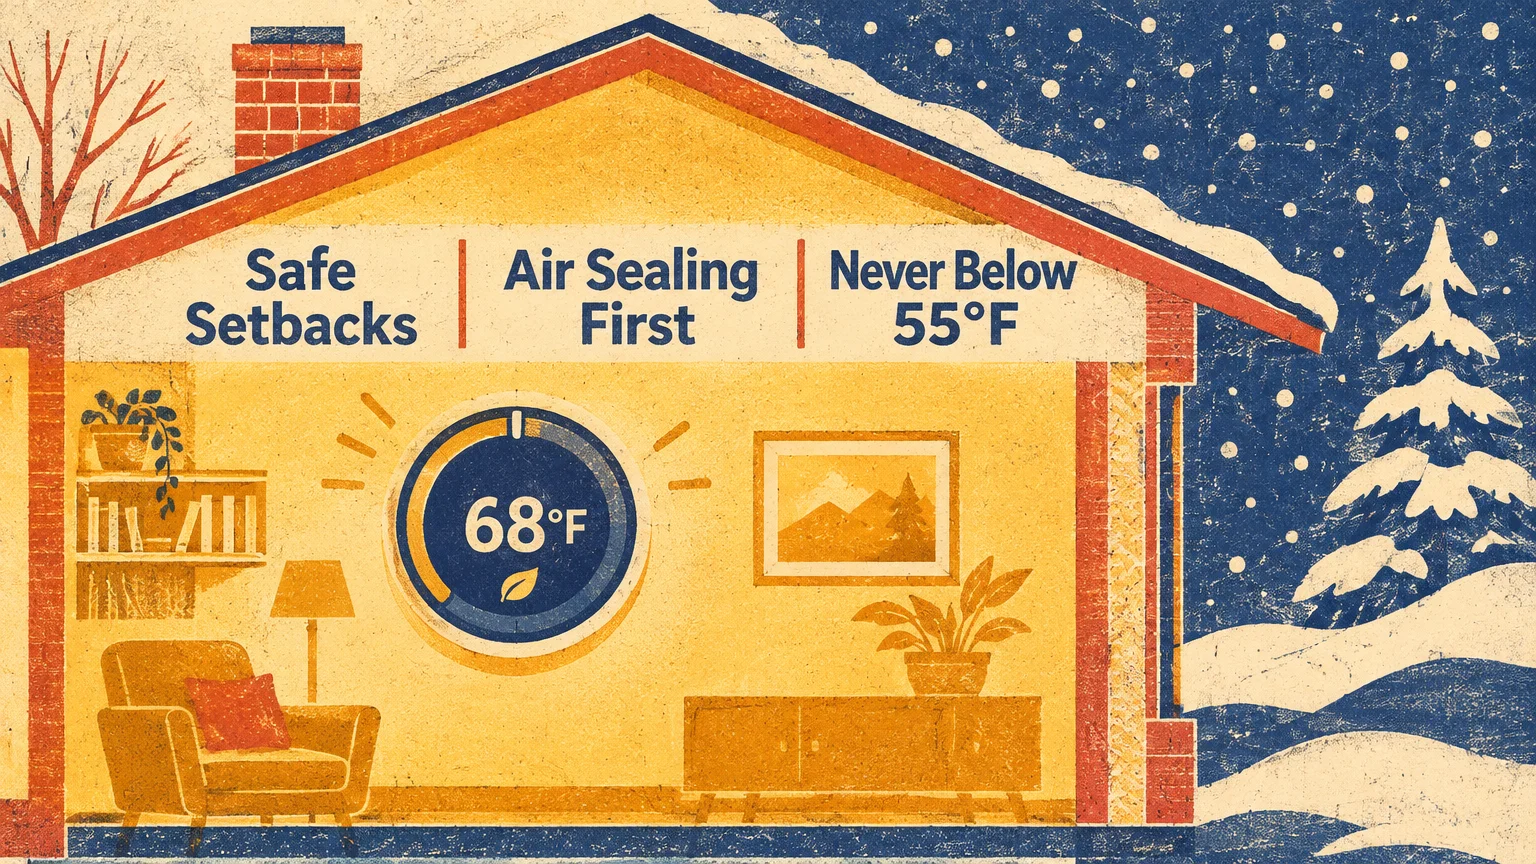
By keeping daytime warmth at 68°F to 70°F, setting responsible 8-hour setbacks, guarding pipes above 55°F, and protecting seniors at 68°F or higher, you avoid catastrophic pipe bursts, mold, and medical emergencies.
Three Actions to Take Today
First, audit your thermostat schedule tonight to verify your away floor sits at 55°F or higher—and confirm heat pumps use no more than a 2°F setback.
Second, walk your exterior walls, attic hatch, and basement plumbing this weekend with caulk, weatherstripping, and foam pipe sleeves in hand.
Third, check in on older parents or neighbors to make sure their thermostats stay at 68°F or warmer throughout cold snaps.
Have you tackled a weekend draft-sealing upgrade or smart thermostat swap this season? Share your winterization project photos with our community, or subscribe to our newsletter for weekly renovation ideas delivered straight to your inbox.