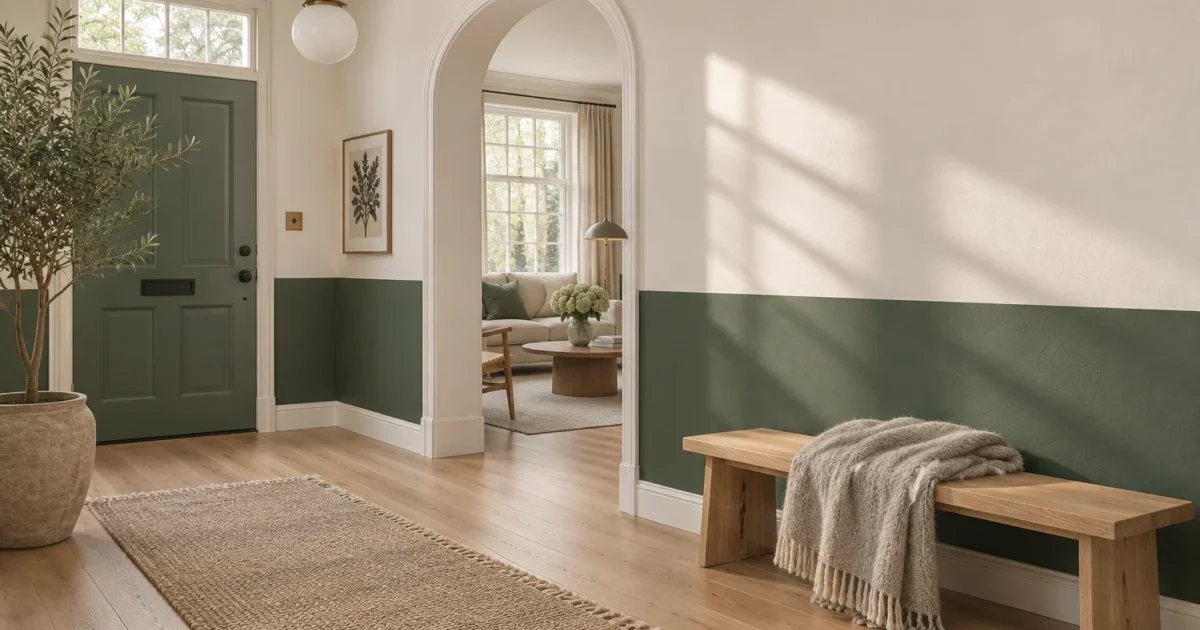
Fresh two tone walls instantly give flat drywall custom architectural character without the dust or expense of carpentry. By pairing contrasting shades along a deliberate line, you can anchor furniture, shift ceiling proportions, and elevate everyday rooms.
You do not need a massive budget or professional crew to pull off crisp, designer-level interior paint design. With accurate measurements, the right painter’s tape, and proven color ratios, a single weekend project delivers dramatic results.
Explore nine versatile wall paint ideas below, along with exact prep steps, sheen pairings, and safety guidelines for lasting finishes.
Project Overview & Why It Matters
Applying two color paint transforms how your eyes read a room’s height, width, and brightness. Unlike a single monochrome coat, a split finish creates a built-in focal plane that frames artwork, headboards, and dining tables.
You can adapt this technique to bedrooms, hallways, entryways, home offices, and powder rooms. Because paint covers imperfections and refreshes tired drywall quickly, two tone walls often outshine wallpaper for versatility and long-term repairability.
Proportions That Prevent Awkward Splits
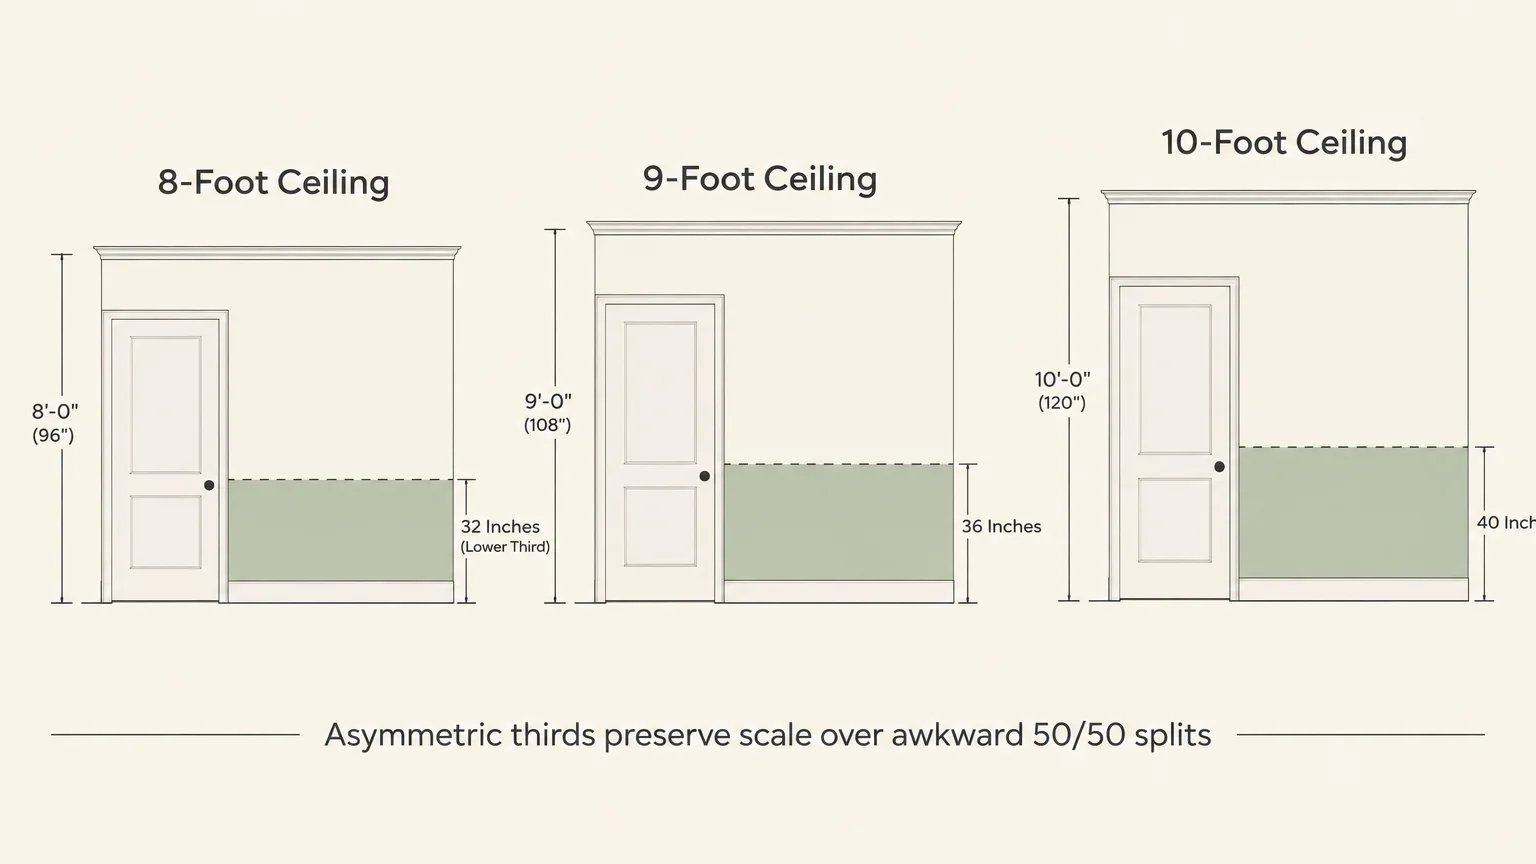
Splitting a wall directly down the middle at fifty percent usually makes a room feel boxy and cut in half. Designers rely on asymmetric thirds instead to mimic classic millwork and guide the eye naturally.
According to This Old House, standard lower-wall treatments sit one-third of the way up the wall, while taller plate-rail lines extend to two-thirds. Older homes often feature classic lower splits between 36 and 42 inches high.
For standard rooms, a one-third split places your painted line at 32 inches on an 8-foot ceiling and 36 inches on a 9-foot ceiling. On 10-foot ceilings, aim for 40 inches—or up to 48 inches in formal dining rooms.
In spaces with soaring ceilings, placing a horizontal break at 60 to 70 percent of the wall height scales down excess vertical space. That visual anchor makes cavernous living rooms feel grounded and inviting.
Using Light Reflectance Value for Balance
To keep your two color paint layout balanced, check each swatch’s Light Reflectance Value before buying sample pots. Sherwin-Williams measures LRV on a 0 to 100 scale, showing how much visible light a finish bounces back.
Deep blacks sit near the bottom, such as Tricorn Black SW 6258 at LRV 3 and Benjamin Moore Jet Black 2120-10 at LRV 4.71. Bright whites top the chart, including Simply White OC-117 at 89.52 and High Reflective White SW 7757 at 93.
As a reliable rule, place the lower-LRV shade on the bottom half of the wall. Darker tones below ground your furniture visually, while brighter shades overhead preserve daylight and openness.
Budget and Timeline Expectations
Painting a single bedroom yourself typically takes one to two days, including masking, priming, and applying two finish coats. Most standard paints cover roughly 250 to 400 square feet per gallon depending on drywall texture.
Data from Angi and HomeGuide shows interior paint averaging $20 to $60 per gallon, though flagship lines reach $80 to $95. Hiring a professional averages $9.50 to $20 per square foot—around $950 to $2,000 for a bedroom.
Doing the labor yourself keeps your total material spend reasonable while delivering custom results. Even with premium brushes and multi-tier tape, you save thousands over professional living room quotes of $2,000 to $4,000.
Tools, Materials, and Prep Checklist
Crisp transitions depend far more on disciplined preparation than steady hands alone. Gathering every supply before opening a paint can prevents rushed shortcuts while wet edges dry.
Essential Tools and Painter’s Tape Specs
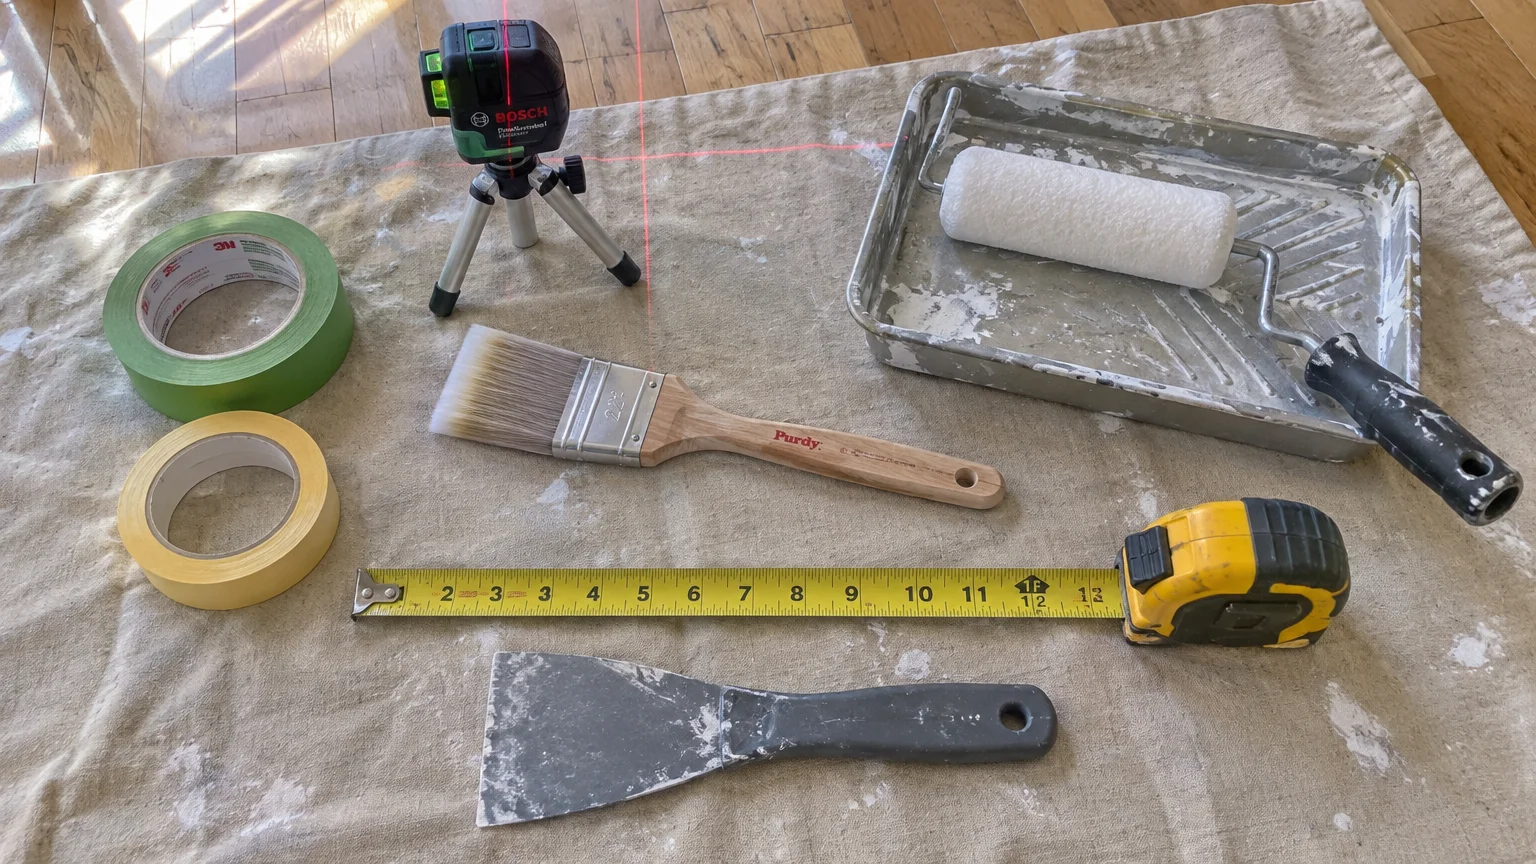
Start with a self-leveling laser level or a long bubble level, a steel tape measure, and a light pencil for layout marks. Keep a sturdy step ladder, canvas drop cloths, and a painter’s multi-tool nearby for scraping and opening cans.
Pick up two angled sash brushes for cutting crisp corners and a standard roller frame with medium-nap covers for smooth drywall. Add two roller trays with disposable liners so you can switch colors without pausing to wash equipment.
Choose your painter’s tape carefully based on wall cure time, referencing 3M ScotchBlue performance standards. Standard tape can peel fresh paint that has not cured for at least 30 days.
When taping over newly painted base layers after 24 hours of drying, use delicate-surface tape like ScotchBlue #2080. For cured surfaces between 50 degrees and 100 degrees Fahrenheit, Multi-Surface #2090 removes cleanly for 14 days and PROSharp 2093+ lasts 21 days.
Paint Tiers, Sheens, and Quantities
Multiply wall length by height and divide by the can’s coverage rate—typically 250 to 400 square feet per gallon—to estimate quantities. Plan for two finish coats on both colors, or up to three coats for low-pigment earthy reds.
For budget planning, Behr runs $25 to $55 per gallon, while Sherwin-Williams ranges from $35 entry lines to $75–$90 for Emerald. Benjamin Moore spans roughly $45 entry gallons up to $80–$95 for Aura.
Match your sheen to room traffic using Benjamin Moore reflectance guidelines, which measure low-luster paints at 85 degrees and glossier finishes at 60 degrees. Flat finishes at 0 to 4 percent reflectance hide drywall bumps on ceilings and upper walls.
Matte sits at 3 to 10 percent reflectance for low-traffic bedrooms, while specialized Aura Bath & Spa matte handles bathroom steam at 3 to 4.5 percent. Use Eggshell at 10 to 25 percent for living rooms and hallways.
For kids’ spaces and stairwells, step up to Satin or Pearl at 20 to 35 percent reflectance. Reserve Semi-Gloss at 40 to 65 percent for baseboards, doors, and high-splash zones.
Pre-1978 Lead Safety and VOC Rules
Residential lead-based paint was banned in 1978, yet it still exists in roughly half of older U.S. homes. Before sanding or scraping any pre-1978 wall, check the U.S. EPA lead safety guidelines.
Under the EPA Renovation, Repair and Painting Rule, paid contractors and landlords disturbing over 6 square feet per interior room must hold EPA certification and use HEPA dust containment. Unpaid homeowners working on their own primary residence are exempt, though dry sanding suspected lead remains hazardous.
Always test questionable layers with an EPA-recognized swab kit before disturbing old coatings, and hire an RRP-certified pro if lead appears. When selecting new paint, watch indoor air quality standards closely.
Federal rules cap coatings at 250 grams per liter for flat finishes and 380 grams per liter for non-flat finishes. Strict regional rules, including California Air Resources Board limits, tighten those caps to 50 grams per liter flat and 100–150 non-flat.
Note that products labeled zero-VOC can still legally contain up to 5 grams per liter in the base paint, and conventional counter colorants add more. Look for third-party CDPH 01350 emissions certification when painting nurseries or poorly ventilated bedrooms.
Step-by-Step Instructions
Follow this phased workflow to achieve razor-sharp lines without bleeding under the tape. Work systematically from your lightest upper shade down to your darker lower hue.
Phase 1: Clear, Clean, and Repair Drywall
Remove outlet covers, switch plates, curtain brackets, and wall art, storing screws inside labeled zipper bags. Pull furniture to the center of the room and cover floors completely with canvas drop cloths.
Wash walls gently using mild dish soap and warm water to remove hand oils, kitchen grease, and dust. Rinse with a damp sponge and allow the surface to dry thoroughly.
Fill nail holes and hairline cracks with lightweight spackle, then sand patched areas flush with fine-grit sandpaper once dry. Spot-prime repaired patches and high-contrast transitions using a stain-blocking primer so gloss levels stay uniform.
Phase 2: Paint the Lighter Upper Section First
Most pros paint the lighter upper color first—overlapping slightly past your planned dividing line—because covering light paint with dark paint requires fewer coats later. Cut in along the ceiling and corners with your angled brush.
Roll the upper field in smooth overlapping strokes to distribute paint evenly without lap marks, then finish with light vertical passes. Wait per label directions before applying the second coat.
Once your final upper coat finishes, wait a minimum of 24 hours before applying delicate-surface painter’s tape over that fresh finish. Rushing this step risks pulling uncured upper paint right off the drywall.
Phase 3: Measure, Level, and Seal Your Split Line
Set your laser level at your target height—such as 36 inches on a 9-foot wall—and project a continuous horizontal beam across the room. If using a manual level, measure up from the floor at several spots and connect marks lightly with pencil.
Press delicate-surface tape firmly just above your pencil line so the bottom edge defines the exact boundary. Burnish the lower edge down using a plastic putty knife or card to flatten micro-gaps along drywall texture.
For razor-sharp edges on textured walls, paint a thin coat of your upper wall color right over the taped edge and let it dry. That sealing trick plugs tiny crevices so your contrasting color cannot bleed underneath.
Phase 4: Apply the Lower Color and Pull Tape Cleanly
Cut along the tape seam, baseboards, and corners with your darker or bolder shade using a fresh angled brush. Roll the lower section carefully with your second roller sleeve, stopping just shy of the tape edge so you do not flood the seam.
Apply a second coat once the first dries to ensure deep, even saturation without thin spots. Once the paint is dry to the touch, typically 30 to 60 minutes after your final pass, score lightly along the tape edge with a putty knife.
Pull the tape back slowly onto itself at a 45-degree angle to shear cleanly through the dried film. If adhesive clings slightly, switch to a 90-degree pull angle and work slowly across the wall.
Troubleshooting Common Two-Tone Mishaps
If small specks of paint bleed beneath your tape, let the lower coat cure for 24 hours rather than wiping wet paint, which smears the stain. Use a fine artist brush dipped in your upper shade to dab out tiny bleeds invisibly.
Should peeling occur when pulling tape, stop immediately and score the remaining edge carefully with a sharp utility blade before resuming. Patch torn drywall paper with a thin skim coat of joint compound, prime it, and touch up once dry.
Style & Finishing Touches
With your prep workflow mastered, explore these nine designer-tested wall paint ideas. Each pairing combines smart color psychology, verified LRV balance, and practical sheen choices tailored to real U.S. homes.
1. Classic One-Third Chair Rail Split
Anchor dining rooms or entryways by placing your horizontal line at one-third wall height—32 inches on 8-foot ceilings or 36 inches on 9-foot ceilings. You get the grounded formality of traditional wainscoting without installing wood trim.
Pair Benjamin Moore’s rich Webster Green HC-130 at LRV 20.2 below with airy Simply White OC-117 at LRV 89.52 above. Stick with Flat or Matte overhead and wipeable Eggshell below so dining chairs never scuff the finish.
2. Tall Two-Thirds Plate-Rail Drama
Raise your dividing line to two-thirds height—or 60 to 70 percent up the wall—to draw eyes upward in rooms with modest furnishings. This taller proportion creates an enveloping wrap that makes hung artwork pop against the saturated bottom band.
Try Valspar’s Cottage Door 8004-38E, a mid-tone neutral blue at LRV 26, or Glidden’s smoky Artifact PPG10-16 on the lower two-thirds. Cap the upper third with Sherwin-Williams High Reflective White SW 7757 at LRV 93 to keep the ceiling floating.
3. Color-Blocked Arch or Corner Wrap
Skip full-room wall lines and paint a crisp geometric arch or corner wrap to carve out a reading nook or desk zone. This smart accent wall ideas approach replaces bulky bookshelves or room dividers in open-plan spaces.
Use warm earth shades like Dutch Boy’s Deep Rooted 311-7DB or Valspar’s Warm Eucalyptus over a soft neutral base like Pantone’s Cloud Dancer. Trace arches easily using a pencil tied to a piece of string anchored at your center point.
4. Matte-Over-Eggshell Monochromatic Pairing
Not every two color paint project requires dramatic contrast; pairing two close hues—or identical shades in differing sheens—creates subtle light play. As sunlight moves across the room, the lower wall catches a soft glow while the upper surface absorbs glare.
Place Behr’s mossy olive Grounded T27-01 in Eggshell along the lower third, topped by a softened sage like Sherwin-Williams Celery SW 6421 at LRV 71 in Matte. This serene combination shines in quiet home offices and sunlit sunrooms.
5. High-Contrast Black and White Hallway
Long, narrow hallways suffer fast from backpack scuffs, pet traffic, and muddy shoes. Grounding the bottom 36 to 42 inches in deep black conceals daily wear while crisp white overhead keeps cramped corridors bright.
Combine Sherwin-Williams Tricorn Black SW 6258 at LRV 3—or Benjamin Moore Jet Black 2120-10 at LRV 4.71—in Satin on the bottom half with Chantilly Lace OC-65 at LRV 90.04 above. Install narrow picture ledges along the seam for effortless art rotation.
6. Restful Botanical Bedroom Split
Bedrooms benefit from muted nature hues that soften morning glare and promote evening calm. Combining two organic greens or warm khakis gives standard drywall custom boutique-hotel polish.
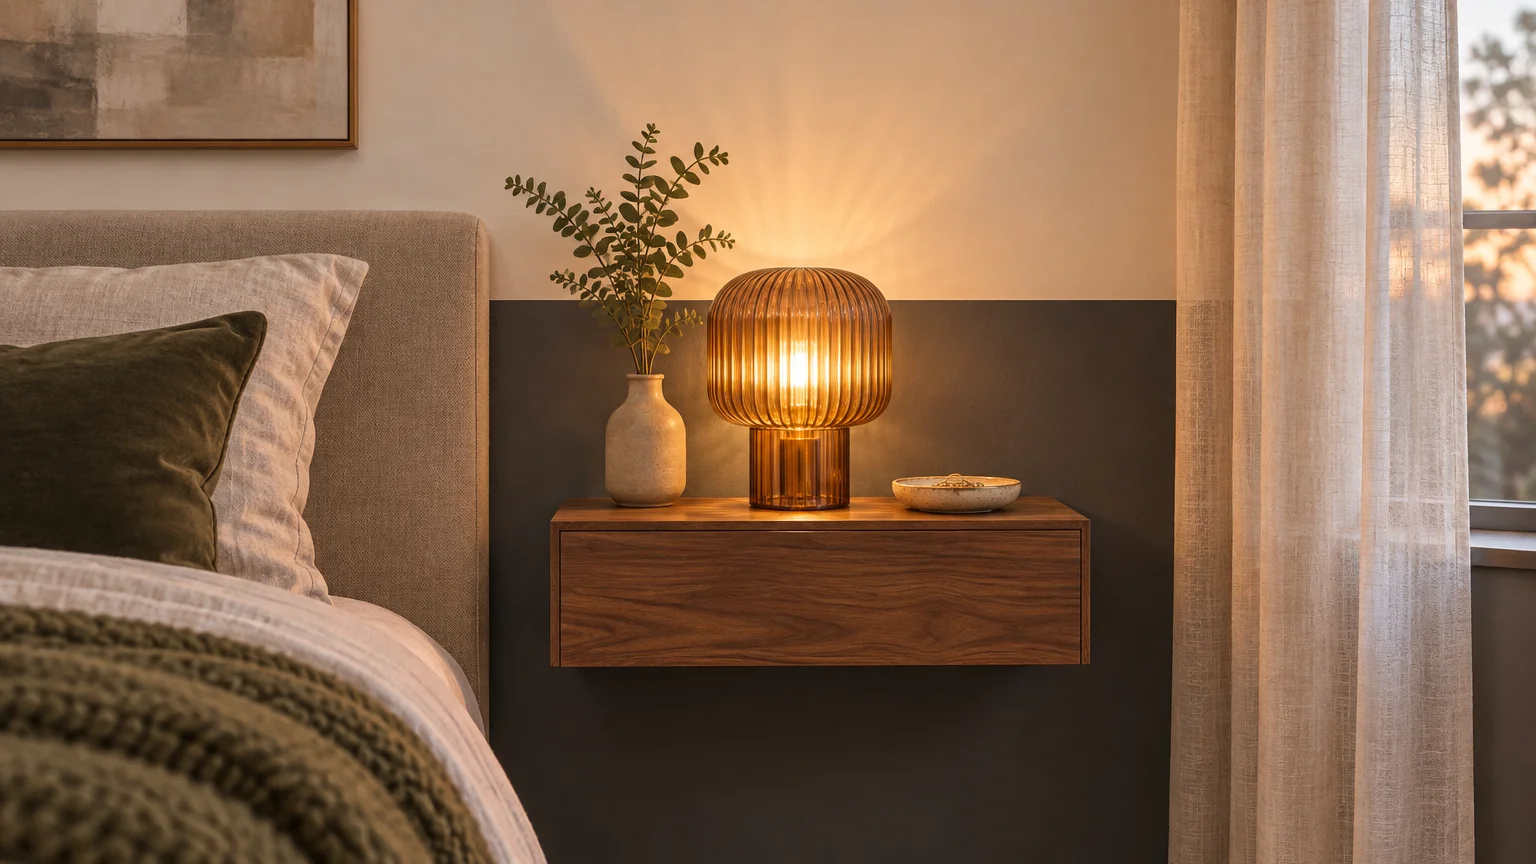
Apply Behr’s smoky jade Hidden Gem or Benjamin Moore’s charcoal-brown Silhouette behind the headboard up to 40 inches. Float Sherwin-Williams Universal Khaki SW 6150 above to tie wood nightstands and linen bedding together seamlessly.
7. Painted Faux Wainscoting and Matching Trim
Elevate builder-grade baseboards by painting your existing trim, doors, and the lower wall band the exact same color in Semi-Gloss. Unifying trim and drywall eliminates choppy horizontal stripes and creates the illusion of expensive custom millwork.
Because baseboards take vacuum bumps and mop splashes, Semi-Gloss at 40 to 65 percent reflectance resists chipping and cleans easily. Keep the upper wall in soft Matte or Eggshell for rich textural contrast.
8. Vertical Banding for Narrow Bedrooms
Turn the traditional horizontal split 90 degrees by running a vertical block of color behind your bed, desk, or dining buffet. Vertical interior paint design elongates short walls and draws eyes straight toward the ceiling.
Tape two plumb vertical lines aligned with the outer edges of your nightstand pair using a laser level. Coat the wide center column in a grounded darker hue while leaving flanking wall strips in bright, reflective white.
9. Upper-Third Ceiling-Wrap Canopy
In tall bedrooms or nurseries that feel overly cavernous, stop your brighter lower paint two-thirds up the wall and carry the upper shade right onto the ceiling. Wrapping the upper wall and ceiling together lowers visual height and softens harsh corners.
Use Flat paint at 0 to 4 percent reflectance on both the upper band and ceiling so overhead light fixtures never cast glaring streaks. Warm neutral whites or soft botanical greens create an inviting canopy effect.
Maintenance & Long-Term Care
Freshly painted two tone walls look sharp for years when you let coatings cure before heavy cleaning. Most latex paints feel dry quickly yet require roughly 30 days to reach maximum hardness and scrub resistance.
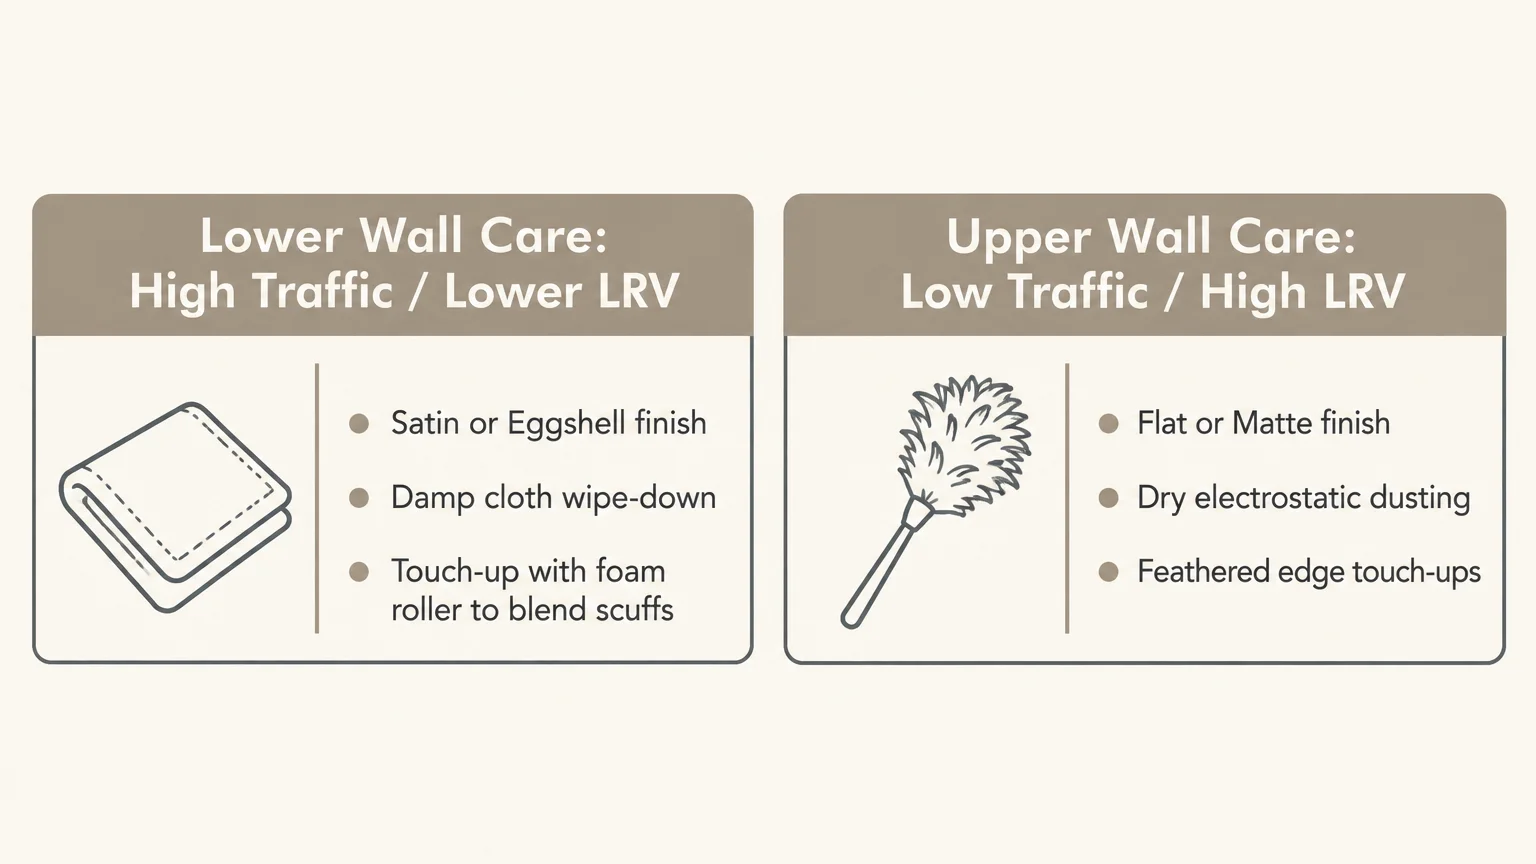
During that first month, dust lightly with a dry microfiber cloth instead of scrubbing smudges. Once cured, clean Eggshell, Satin, and Semi-Gloss lower walls using lukewarm water, gentle dish soap, and a soft non-abrasive sponge.
Avoid harsh ammonia cleaners or abrasive pads on Flat and Matte upper walls, as friction burnishes low-luster finishes into shiny patches. Always dab lightly rather than scrubbing flat surfaces.
Store leftover paint cleanly by wiping the can rim, snapping the lid tight, and writing the wall location and sheen on the label. Keep cans inside temperature-controlled closets above freezing so backup touch-up paint stays smooth.
Inspect high-traffic seams, doorframes, and baseboard caulk lines once every spring and fall. Feather small scuffs quickly with a tiny foam brush using the exact sheen originally applied so patches vanish under daylight.
FAQ
What is the best height for two tone walls?
For classic balance, split the wall at one-third height: 32 inches on 8-foot ceilings, 36 inches on 9-foot ceilings, and 40 to 48 inches on 10-foot ceilings. In tall living spaces, raising the line to 60–70 percent brings soaring ceilings into comfortable human scale.
Should the darker color go on the top or bottom?
Placing the lower-LRV darker shade on the bottom works best in most rooms because it grounds furniture and conceals everyday scuffs. Going dark on top works best when you intentionally wrap a high ceiling downward to create an intimate canopy feel.
How long should I wait before taping over fresh paint?
Standard painter’s tape requires at least 30 days of cure time before touching fresh paint safely. If you want to finish your project in one weekend, wait at least 24 hours and use a delicate-surface tape rated specifically for freshly painted surfaces.
Can I paint two tone walls on heavily textured drywall?
Yes, though textured drywall requires an extra sealing step to stop paint bleed. Burnish your delicate-surface tape tightly, seal the seam with a thin coat of your base wall color, let it dry, and then apply your contrasting shade.
Do I need a chair rail molding between the two colors?
No—a crisp, laser-leveled paint seam looks sleek and contemporary on its own while saving hundreds of dollars on lumber and saws. You can always add wood trim later along that exact height line if you want extra architectural shadow.
Takeaway & Next Steps
Thoughtful two tone walls deliver custom architectural polish on an approachable weekend budget. With accurate third-height math, LRV-balanced colors, and disciplined tape work, your DIY finish will rival designer interiors.
Take three immediate actions today to launch your makeover. First, measure your room’s ceiling height and mark your ideal one-third or two-thirds split line lightly with painter’s tape to test the scale.
Second, pick up two contrasting sample pots—checking LRV ratings and sheen levels—and brush large swatches onto poster board to view in morning and evening light. Third, verify your home’s build year and gather EPA-safe prep supplies, delicate-surface tape, and angled brushes.
Ready to show off your crisp new lines or explore more weekend transformations? Share your finished project photos with our community or subscribe below for weekly home renovation ideas.