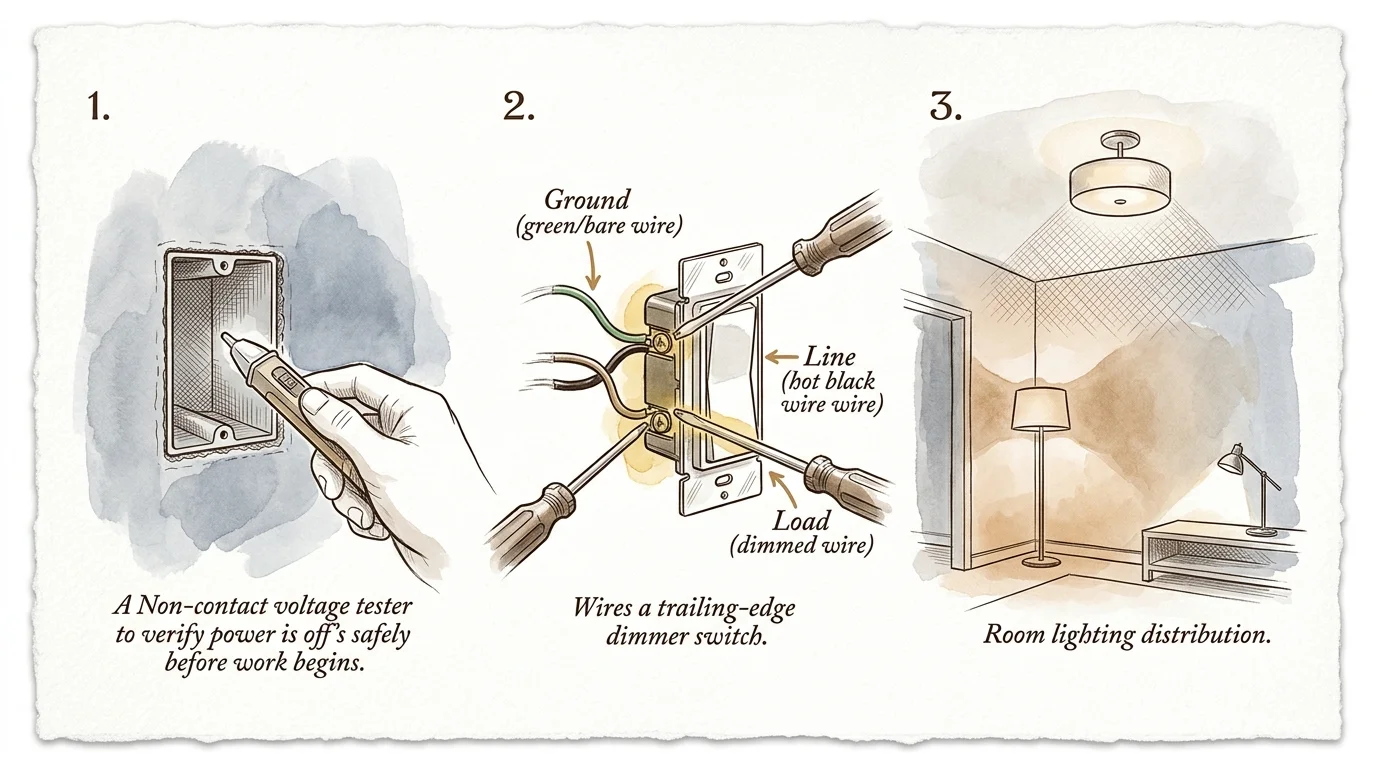
Step-by-Step Instructions
Mistake 1: Flooding Spaces with High-Kelvin Daylight Bulbs
Many shoppers purchase bulbs labeled “Daylight” assuming they provide sunny, natural warmth. In reality, these bulbs emit a cool 5,000K to 6,500K spectrum resembling a commercial hospital wing.
Replace these harsh lamps with 2,700K soft white bulbs in living rooms, dens, and bedrooms. This color temperature mimics the gentle amber wavelength of traditional incandescent bulbs.
Reserve 3,000K warm white bulbs for kitchens, laundry rooms, and home offices. That spectrum delivers crisp visibility for utility tasks without casting sterile blue undertones.
Mistake 2: Buying Bulbs with a Low Color Rendering Index
Bargain LED bulbs frequently feature a Color Rendering Index (CRI) rating below 80. This low score washes out hardwood tones, dulls paint pigments, and makes human skin appear pale or sickly.
Always inspect product packaging to verify a CRI score of 90 or higher. High CRI lighting allows rich earth tones, natural textiles, and vibrant artwork to render true to life.
Look for bulbs certified under California Title 24 / JA8 standards. That benchmark guarantees a minimum 90 CRI rating and strict flicker prevention for premium indoor comfort.
Mistake 3: Relying on a Single Overhead Light Fixture
Relying entirely on a central ceiling fixture creates a flat, institutional environment. A solitary overhead source casts harsh downward shadows beneath eyes and leaves room corners swallowed in gloom.
Establish a balanced three-layer lighting scheme across every living space. Blend ambient overhead light, focused task illumination, and decorative accent lighting to build depth.
Place table lamps at seated eye level and floor lamps in empty corners. This multi-source configuration softens contrast ratios and wraps the entire room in balanced warmth.
Mistake 4: Overlighting Rooms Without Lumen Calculations
Blasting a room with excessive illumination destroys cozy ambiance and causes persistent eye fatigue. Many homeowners install oversized fixtures without assessing their actual square footage requirements.
Follow the Illuminating Engineering Society guidelines to establish proper room brightness. Calculate total room square footage and multiply that figure by 10 to 20 lumens for relaxing areas.
A 200-square-foot living room requires approximately 2,000 to 4,000 total lumens across all sources. For kitchen prep zones, multiply the area by 30 to 50 lumens instead.
Mistake 5: Pairing Modern LEDs with Legacy Dimmer Switches
Using modern LED bulbs on older incandescent dimmers causes annoying buzzing, hums, and visible strobe effects. Legacy leading-edge switches were engineered for high-wattage resistive loads, not solid-state electronics.
Replace outdated switches with dedicated trailing-edge or universal electronic dimmers. These devices provide smooth, silent control down to low light levels without damaging delicate LED drivers.
Verify that your new switch matches the bulb manufacturer compatibility list before purchase. High-quality dimmers feature adjustment dials to eliminate low-end flicker entirely.
Mistake 6: Overlooking Dim-to-Warm LED Technology
Standard LEDs retain their static color temperature as you slide a dimmer down. When lowered, they produce a dull, grayish cast that feels dreary rather than intimate.
Install dim-to-warm LED bulbs in dining rooms, living rooms, and primary bedrooms. These smart diodes automatically shift from 2,700K down to 1,800K as brightness decreases.
This dynamic shift replicates the golden, candle-like glow of traditional dimmed incandescents. It creates an instantly welcoming atmosphere for evening gatherings and late-night relaxation.
Mistake 7: Creating “Swiss Cheese” Ceilings with Recessed Cans
Installing symmetrical grids of recessed downlights across a ceiling causes harsh glare and distracting cone patterns. Downlights aimed strictly at bare flooring waste light and fail to illuminate people pleasantly.
Position recessed fixtures closer to walls to graze vertical surfaces like textured drywall, brick, or artwork. This technique bounces indirect light back into the living area gently.
Choose recessed trims with deep baffles or regressed lenses to conceal the bare diode. Deep baffles eliminate uncomfortable direct glare when you walk through the room.
Mistake 8: Neglecting Vertical Wall Illumination
The human eye registers room brightness primarily by viewing vertical surfaces rather than horizontal flooring. Leaving perimeter walls in shadow makes spaces feel confining, cave-like, and physically cold.
Incorporate hardwired wall sconces, picture lights, or plug-in uplights aimed at corner walls. Illuminating vertical planes visually pushes walls outward and makes rooms appear significantly larger.
Aim adjustable spotlight fixtures toward tall houseplants, bookshelves, or drapery panels. Textured wall grazing introduces dramatic visual warmth and eliminates dead zones in your floor plan.
Mistake 9: Choosing Translucent, Cold Lampshades
Thin white paper or plastic lampshades create piercing hot spots that dominate visual attention. They also project a cold, stark glare across seating areas and tabletops.
Swap flimsy shades for dense natural linen, silk, or parchment designs. Opaque materials diffuse intense diode light evenly without blinding guests seated nearby.
Select lampshades featuring gold, brass, or warm champagne inner foil linings. These metallic interiors reflect a flattering, radiant amber glow into the room.
Troubleshooting Common DIY Lighting Glitches
If newly installed LEDs glow dimly after you flick the switch off, stray voltage is leaking through the circuit. Install an LED bypass module or upgrade to a switch with a neutral wire connection.
When individual bulbs on the same circuit display slightly different color temperatures, check manufacturing date codes. Purchase bulbs packaged within the same production batch to maintain tight Kelvin binning.
Always shut off the dedicated circuit breaker before unscrewing fixtures or swapping wall controls. Test every wire with your non-contact voltage tester to verify zero electrical current.