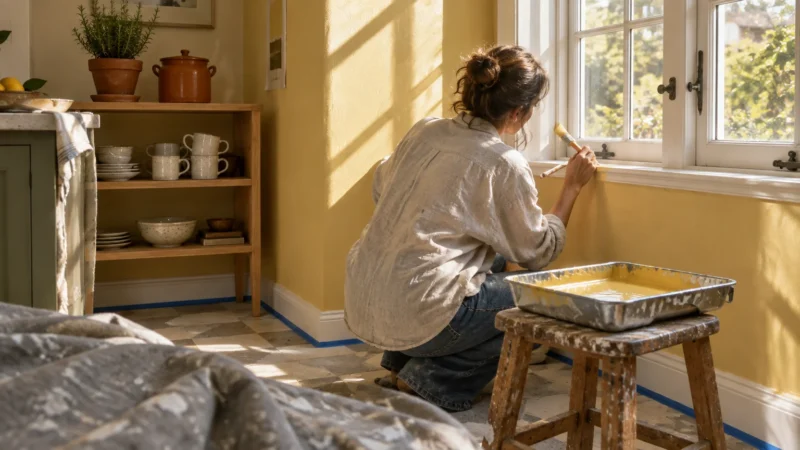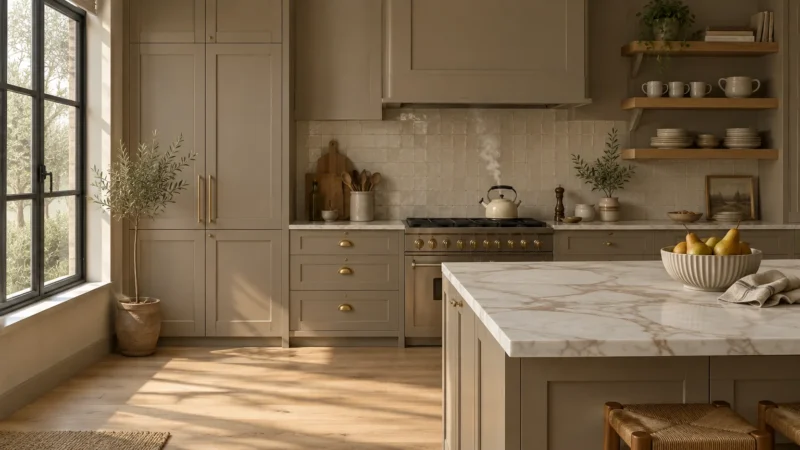
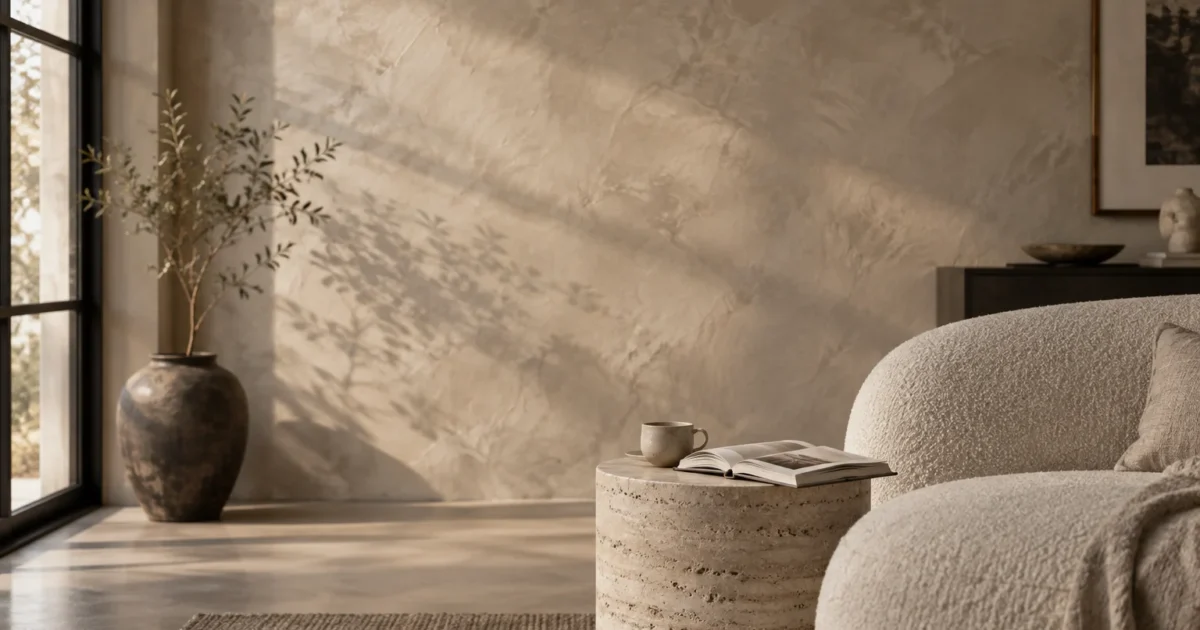
You can transform a bland living space into a designer showcase without jarring your senses. A subtle accent wall introduces depth, architectural character, and warmth while preserving visual balance throughout your room.
Loud neon hues and chaotic geometric graphics often overpower a layout and cause visual fatigue. Choosing grounded textures and low-contrast palettes keeps your focal point elegant, timeless, and completely relaxing.
This guide reveals ten understated feature wall ideas, practical material checklists, and professional installation steps. You will learn how to design, install, and finish a stunning focal wall that endures.
Project Overview & Why It Matters
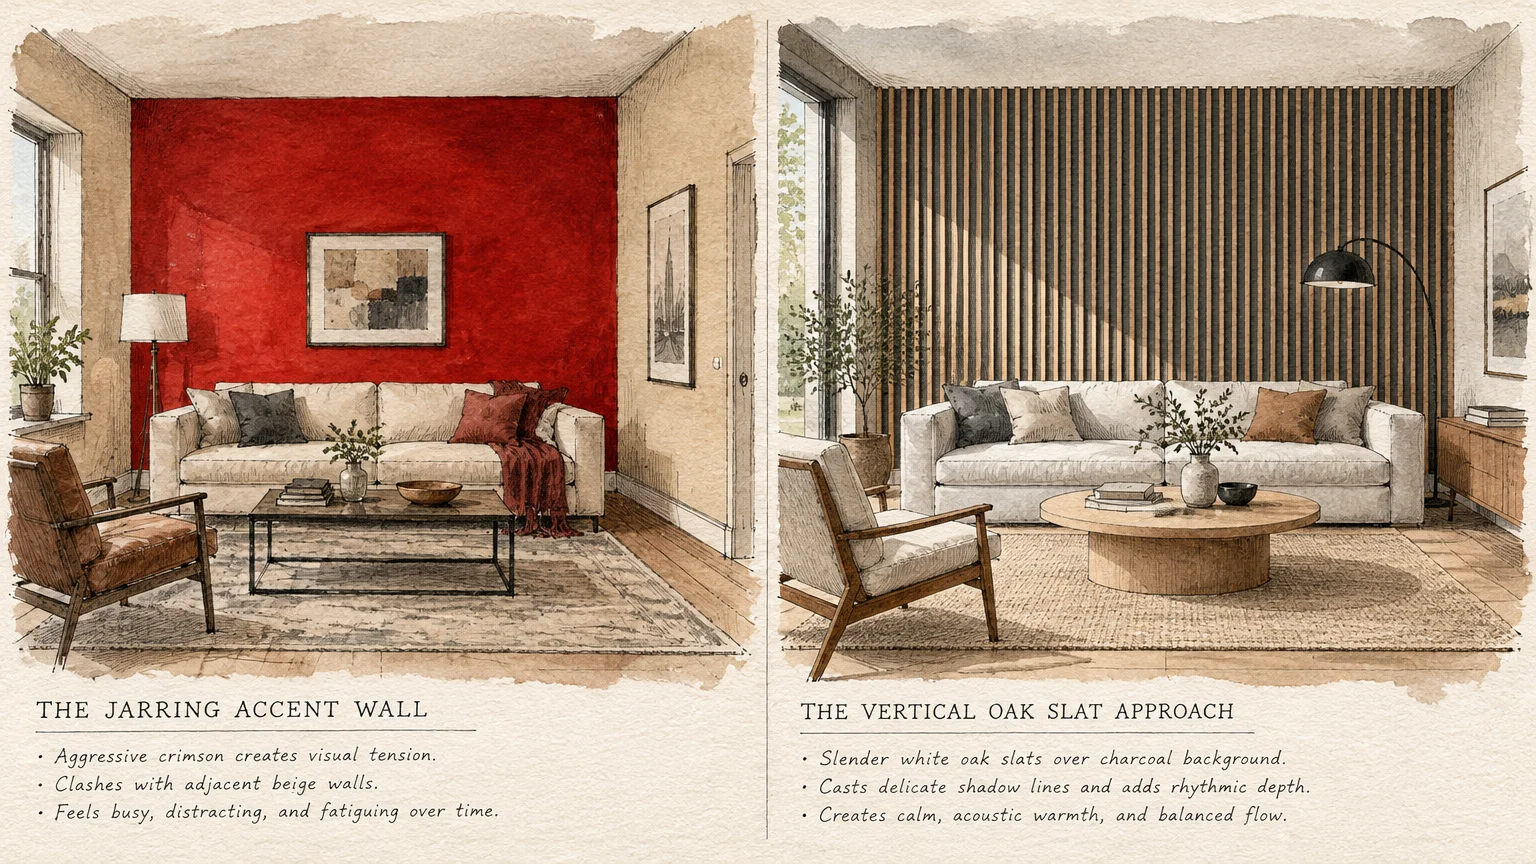
Traditional accent walls from past decades often relied on aggressive paint swatches that dominated an entire room. Slapping a bright crimson or navy slab behind a sofa frequently disjointed the floor plan and disrupted spatial flow.
A modern subtle accent wall takes a completely different path by prioritizing architectural nuance, texture, and light reflection. It invites the eye to linger without shouting for attention across the room.
Every home contains spaces that benefit from this balanced approach. Primary bedrooms, living room sofa walls, dining room nooks, and entryways instantly gain character when you introduce calculated depth.
Subtle designs also protect your investment by remaining timeless. While flashy trends quickly date an interior, quiet architectural features and soft organic palettes adapt effortlessly as your furnishings evolve.
When you reduce color contrast, tactile surfaces become the primary design vehicle. Shadows cast by wood trim, the soft sheen of limewash, and the organic weave of grasscloth create rich spatial dimension.
Ten Subtle Accent Wall Ideas That Don’t Overwhelm
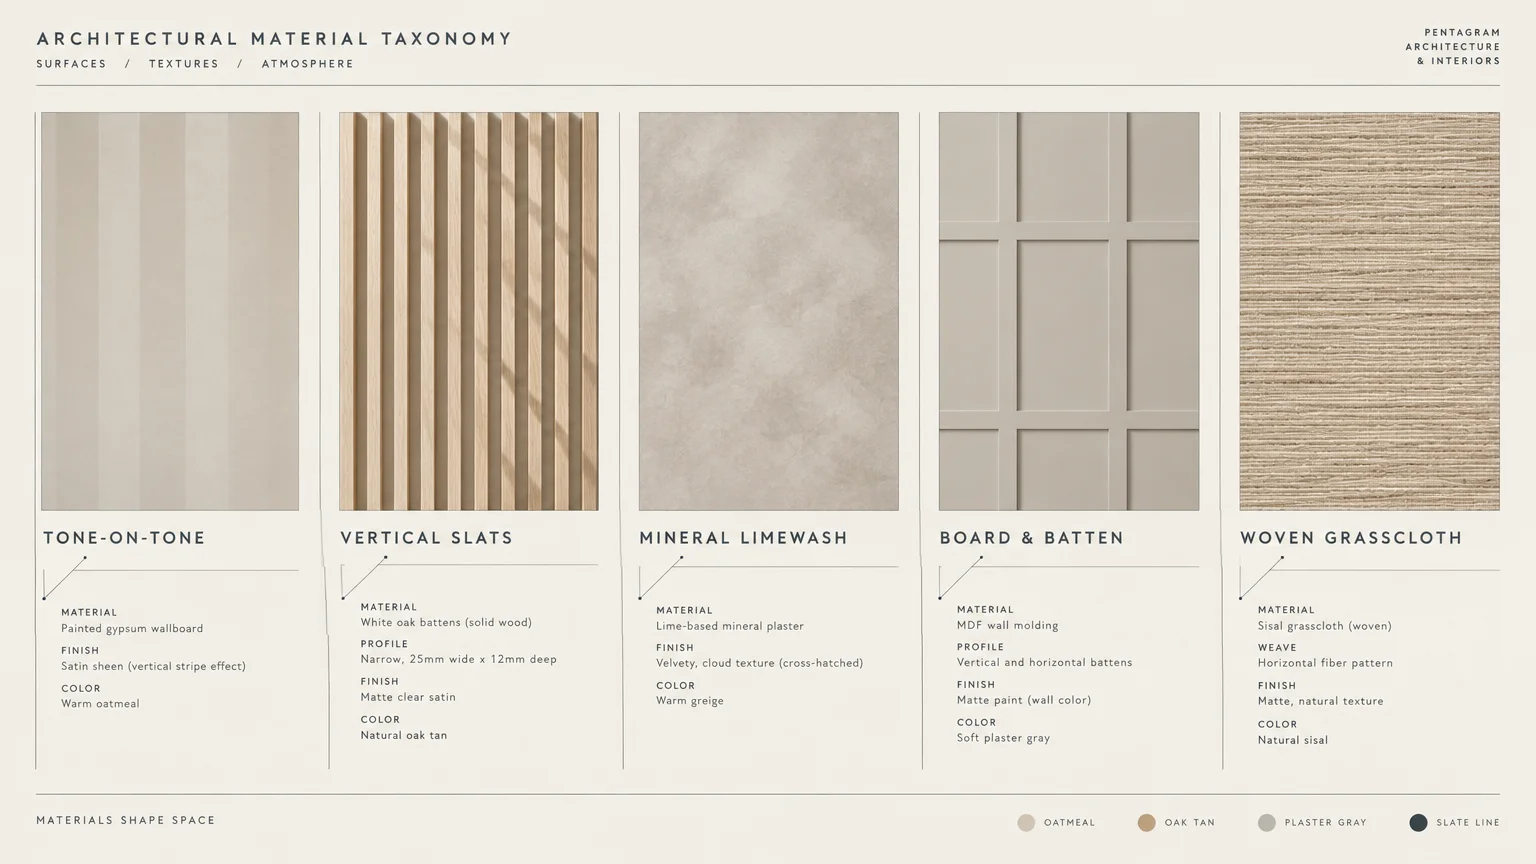
1. Tone-on-Tone Monochromatic Paint
Select a paint shade just one or two steps deeper than your existing wall color on the manufacturer swatch card. This simple shift creates an intentional focal anchor while preserving continuous visual harmony throughout the room.
You can also experiment with sheen contrast rather than color contrast. Applying a satin finish over a flat base coat produces elegant, light-catching vertical bands that never overpower the space.
2. Slender Vertical Wood Slats
Install narrow white oak or pale pine slats vertically across your chosen wall. The rhythmic repetition introduces clean Scandinavian lines and organic warmth that soften stark drywall.
Keep the spacing between slats narrow and mount them over a dark charcoal or matching neutral wall. This technique generates intriguing shadow lines and even dampens ambient room echo.
3. Mineral Limewash and Roman Clay
Limewash paint deposits natural mineral crystals that create a velvety, cloud-like texture across drywall surfaces. The subtle tonal variations resemble aged European plaster without requiring full masonry construction.
Apply the mineral wash using wide cross-hatch strokes with a masonry brush. The resulting matte finish diffuses natural light beautifully and camouflages minor surface imperfections across older walls.
4. Understated Board and Batten
Board and batten millwork adds timeless craftsmanship and structural depth to any standard room. Space your vertical battens evenly and paint them the exact same shade as the adjacent walls.
By painting the woodwork and wall uniformly, you let natural shadows define the pattern rather than sharp color contrasts. The technique delivers rich architectural character that blends seamlessly into both traditional and modern homes.
5. Natural Grasscloth Wallcovering
Woven grasscloth brings tactile warmth, earthy scent, and subtle luxury into your interior layout. Fibers like sisal, jute, and seagrass introduce rich organic variance without loud graphic prints.
Choose an un-dyed, neutral weave that complements your existing furniture and floor stain. The visible seams between wallpaper strips celebrate genuine artisanal texture rather than machine-printed repetition.
6. Picture Frame Box Trim
Picture frame molding creates refined elegance reminiscent of classic Parisian apartments. Install narrow decorative trim in symmetrical rectangles across the wall to break up massive drywall expanses.
Coat both the wall and the applied moldings in a velvety matte or eggshell finish. This keeps the look tailored, sophisticated, and quiet while elevating your ceiling height visually.
7. Symmetrical Grid Gallery Decor
You do not need lumber or wallpaper to establish a tasteful focal anchor. Arrange a uniform grid of matching wood or metal frames fitted with oversized white mats.
Fill the frames with low-contrast black-and-white family portraits or neutral botanical sketches. The disciplined geometry delivers architectural structure, functioning as bespoke accent wall decor without chaotic clutter.
8. Recessed Built-In Bookcases
Floor-to-ceiling built-ins provide functional storage while naturally anchoring a living area or home library. Recessing shelves into existing wall studs creates architectural utility without encroaching on floor space.
Paint the interior backing board just a half-shade darker than the outer face frames. This subtle feature wall idea adds gentle depth behind your books and ceramic keepsakes.
9. Vertical Shiplap in Muted Neutrals
Horizontal shiplap can feel heavy or overtly rustic in modern settings. Running tongue-and-groove boards vertically draws the eye toward the ceiling and makes standard eight-foot rooms feel remarkably taller.
Ditch stark farmhouse white in favor of soft warm putty, pale mushroom, or muted sage. The soft color combined with crisp vertical lines delivers a fresh, restrained architectural backdrop.
10. Low-Contrast Two-Tone Color Blocking
Divide your wall horizontally at standard chair-rail height, roughly one-third up from the floor. Paint the lower section a grounding neutral like warm greige and the upper portion a soft ivory.
This simple horizontal division anchors low furniture pieces without shrinking the perceived volume of the room. It delivers the structural presence of wainscoting on a DIY weekend painting budget.
Tools, Materials, and Prep Checklist
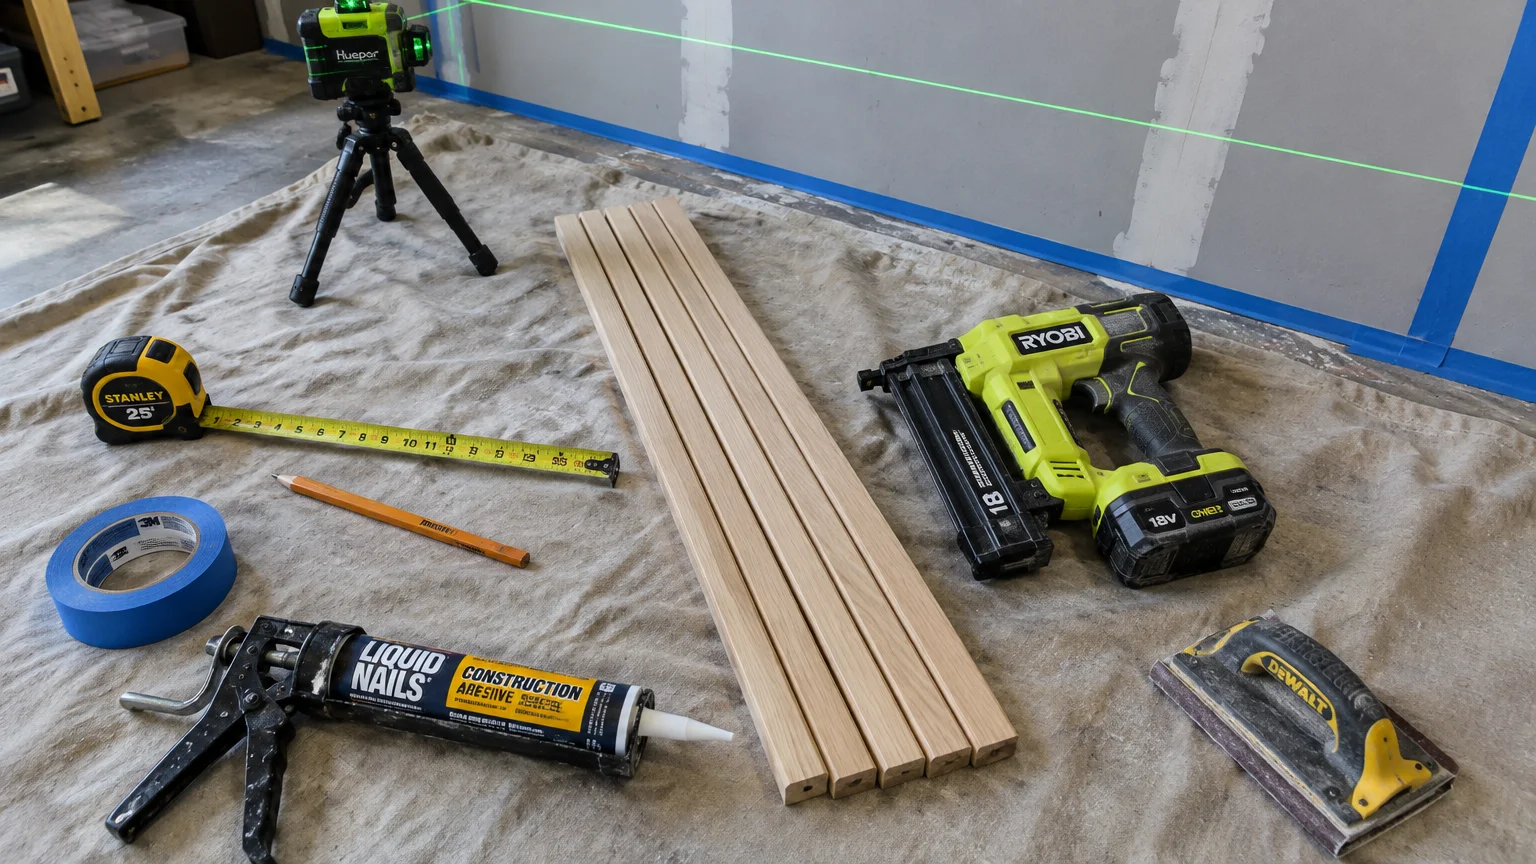
Before launching your project, assemble quality tools and materials suited for interior carpentry and finishing. Having everything staged beforehand ensures precise execution and keeps your workspace safe.
Essential Hand and Power Tools: You need a reliable tape measure, a four-foot bubble level, and an electronic stud finder. Gather a miter saw, an 18-gauge brad nailer, and a smooth caulk gun.
Painting Equipment: Invest in a professional angled sash brush and a high-density microfiber roller. Have painter’s tape, a sturdy paint tray, clean drop cloths, and 120-grit sanding sponges ready for action.
Lumber and Fasteners: For millwork projects, select primed medium-density fiberboard or finger-jointed pine boards. Use 1.5-inch or 2-inch 18-gauge brad nails alongside interior construction adhesive to anchor panels securely.
Wall Finishes and Adhesives: Choose paintable acrylic latex caulk, sandable wood filler, and premium drywall primer. For coatings, select durable interior accent wall paint from reputable manufacturers like Sherwin-Williams or Benjamin Moore.
Personal Safety Gear: Prioritize safety by reviewing standard workshop guidelines from the Occupational Safety and Health Administration. Wear certified eye protection and a dust mask when sawing lumber or sanding drywall.
Surface Prep Essentials: Thorough prep work guarantees professional results that withstand seasonal shifts. Wash your drywall with diluted tri-sodium phosphate to remove oils, scrape away loose material, and fill lingering nail pops.
Step-by-Step Instructions
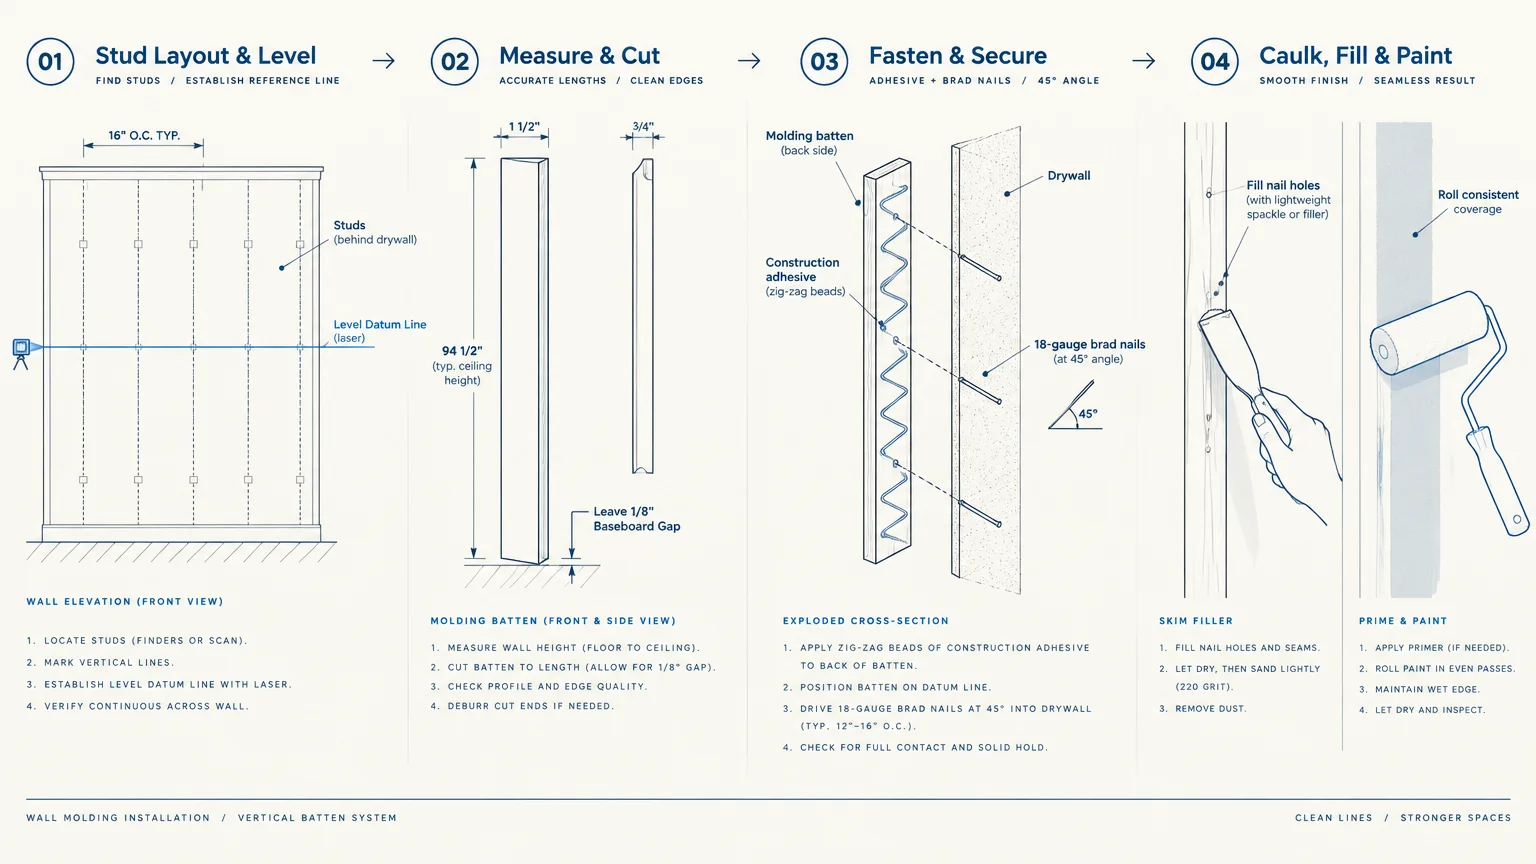
Follow these methodical phases to construct a durable, perfectly balanced feature wall. Taking your time during planning prevents costly material waste and misaligned joints later.
Phase 1: Surface Inspection and Stud Mapping
Begin by scanning your entire wall with a reliable stud finder to identify framing locations. Mark each stud centerline lightly in pencil along the floor and ceiling lines.
Use a circuit tester near nearby outlets and switches before driving fasteners. Locate hidden plumbing and electrical runs behind drywall to prevent dangerous punctures while nailing your trim.
Phase 2: Calculating Layout and Spacing
Measure the total width and height of your feature wall using a rigid steel tape measure. Subtract the cumulative width of all trim boards before calculating the open spacing between decorative panels.
Never rely on your room corners or ceilings being perfectly plumb or level. Establish your initial layout from a true center point using a four-foot spirit level or laser level.
Phase 3: Cutting and Fastening Materials
Cut your trim boards using a miter saw fitted with a fine-finish blade for clean edges. Double-check each individual cut measurement because wall heights often vary across a single room.
Apply a thin bead of construction adhesive to the back of each board for long-term stability. Secure the boards to wall studs with 18-gauge brad nails fired at alternating angles.
Phase 4: Caulking, Patching, and Sanding
Fill every visible nail hole with sandable wood filler, leaving the compound slightly proud of the surface. Once dry, smooth each patch flush with the board using 120-grit sandpaper.
Run a fine bead of paintable acrylic latex caulk along every joint where wood meets drywall. Smooth the caulk line with a damp lint-free cloth or finger to eliminate shadow gaps.
Phase 5: Priming and Applying the Finish Coat
Spot-prime all bare wood joints, filled nail holes, and raw drywall patches with stain-blocking primer. Priming seals porous fillers and prevents uneven sheen variations in your final paint coat.
Apply two uniform coats of accent wall paint using an angled sash brush for corners and a microfiber roller for broad faces. Allow two to four hours of drying time between coats.
Troubleshooting Common Installation Snags
Wavy drywall often creates gaps behind straight trim boards during installation. Overcome this by scribing the lumber to match the contour or filling minor depressions with flexible caulk.
If a board joint refuses to align flush, gently pry the recessed board forward before fastening. Place a thin wood shim behind the board to lock it perfectly flush with the neighboring piece.
Style & Finishing Touches
Subtle walls thrive on thoughtful detailing, balanced lighting, and restrained decorative layers. Pairing the right architectural elements transforms simple carpentry into high-end interior design.
Curating Low-Contrast Color Palettes
Soft earth tones establish a grounded atmosphere without overwhelming smaller living spaces. Warm greiges, dusty moss greens, pale terracotta, and misty slate blues offer gentle depth under variable lighting.
Test paint swatches directly on your wall to observe how pigments react throughout the day. North-facing rooms require warmer undertones, while sun-drenched south-facing spaces comfortably accommodate cooler grey and blue hues.
Illuminating Texture and Shadow Lines
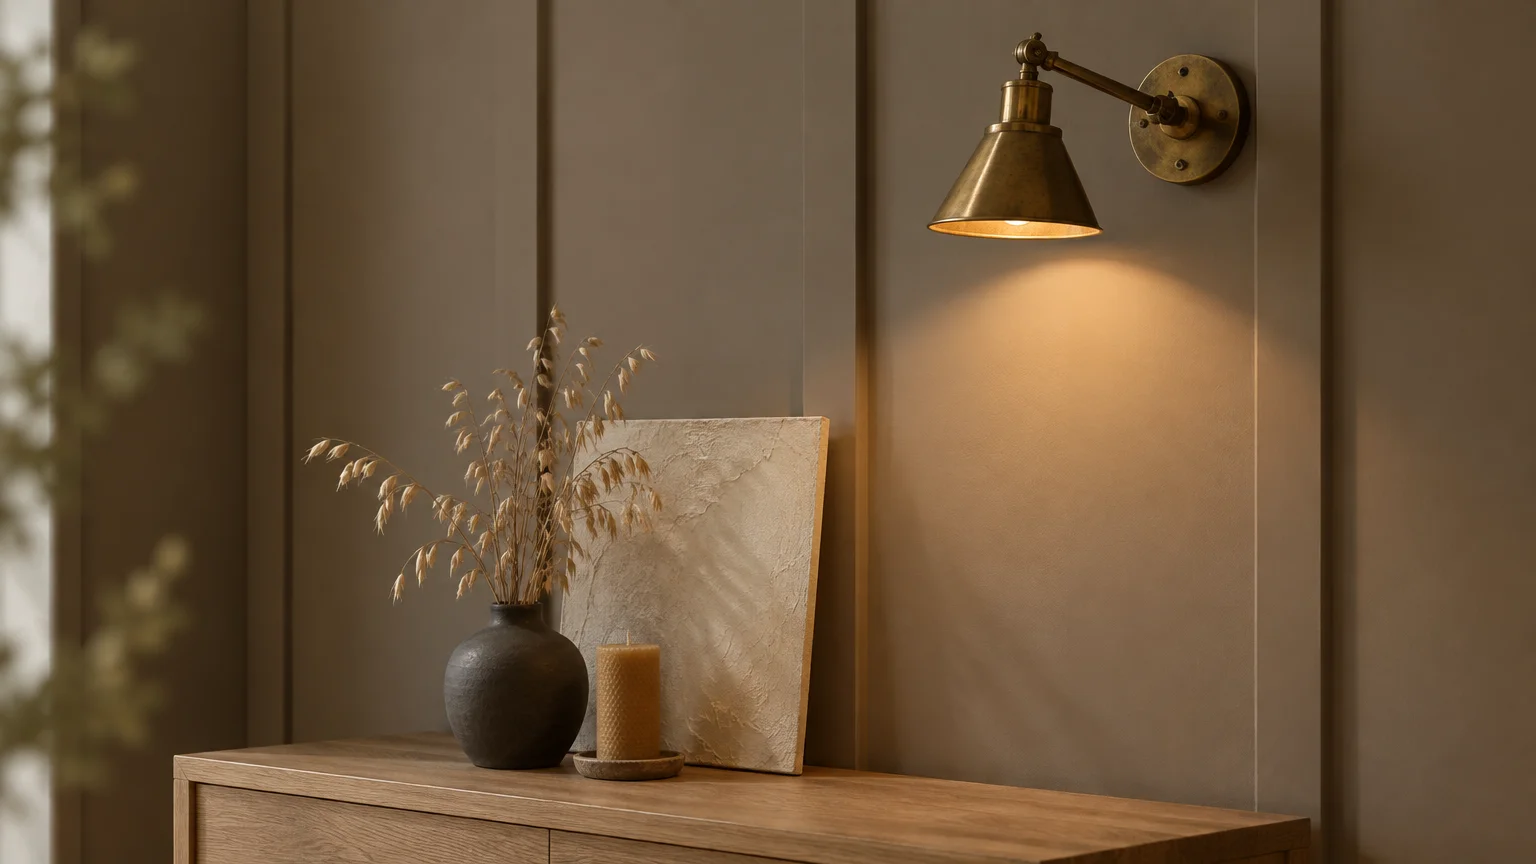
Directional lighting is essential for accentuating texture, wood slat grooves, and molding profiles. Install warm 2700K LED ceiling gimbals or hardwired wall sconces to cast soft grazing light downward.
Avoid harsh fluorescent overhead fixtures that wash out delicate shadow lines. Layered lighting creates intimate warmth and emphasizes the craftsmanship of your subtle accent wall after sunset.
Styling Accent Wall Decor
Keep wall hangings minimalist so your architectural backdrop remains the primary star. Hang a single large canvas with ample negative space or lean an arched floor mirror nearby.
Incorporate natural materials like brushed brass hardware, matte ceramic planters, and linen window drapery. These organic accents harmonize with textured feature wall ideas without creating chaotic visual competition.
Scaling Your Design to Fit Your Budget
Achieving a high-end designer look does not require an enormous financial investment. A simple tone-on-tone paint transformation or two-tone color block costs very little yet completely revamps a room.
If you possess moderate carpentry skills, adding DIY box trim or vertical shiplap delivers maximum return on investment. For luxury master suites, custom floor-to-ceiling white oak slats create bespoke architectural value.
Maintenance & Long-Term Care
Preserving your focal wall requires minimal effort when you implement proper cleaning and maintenance protocols. Tailor your maintenance routine to the specific materials installed on your wall.
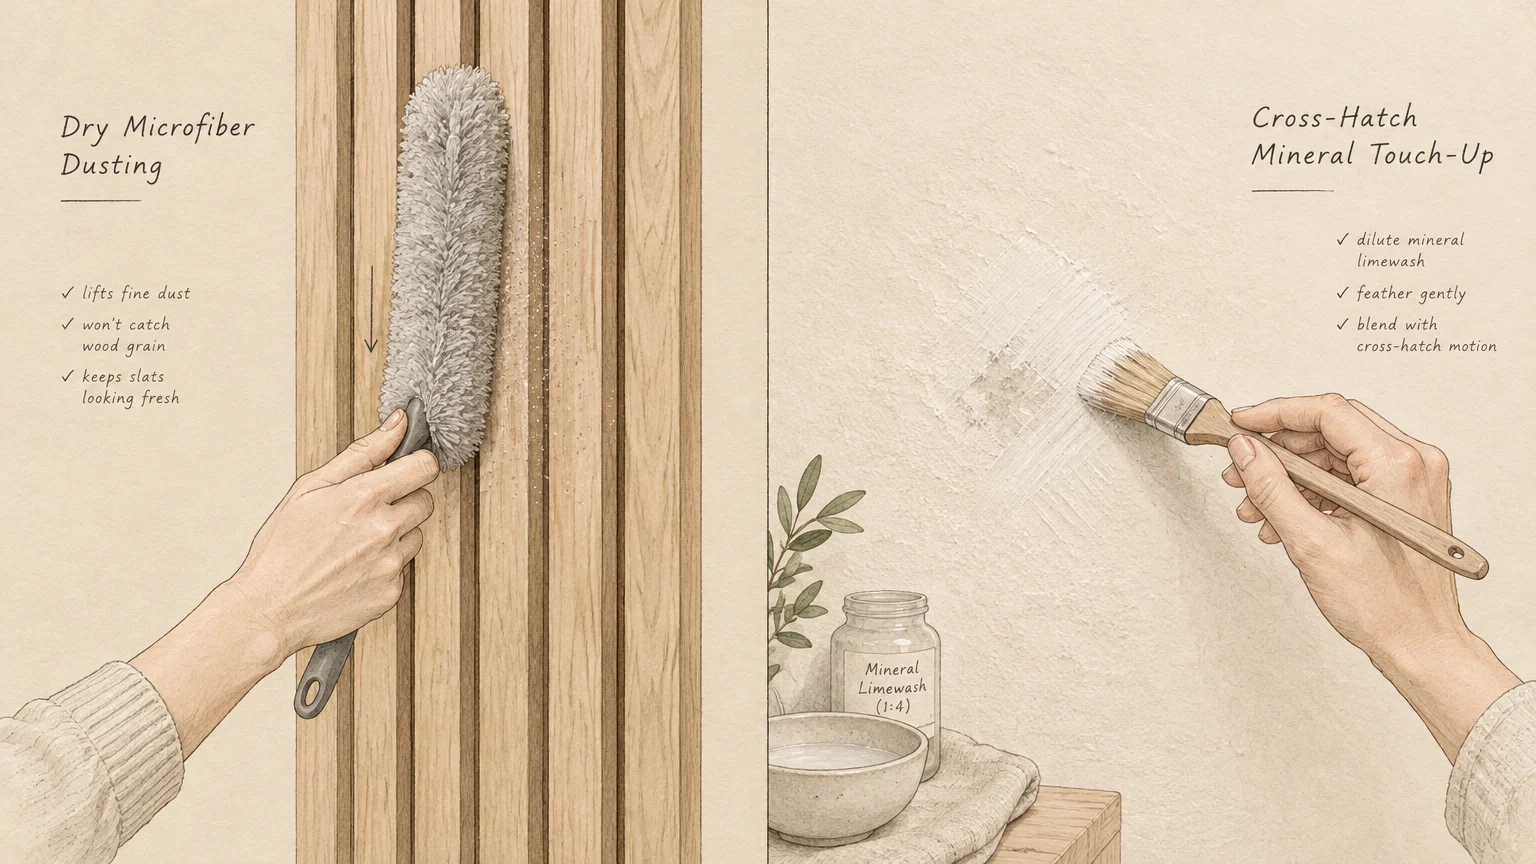
Dust trim moldings, wood slats, and panel ledges weekly with an electrostatic microfiber duster. Removing dust regularly prevents dirt from bonding with paint surfaces in high-traffic zones.
Clean scuffs from painted woodwork using a soft sponge dampened with warm water and mild dish soap. Never use abrasive scouring powders or harsh chemical solvents that strip paint finishes.
Natural grasscloth wallcoverings are sensitive to excessive moisture and should never be scrubbed. Gently vacuum grasscloth every few months using a soft bristle brush attachment to lift dust.
For limewash and mineral clay walls, wipe away minor smudges with a barely damp microfiber cloth. Avoid aggressive rubbing, which can polish the matte mineral surface and create noticeable shiny patches.
Natural lumber contracts during dry winter heating seasons and expands in humid summer months. Maintain indoor relative humidity between thirty and fifty percent to minimize seasonal joint cracking.
Inspect caulk seams annually along board junctions and baseboards. Recaulk minor separation lines with paintable latex caulk, and touch up nail holes using stored leftover wall paint.
FAQ
Which wall in a room should you choose for a subtle accent wall?
Select the wall that naturally commands attention when entering the room. Ideal locations include the wall behind your bed headboard, the fireplace surround, or the main sofa wall.
Avoid walls broken up by multiple off-center windows or asymmetrical doorways. Continuous flat surfaces yield the cleanest sightlines and the most balanced architectural framing.
Should an accent wall always be darker than the other walls?
Not necessarily. While a slightly deeper tone grounds a room, subtle feature walls can simply introduce tactile texture while retaining the exact same paint color.
Using identical paint shades across trim molding and drywall creates understated shadow lines. This approach delivers dimensional depth without altering the room’s overarching color temperature.
Can you create an accent wall in a small room without shrinking the space?
Yes, low-contrast designs actually make compact rooms feel larger by establishing visual depth. High-contrast colors chop up small layouts, whereas subtle textures draw the eye smoothly upward.
Vertical shiplap and slim wood slats accentuate ceiling height and create an airy, expansive feeling. Choose soft, light-reflecting neutrals to maximize ambient illumination in cramped quarters.
Is peel-and-stick wallpaper safe for drywall?
High-quality peel-and-stick wallpaper is generally safe for properly primed and cured drywall surfaces. However, applying removable paper over unprimed or freshly painted walls can cause adhesive failure and tears.
Always allow newly painted walls to cure for at least three full weeks before applying wallpaper. Test a small sample swatch in an inconspicuous corner to verify adhesive compatibility.
What paint sheen works best for a subtle accent wall?
Matte and eggshell finishes work best because they diffuse light softly and hide surface imperfections. High-gloss finishes reflect intense glare that can make subtle architectural elements feel harsh.
For trim and millwork applied to drywall, a soft satin sheen provides ideal durability and easy wipeability. The gentle contrast between matte wall paint and satin trim creates stunning visual interest.
Takeaway & Next Steps
A subtle accent wall elevates your home with refined elegance, architectural character, and enduring charm. By leaning into texture, low contrast, and quality craftsmanship, you create a restful sanctuary that never overwhelms.
Tackling this project yourself builds valuable DIY skills while adding tangible value to your living space. Begin your transformation this weekend by taking these three immediate actions:
1. Identify Your Anchor Wall: Walk through your room and select the primary wall that naturally anchors your layout. Take precise width and height measurements to determine material requirements.
2. Collect Material and Color Samples: Gather paint swatch cards, wood slat samples, or grasscloth swatches from local suppliers. Tape them to your target wall to observe undertones across different times of day.
3. Map Your Fastener Locations: Locate and mark all wall studs, electrical outlets, and plumbing pathways across your work surface. Prepare your tools and staging area to ensure a seamless, safe installation.
We want to hear about your home improvement journey! Share your finished accent wall photos with our community, or subscribe below for weekly renovation ideas and expert DIY guides.