Eliminating persistent shower film requires the right chemistry rather than backbreaking physical labor. You can restore cloudy glass and dull tile to a sparkling finish in one afternoon by correcting common cleaning errors.
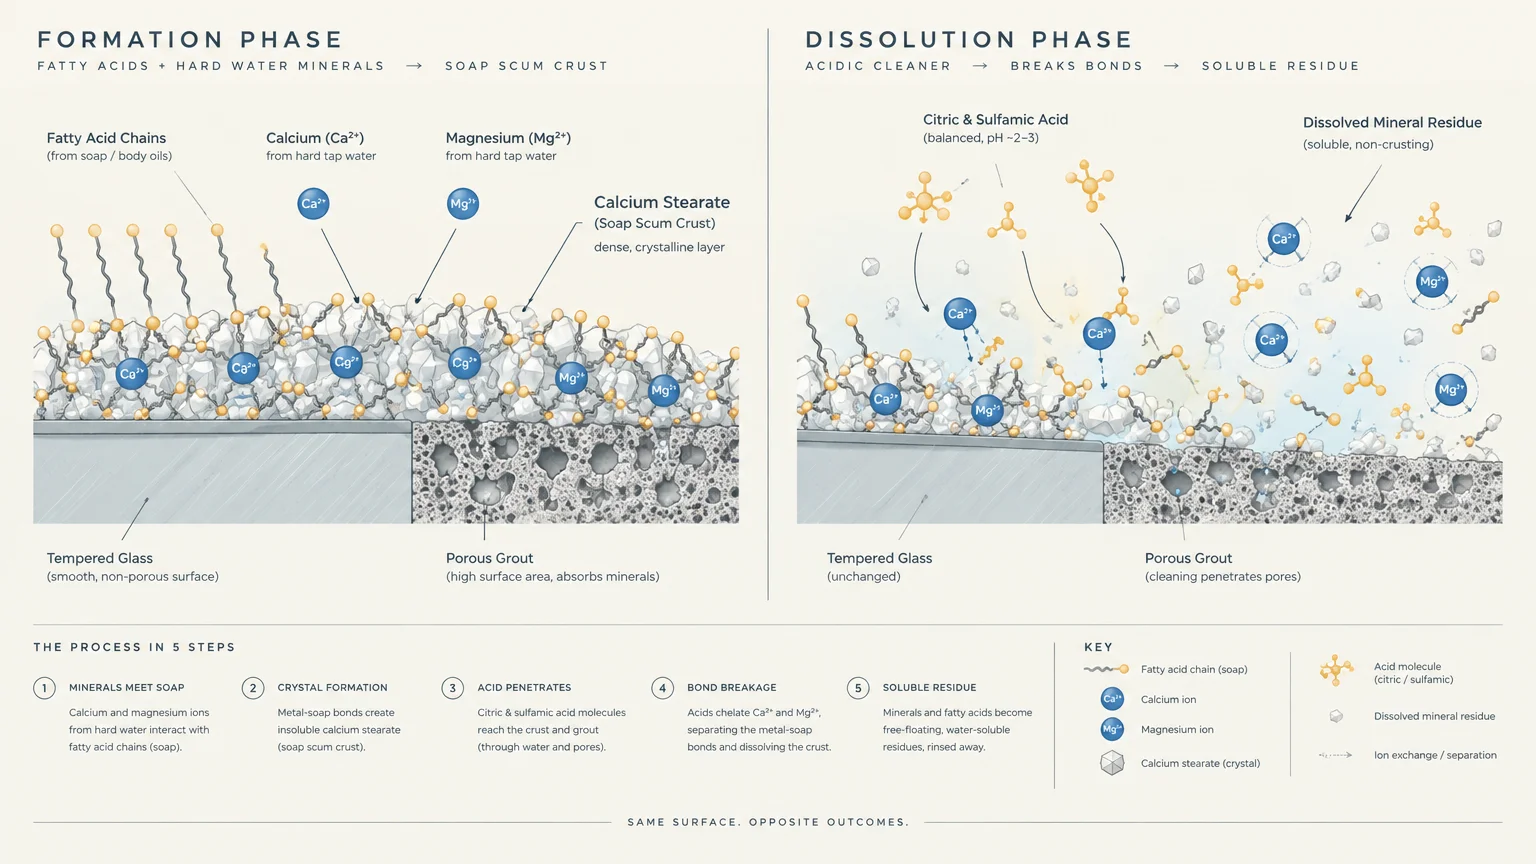
Soap scum forms when fatty acids in traditional soaps bind with calcium and magnesium minerals in tap water. That chemical reaction creates a stubborn, chalky crust known as calcium stearate.
Avoid wasted effort and surface damage by discovering why your routine fails and how smart bathroom cleaning tips eliminate grime permanently.
Project Overview & Why It Matters
Soap scum transforms bright master bathrooms into dingy, uninviting spaces. Understanding proper soap scum cleaning protects your plumbing fixtures and preserves high-end wall surrounds.
Mineral deposits combine with animal fats to create a dense film on surfaces. This residue clings tenaciously to porous grout, acrylic pans, and frameless glass shower enclosures.
Standard scrubbing frequently fails because mechanical friction cannot break down metal-soap chemical bonds. You must dissolve the underlying mineral structure with balanced acidic solutions.
Correcting shower cleaning mistakes saves hours of repetitive labor every month. Clean surfaces prevent permanent micro-scratching on tempered glass while halting mold colonization.
Understanding the difference between surface grime and chemical mineral bonding empowers you to choose the right products. You avoid damaging expensive fixtures while cutting your chore time in half.
Tools, Materials, and Prep Checklist
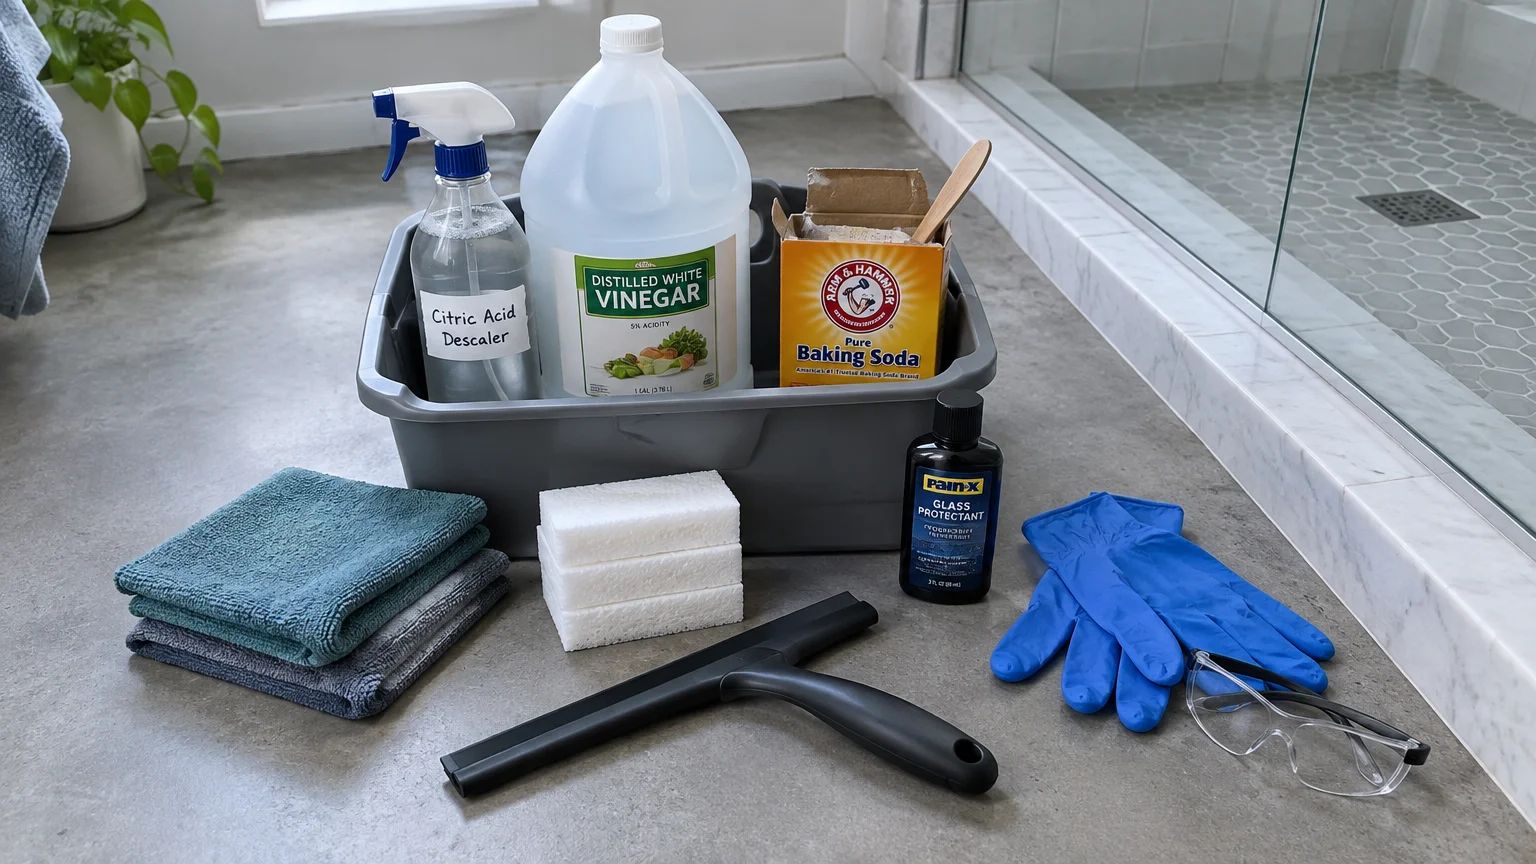
Gathering the right equipment before you begin ensures fast, safe results without surface scratches. These accessible supplies deliver commercial-grade cleaning performance at minimal expense.
Microfiber cloths ($10 for a 12-pack): Use split-fiber microfiber towels to trap dissolved residue without scratching glass.
Non-scratch scrub sponges ($4 for a 3-pack): Choose white cellulose pads rated safe for acrylic tubs and glass.
Acidic bathroom descaler ($8 to $12 per bottle): Purchase cleaners formulated with citric or sulfamic acid to dissolve minerals.
Distilled white vinegar ($3 per gallon): Use food-grade white vinegar for an affordable, eco-friendly acid wash on ceramic tile.
Baking soda ($2 per box): Mix sodium bicarbonate with water to form a gentle polishing paste for heavy spots.
Professional silicone squeegee ($12 to $18): Invest in a durable squeegee equipped with an ergonomic handle and flexible blade.
Hydrophobic glass sealant ($15 to $25 per bottle): Apply a polymer surface protectant to repel future water droplets and soap scum.
Protective gear ($8 total): Wear nitrile gloves and safety glasses to shield your skin and eyes from acidic mist.
Ventilate the bathroom by running the exhaust fan before starting work. Clear all toiletries and bath accessories from the shower footprint.
Keep all your bathroom cleaning supplies in a portable plastic caddy stored in a dry closet. Having your materials organized makes quick weekly touch-ups simple and convenient.
Step-by-Step Instructions
Addressing persistent bathroom film requires correcting the errors that perpetuate it. Here are the 10 most common mistakes homeowners make, along with proven fixes.
Mistake 1: Wiping Away Cleaner Immediately
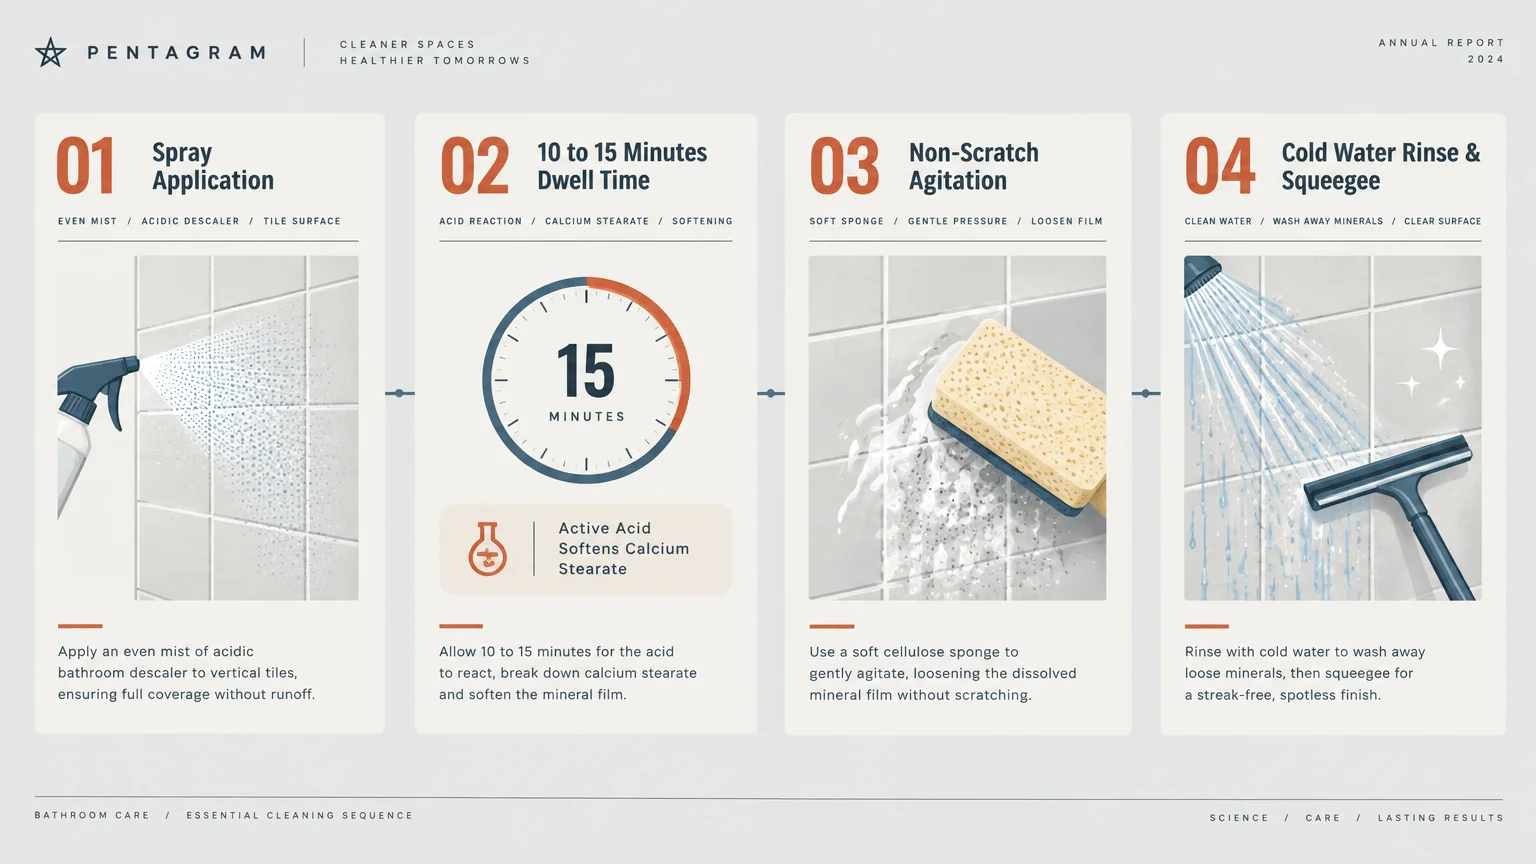
Spraying a surface and wiping immediately prevents active ingredients from breaking mineral bonds. Descalers require contact time to dissolve dense calcium stearate deposits.
Apply your acidic cleaner across tiles or glass, then allow it to dwell for 10 to 15 minutes. This dwell time softens the grime so it wipes away effortlessly.
If the solution begins drying on vertical tile, mist it lightly with clean water to reactivate the cleaning agents. Chemical dwell time does the hard work for you.
Mistake 2: Using Vinegar on Natural Stone
Acidic cleaners like vinegar etch calcite-based stone like marble, limestone, and travertine. Chemical etching creates permanent dull spots that ruin expensive tile installations.
Follow guidelines from the Tile Council of North America and clean stone with pH-neutral stone detergents instead. Lift stubborn grime with baking soda and dish soap pastes.
Always test any new cleaning formula in a hidden corner before applying it broadly across stone walls. When in doubt, hire an expert stone restoration contractor.
Mistake 3: Relying Solely on Chlorine Bleach
Homeowners often grab chlorine bleach to whiten cloudy shower glass and stall walls. Bleach disinfects organic mildew, but it cannot dissolve inorganic mineral salts.
Bleach leaves the chalky mineral crust intact to collect fresh body oils. Use targeted acidic descalers instead when learning how to remove soap scum.
Chelating agents like tetrasodium EDTA bind with calcium ions, pulling them safely into solution. These specialized ingredients remove the crust without emitting harsh chemical fumes.
Mistake 4: Mixing Bleach With Acidic Products
Combining household cleaning chemicals creates severe safety hazards in enclosed bathrooms. Mixing chlorine bleach with vinegar or descaling acids releases toxic chlorine gas.
Check chemical warnings from the Centers for Disease Control and Prevention before tackling deep cleans. Always flush surfaces thoroughly with clear water between different cleaning treatments.
Keep separate labeled spray bottles and dedicated cleaning cloths for each cleaning solution in your home. Never pour chemical residues down the drain together.
Mistake 5: Scrubbing With Harsh Abrasives
Green scouring pads, steel wool, and pumice stones inflict irreversible scratches on fiberglass, acrylic, and glass. These micro-scratches trap soap residue faster and ruin clarity.
Switch to non-scratch white nylon pads or dense microfiber cloths. These soft tools apply sufficient mechanical friction to lift softened film safely.
For heavy crusts, apply a paste of baking soda and liquid soap using a damp cloth. The mild alkalinity lifts oils while providing safe, non-scratch friction.
Mistake 6: Rinsing With Cold Water
Cold water solidifies the fatty acids in soap, turning them into a sticky paste that resists rinsing. Cold rinsing merely smears greasy film across clean panels.
Rinse shower enclosures thoroughly with hot water to melt lingering fatty lipids. High-temperature water flushes dissolved calcium salts down the drain smoothly.
Use a detachable handheld shower head to spray hot water directly into tile grout joints. High water pressure paired with heat dissolves stubborn residue quickly.
Mistake 7: Skipping Daily Water Removal
Allowing shower water to evaporate naturally leaves dissolved minerals behind on walls and doors. Over several days, evaporating droplets bake into thick, opaque scale layers.
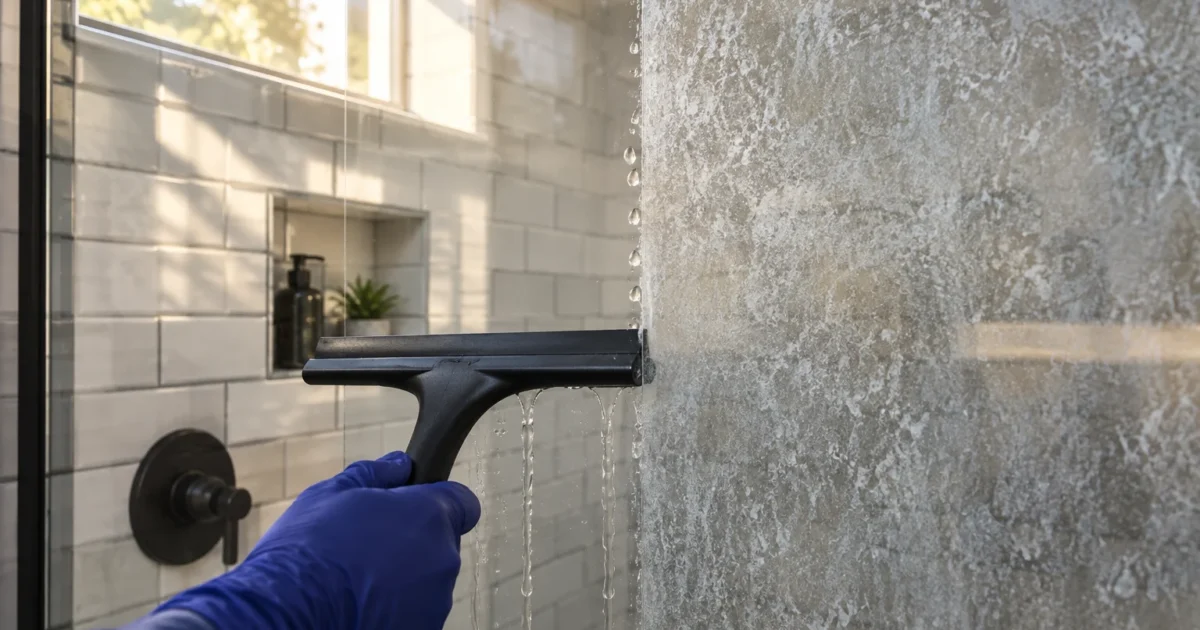
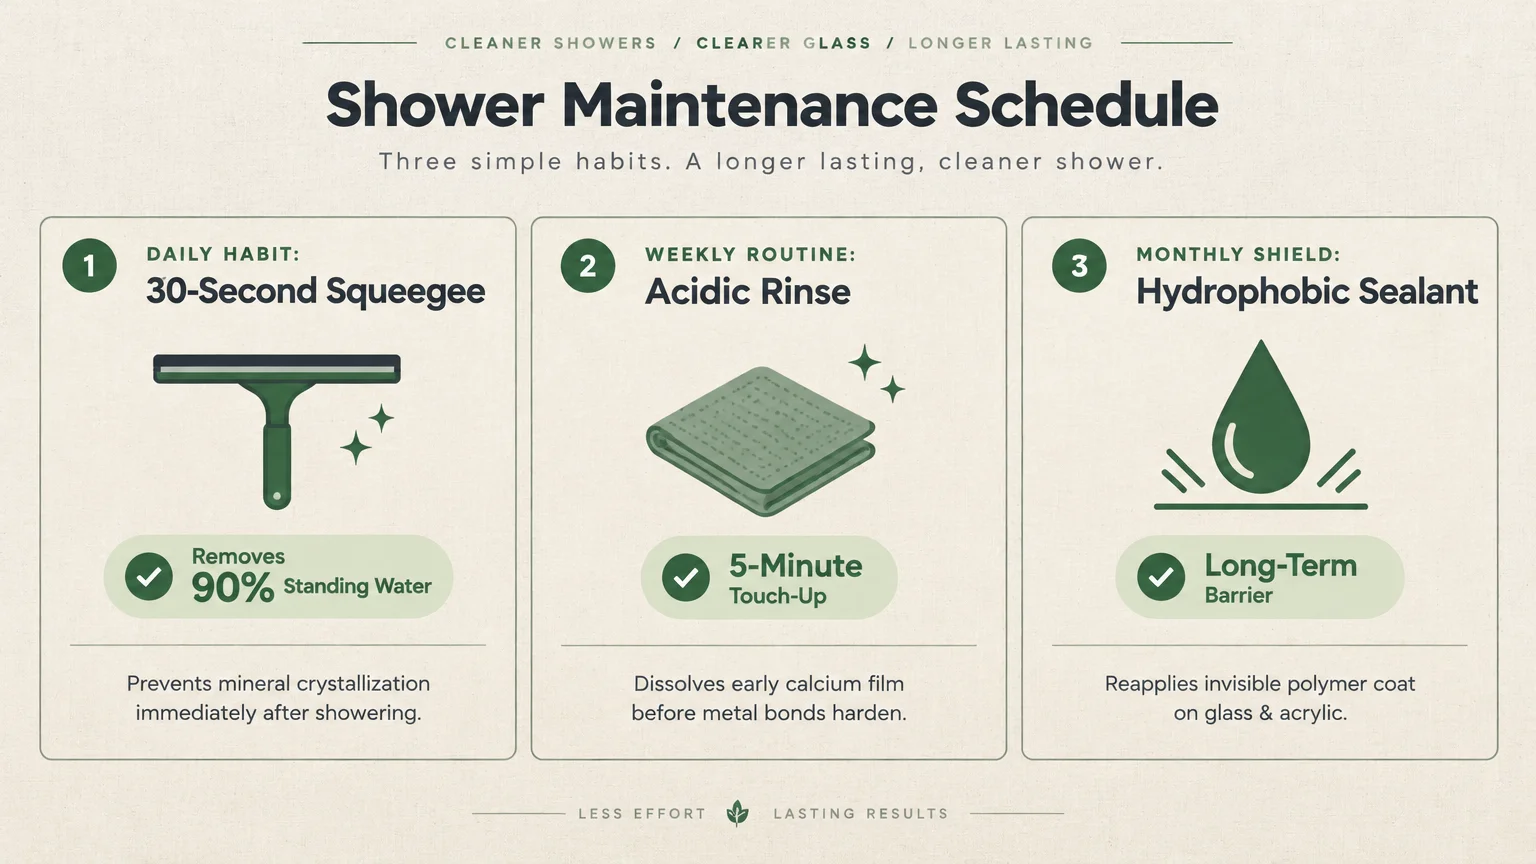
Keep a flexible squeegee in your shower and spend 30 seconds wiping walls down after bathing. This quick habit prevents the majority of shower cleaning mistakes.
Wipe down metal handles, hinges, and bottom door sweeps with a dry microfiber rag after squeegeeing. Removing standing water prevents mineral crust from seizing moving hardware parts.
Mistake 8: Using Tallow-Heavy Bar Soaps
Traditional bar soaps contain animal tallow saponified with sodium hydroxide. When these fats meet hard water minerals, they precipitate instantly into insoluble calcium stearate.
Switch to synthetic liquid body washes or vegetable glycerin bars to eliminate the reaction. Synthetic cleansers rinse cleanly down the drain without binding to minerals.
You can also choose vegetable-based liquid soaps with synthetic lathering agents if you prefer plant formulations. These alternatives rinse away without reacting with dissolved tap water minerals.
Mistake 9: Overlooking Severe Water Hardness
If your home supply contains excess dissolved calcium and magnesium, scum returns within days of scrubbing. Scrubbing addresses the surface symptom while ignoring the underlying cause.
Test your water supply using an inexpensive home test strip kit. Consider installing a water softener or descaling shower filter to stop mineral buildup.
Municipal water reports provide exact mineral metrics; contact your local water authority to determine your local grain count. Knowing your water hardness helps you choose the right cleaning frequency.
Mistake 10: Leaving Glass and Grout Unsealed
Porous tile grout and untreated glass have microscopic depressions that trap water and dirt. Leaving surfaces unsealed guarantees quick scum reattachment after heavy cleaning.
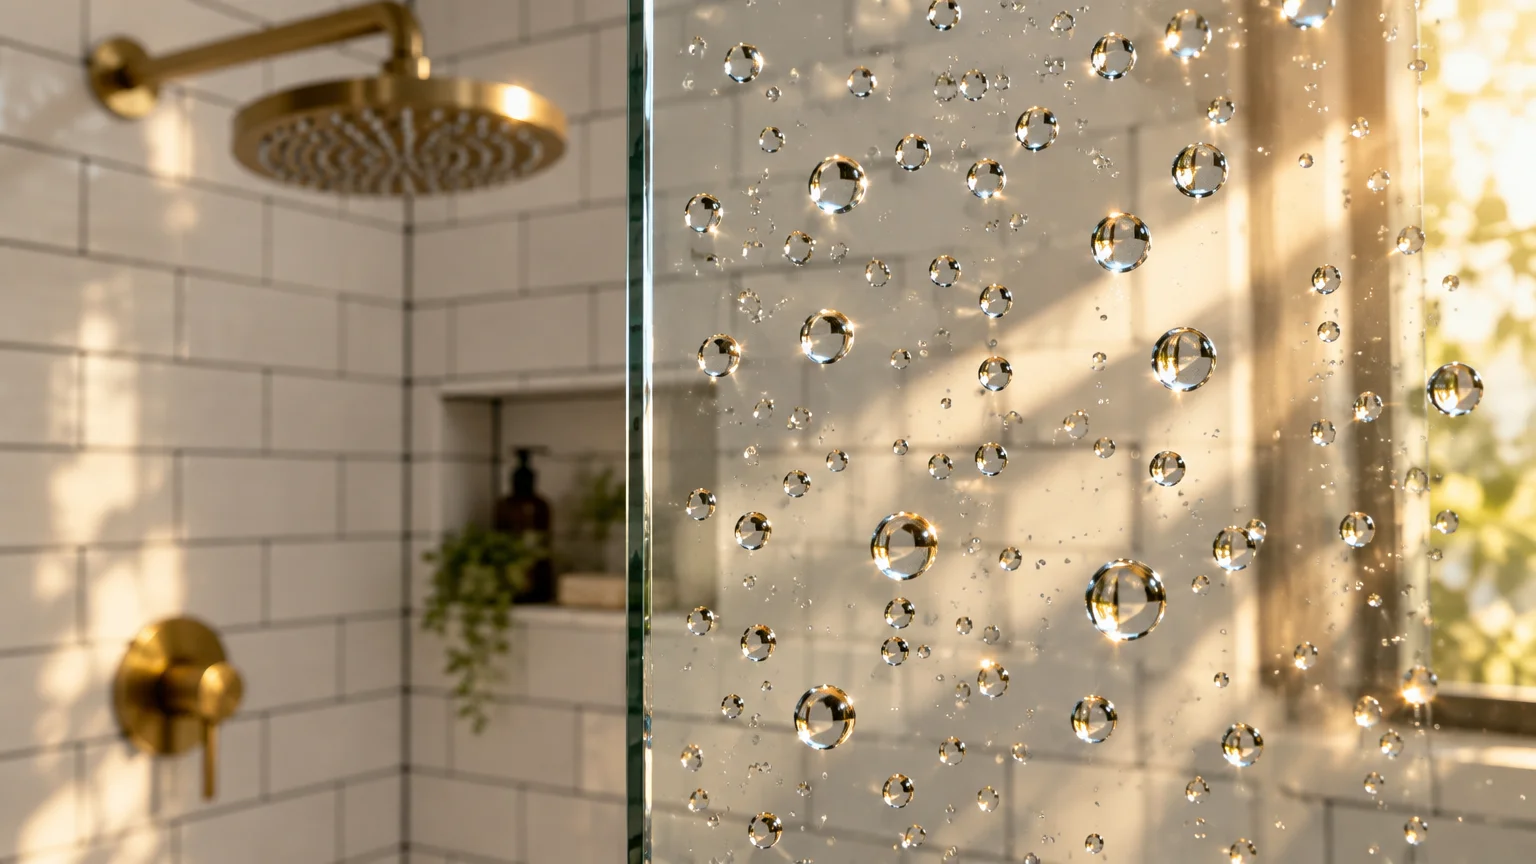
Apply a hydrophobic spray after you clean glass shower door panels to force water beading. Seal grout lines annually with a penetrating fluoropolymer sealer.
Reapply glass protectant whenever water stops forming tight beads on the shower door surface. Regular recoating keeps your glass looking brand new between deep cleaning sessions.
Style & Finishing Touches
A sparkling clean shower sets the stage for high-end aesthetic enhancements that elevate your space. Updating fixtures and hardware turns practical maintenance into luxurious design.
Swap worn chrome hardware for modern matte black or brushed bronze finishes. These contemporary tones complement popular tile styles and hide light water spots better than chrome.
Upgrade existing shower panels to ultra-clear low-iron tempered glass. Low-iron glass eliminates the greenish edge tint seen in standard glass, providing brilliant transparency.
Mount floating solid-surface corner shelves or recessed wall niches to organize bottles neatly. Elevating shampoo containers prevents standing water puddles that breed slimy soap rings.
Pair crystal-clear glass with minimalist frameless hinges to maximize natural light throughout the room. Clean, unobstructed sightlines make even modest bathrooms feel spacious and airy.
Maintenance & Long-Term Care
Proactive care prevents grime from accumulating and protects delicate fixtures from harsh chemicals. Establish a simple maintenance routine to preserve your pristine surfaces indefinitely.
Run the bathroom exhaust fan for 20 minutes after every shower to reduce ambient humidity. Review moisture guidance from the Environmental Protection Agency to prevent mildew growth.
Conduct a rapid weekly wipe down with a diluted vinegar spray on ceramic tile and glass. This quick touch-up dissolves minor mineral spots before they bond.
Reapply hydrophobic glass sealant every six months to keep water droplets rolling off smoothly. Inspect peripheral caulk beads seasonally and replace damaged silicone promptly.
Check your shower drain strainer weekly to clear trapped hair and soap buildup. Free-flowing drains prevent water from pooling at the base and depositing scum lines along bottom tiles.
FAQ
How do you safely remove soap scum from marble?
Never apply vinegar or acidic descalers to natural marble or limestone surfaces. Clean marble using pH-neutral stone detergents, warm water, and soft microfiber cloths.
For heavy accumulation, apply a paste of baking soda and mild dish soap. Rub gently with a non-scratch sponge, rinse thoroughly, and wipe dry.
Why does soap scum return to shower glass so fast?
Soap scum returns quickly when hard water minerals react with bar soap on untreated glass. Microscopic pits in bare glass anchor water droplets, accelerating buildup.
Wiping with a squeegee daily and coating the glass with hydrophobic sealant breaks this cycle. Switching to liquid body wash eliminates the greasy binding agent.
Can vinegar damage metal faucets or shower heads?
Prolonged acid exposure can strip protective coatings on brass, bronze, and nickel fixtures. Limit vinegar contact on metal surfaces to five minutes or less.
Rinse faucets thoroughly with fresh water and buff dry with a soft cloth immediately. Avoid soaking decorative finishes in straight vinegar overnight.
What is the difference between hard water stains and soap scum?
Hard water stains consist purely of mineral salts left behind when water evaporates. Soap scum forms when those minerals chemically bond with soap fatty acids.
Hard water spots feel chalky, while soap scum feels waxy and tacky to the touch. Both respond effectively to acidic cleaners and chelating agents.
Does switching to body wash really stop soap scum?
Yes, liquid body washes use synthetic detergents rather than saponified tallow fats. Without fatty acids, water minerals cannot react to create insoluble calcium stearate.
You may still see light water spots, but greasy, cloudy film disappears entirely. This single switch cuts bathroom scrubbing time by more than half.
Takeaway & Next Steps
Mastering shower cleanliness requires proper chemical balance, non-abrasive tools, and daily moisture control. Eliminating these 10 cleaning errors preserves your bathroom finishes and saves hours of scrubbing.
Start transforming your bathroom maintenance routine with these three immediate steps:
Replace bar soaps: Switch to liquid body wash to remove the fatty acids that fuel soap scum.
Use a squeegee: Clear water droplets from walls and doors after every shower to stop mineral deposits.
Seal your glass: Apply a hydrophobic coating to keep shower doors crystal clear for months.
Share photos of your sparkling shower results with our community, or subscribe below for practical home improvement guides delivered weekly.