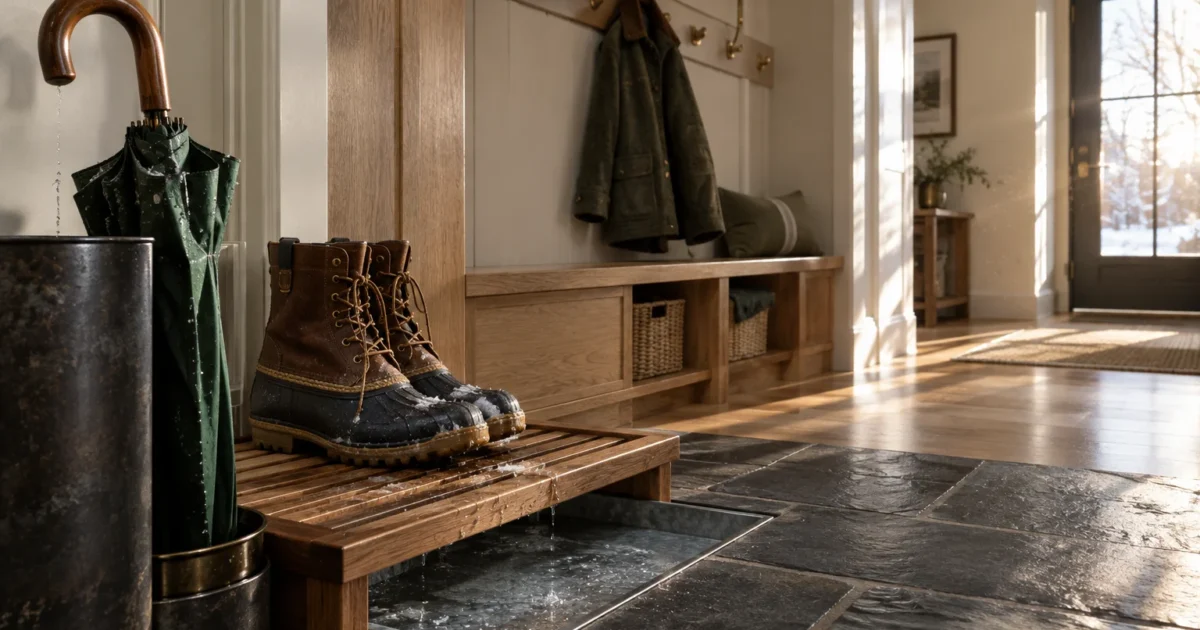
Wet winter boots and dripping umbrellas can quickly ruin hardwood floors and create hazardous, slippery entryways. You can easily protect your interior flooring and organize seasonal clutter by building dedicated drainage zones designed for heavy moisture.
Practical mudroom upgrades stop water at the threshold before it spreads into your living spaces. These smart solutions combine moisture-resistant materials with proper airflow to dry wet gear rapidly.
Transform your foyer into a functional drop zone using durable trays, slotted woodwork, and wall-mounted storage tailored for severe weather.
Project Overview & Why It Matters
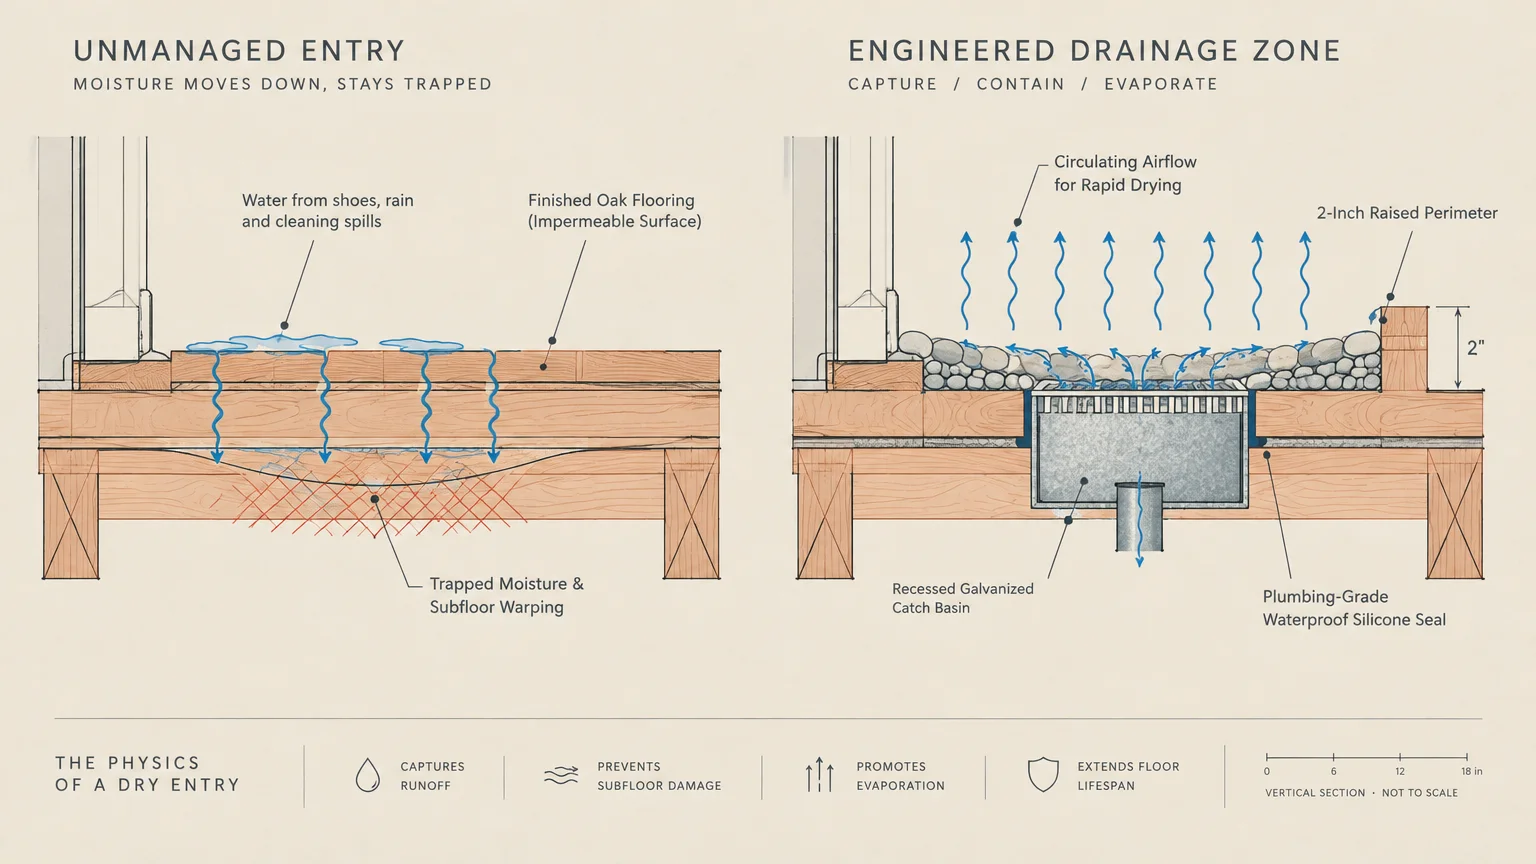
Every winter storm challenges your threshold with melting snow, abrasive road salt, and soaked fabric. Standing water rots subflooring and warps trim when homes lack dedicated moisture containment systems.
Smart entryway organization isolates melting slush while allowing circulating air to evaporate trapped water naturally. Without strategic ventilation, closed closets trap dampness and foster mildew growth on seasonal outerwear.
Ideal spaces for these upgrades include front foyers, garage transitions, and side mudroom alcoves. Even narrow hallways benefit immensely from vertical storage that lifts wet footwear off vulnerable floor surfaces.
Investing in water-managed drop zones preserves your home’s finished surfaces and reduces daily cleaning time. You protect costly hardwood installations while establishing clear organizational habits for household members and guests.
These seven projects range from simple weekend craft builds to custom built-in carpentry installations. Each concept focuses on moisture isolation, airflow enhancement, and straightforward long-term maintenance.
Tools, Materials, and Prep Checklist
Proper preparation ensures your moisture barrier holds up against slush, dirt, and heavy daily foot traffic. Gather your equipment before you begin cutting materials or assembling wall hardware.
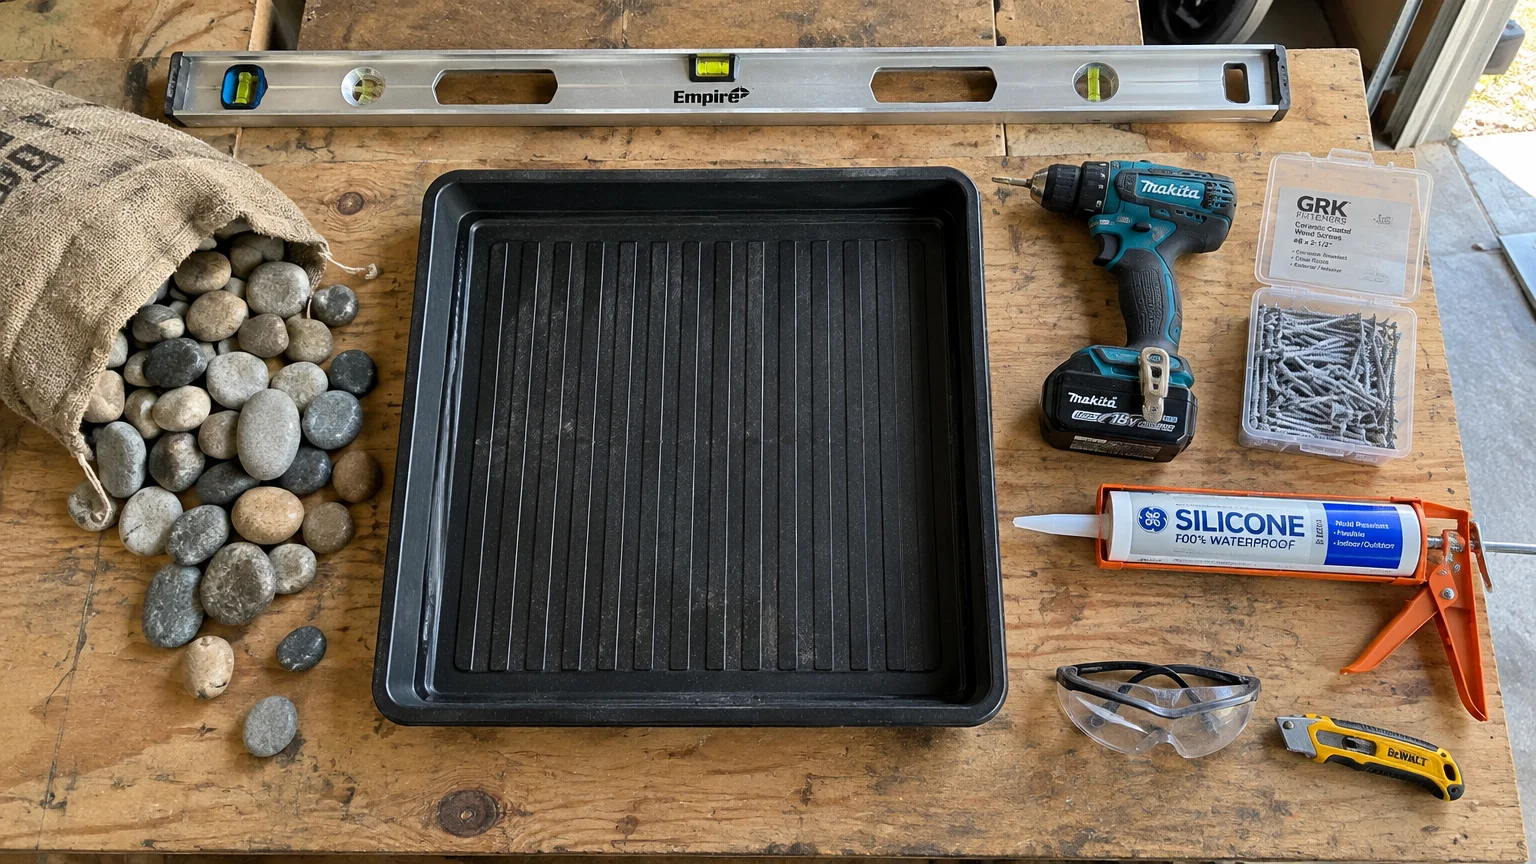
Essential hand tools include a tape measure, a four-foot level, a utility knife, and a caulking gun. For carpentry projects, keep a cordless drill, a miter saw, and safety goggles within reach.
Select moisture-proof materials such as galvanized steel trays, smooth river stones, cedar planks, and marine-grade polyurethane. Use stainless steel or ceramic-coated wood screws to prevent rust stains caused by wet footwear.
Purchase waterproof silicone sealant rated for plumbing applications to waterproof structural joints. High-traction rubber matting will protect surrounding flooring from accidental overflow during major storms.
Before starting work, measure your entryway dimensions and locate wall studs using a reliable magnetic stud finder. Clean existing baseboards thoroughly and repair any lingering water damage before mounting new assemblies.
Confirm that your chosen entryway layout maintains clear pathways and does not block exterior door swings. Adequate clearance prevents heavy winter coats and footwear from obstructing emergency exit routes.
Step-by-Step Instructions
Build your entryway defenses using these seven proven designs engineered for wet weather. Each option addresses specific footprint constraints, moisture loads, and everyday family needs.
Idea 1: River Stone Drainage Boot Trays
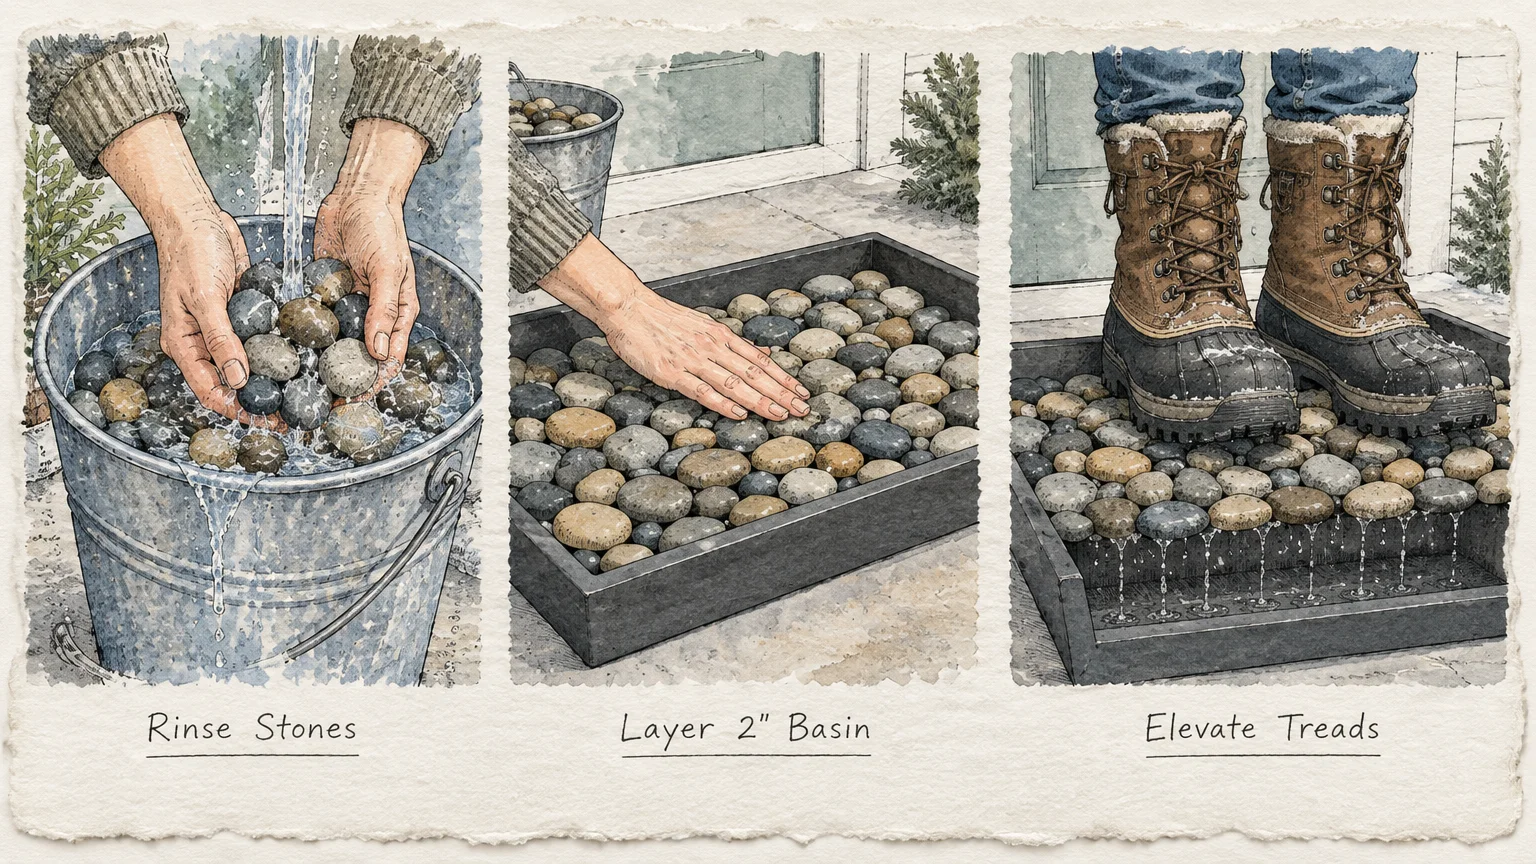
Deep rubber or metal trays filled with smooth river stones provide an exceptional base for thawing winter footwear. The stones elevate boot treads above pooled water, allowing melted snow to drain away cleanly.
Source a heavy-duty rubber tray with raised perimeter edges measuring at least two inches deep. Thoroughly rinse polished river pebbles in a bucket of clean water to remove dust before filling the tray.
Spread the stones in an even layer across the entire tray basin. Place wet footwear directly onto the pebbles so melting ice drains through the gaps to the tray bottom.
Empty the collected runoff once a week during peak storm periods to prevent mineral buildup and stagnant odors. This reliable boot storage solution protects delicate floors with minimal construction effort.
Idea 2: Wall-Mounted Floating Slat Racks
Lifting footwear off the floor maximizes usable square footage in compact entryway ideas winter setups. Suspended slatted shelves promote 360-degree air circulation around damp soles to speed up drying.
Cut rot-resistant cedar or white oak boards into matching thirty-inch lengths. Sand all surfaces smooth and apply two coats of clear exterior spar urethane to repel standing water.
Fasten the slats horizontally across two vertical wooden uprights, maintaining one-inch gaps between boards for ventilation. Secure the completed framework directly into wall studs using three-inch structural wood screws.
Hang wet boots upside down on extended dowels or rest them across the open wooden slats. Position a shallow drip mat beneath the rack to catch falling drops as footwear dries.
Idea 3: Copper Pipe Drip Stand for Umbrellas
Dripping umbrellas require vertical storage that prevents saturated fabric from resting against finished drywall. A custom copper pipe stand introduces industrial style while resisting corrosion from constant moisture contact.
Assemble half-inch rigid copper tubing into a rectangular cage using push-to-connect fittings or lead-free solder. Build the frame thirty inches tall with an eight-inch square base to hold multiple golf umbrellas securely.
Fit a removable copper or ceramic catch dish inside the base to collect falling drops. Water drains directly into the dish without touching nearby baseboards or soaking into floor grout.
These creative umbrella stand ideas keep wet canopies upright so fabric dries without forming mildew creases. Empty the catch basin after heavy rainstorms to prevent water spots.
Idea 4: Slotted Built-In Bench with Forced-Air Venting
Custom mudroom ideas often feature a multipurpose storage bench positioned directly over an active heating register. Harnessing your home’s forced-air heating significantly cuts down footwear drying times during winter months.
Construct an open-base bench frame using cabinet-grade exterior plywood, matching your entryway dimensions. Route parallel ventilation slots into the top seating panel to allow rising warm air to escape freely.
Install a sheet-metal duct diverter inside the bench cavity to channel airflow directly beneath the boot shelf. The warm air circulates through damp treads, drying soaked footwear within a few hours.
Review heating guidelines from the International Code Council to avoid restricting essential HVAC return air. Proper clearance ensures your heating system operates safely and efficiently.
Idea 5: Galvanized Trough Drop Zone
Repurposed livestock troughs provide rugged drop zones that handle muddy grit, slush, and melting salts. Their high metal sidewalls completely contain water splashes kicked off by stomped-out winter work boots.
Select a narrow, shallow galvanized steel trough that fits comfortably against your entryway wall. Line the bottom with perforated commercial rubber matting to dampen metallic clatter and cushion heavy soles.
Install heavy-duty locking casters onto the underside if you prefer rolling the trough into a utility closet. This mobile setup lets you conceal messy footwear quickly when hosting dinner guests.
Inspect the factory seams for water-tightness by filling the trough with an inch of water outdoors first. Seal any leaky corner joints with clear silicone before bringing the metal unit inside.
Idea 6: Waterproof Wainscoting with Heavy-Duty Utility Hooks
Saturated coats and dripping umbrellas quickly ruin painted drywall, causing bubbling paint and hidden wall mold. Installing composite beadboard panels shields your wall framing against direct moisture transfer from wet outerwear.
Mount interlocking cellular PVC or composite wainscot panels up to four feet high along your entryway wall. Fasten panels with exterior-grade construction adhesive and non-corrosive finish nails driven straight into wall studs.
Cap the installation with a sturdy wooden ledge sealed with waterproof exterior enamel paint. Secure cast-iron utility hooks directly through the trim into wall studs to support heavy, water-logged winter jackets.
Apply waterproof silicone caulk along the bottom seam where the wainscot meets the baseboard. This barrier stops running water from penetrating behind wall cavities during wet seasons.
Idea 7: Recessed Floor Mat Well with Drainage Matting
Commercial buildings use recessed mat wells to trap water at thresholds, and homes benefit equally from this technique. Creating a flush drop-in well keeps wet shoes level with surrounding flooring while eliminating trip hazards.
Cut an opening into the subfloor between floor joists, framing the perimeter with structural dimensional lumber. Line the recessed cavity with a waterproof sheet membrane, identical to a curbless shower pan assembly.
Drop a rigid, open-grid drainage mat flush with your finished flooring threshold. Runoff drains through the open grid into the sealed pan below, keeping walking surfaces dry and skid-free.
Consult tile installation standards from the Tile Council of North America for waterproofing best practices. A properly waterproofed well protects subfloors from structural rot for decades.
Safety Callouts and Troubleshooting
Always turn off power at the main breaker panel before cutting into walls to install recessed storage. Concealed electrical cables and plumbing pipes frequently run behind entryway drywall surfaces.
Wear an approved particulate respirator and safety glasses when cutting composite panels or pressure-treated wood. Provide continuous cross-ventilation when applying urethane sealers, solvent-based adhesives, and silicone caulks.
If water escapes past your containment trays, inspect neighboring floorboards immediately for cupping or discoloration. Reapply silicone sealant along baseboard joints to block hidden water migration beneath hardwood planks.
Ensure that hanging racks do not overload drywall anchors; always mount heavy storage racks directly into structural wall studs. Loose wall hardware can pull free under the weight of wet winter coats.
Consult a licensed structural engineer or general contractor if you intend to modify floor joists for recessed wells. Altering floor joists without proper structural framing can compromise your home’s load-bearing capacity.
Style & Finishing Touches
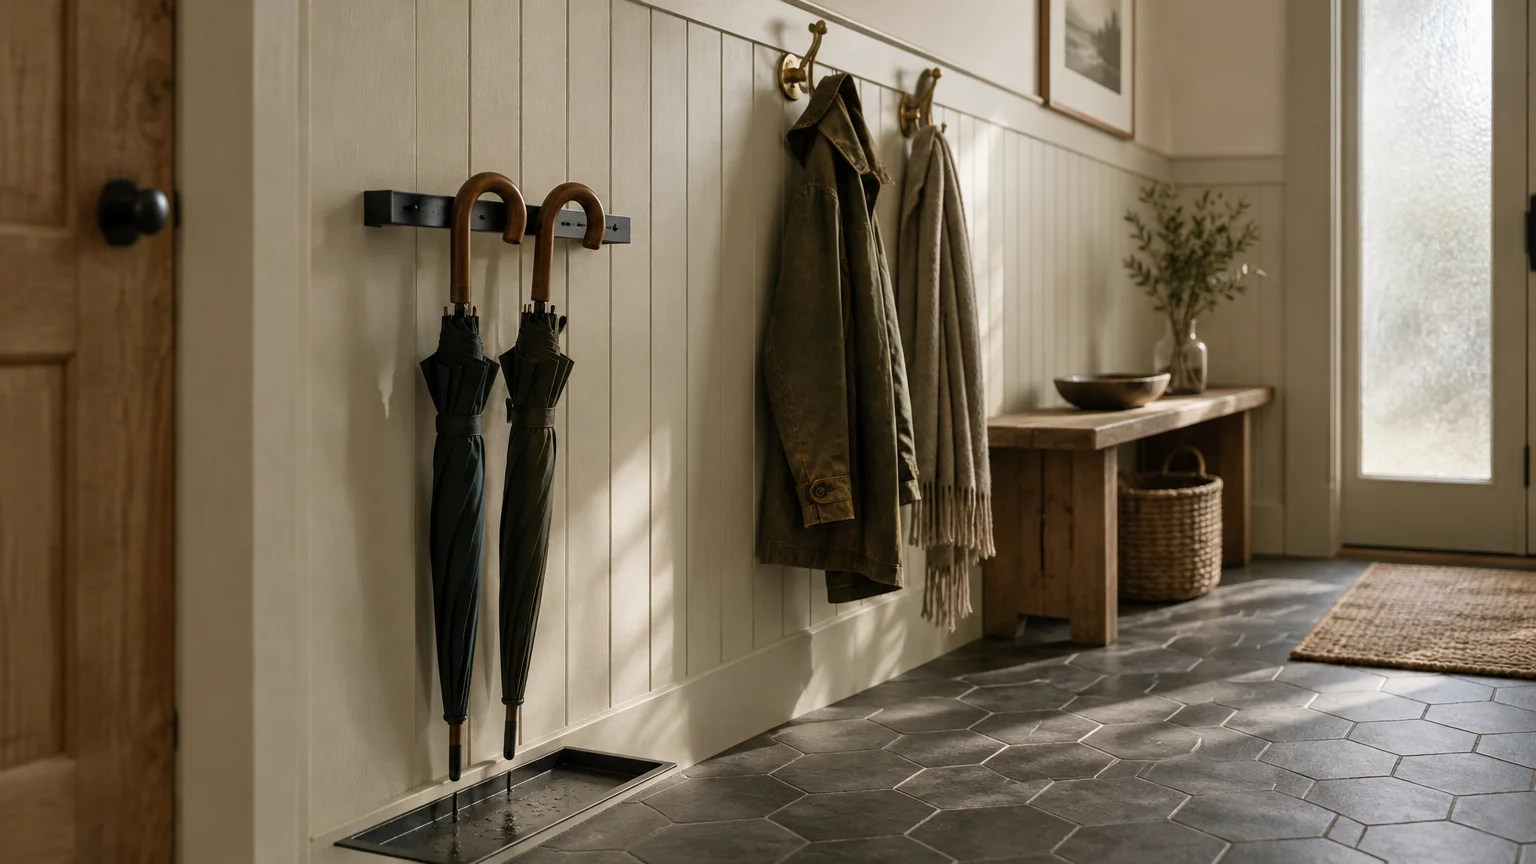
Functional moisture control can integrate seamlessly into your home’s established decorating palette and architectural style. Select water-resistant materials that complement your existing molding profiles, wall paint, and flooring finishes.
For traditional interiors, paint your wainscoting and benches in deep navy, slate gray, or rich evergreen. These saturated shades conceal muddy splashes while establishing a sophisticated, grounded entry aesthetic.
Integrate warm natural textures to soften industrial metal trays and utilitarian rubber floor mats. Synthetic woven baskets made from recycled plastic mimic natural wicker without degrading when holding damp knit gloves.
Install battery-operated or hardwired LED strip lighting underneath floating boot shelves. Crisp accent illumination highlights floor drip zones so family members avoid stepping onto slick surfaces.
Hang a decorative beveled mirror with a moisture-sealed composite frame directly above your entryway drop bench. The glass reflects natural foyer light and gives you a convenient station for last-minute wardrobe adjustments.
Choose brushed brass or matte black coat hooks to add refined hardware accents across your entry wall. Consistent hardware finishes tie disparate storage pieces together into a unified, designer-grade drop zone.
Maintenance & Long-Term Care
Consistent seasonal maintenance protects your entryway investment from corrosive road salt and persistent moisture damage. Establishing a weekly cleaning routine during harsh weather extends the lifespan of your materials.
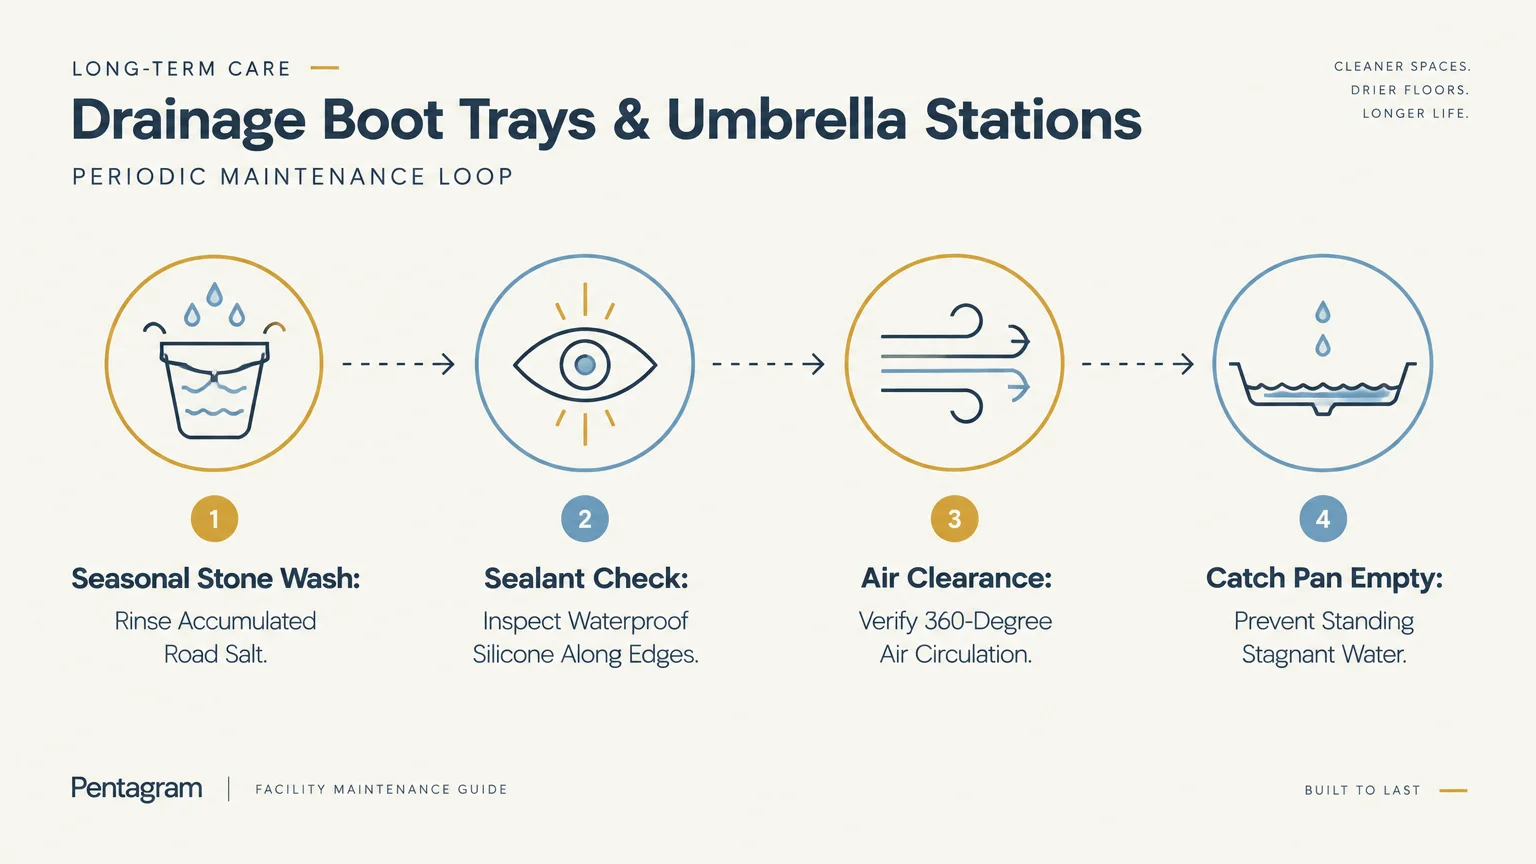
Empty boot trays weekly to prevent standing water from generating mineral deposits and foul odors. Wash stones and rubber liners in a utility tub using warm water and mild dish soap.
Examine silicone caulk beads around perimeter baseboards every autumn before the first winter storm arrives. Remove deteriorating caulk using a flexible scraper and apply fresh anti-microbial silicone to maintain a watertight seal.
Reapply protective spar urethane or paste wax to wooden slats and storage benches once every twelve months. This protective finish repels water runoff and prevents moisture from raising the wood grain.
Wipe copper or galvanized umbrella stands with automotive spray wax to prevent oxidation and water spotting. A light wax barrier shields bare metal surfaces against aggressive road salts tracked inside.
Vacuum floor mat wells regularly using a wet-dry utility vacuum to remove gritty sand and trapped sediment. Keeping drainage paths free of debris ensures meltwater flows freely into containment areas.
FAQ
How do I prevent boot trays from smelling like damp rubber?
Scrub your boot tray monthly with a mixture of warm water, white vinegar, and mild dish soap. This cleaning solution neutralizes odor-causing bacteria without degrading durable rubber or metal materials.
Place breathable linen sachets filled with activated charcoal in the tray corners to absorb ambient dampness continuously. Allow footwear to dry thoroughly before storing it inside enclosed closets.
What is the best flooring for wet entryways?
Porcelain tile and commercial luxury vinyl plank deliver superior resistance to standing water and muddy abrasion. Both materials prevent moisture penetration and clean up quickly after heavy winter storms.
If your home features original hardwood floors, protect the entrance zone with non-staining rubber-backed runner rugs. Never let saturated carpets sit directly on polyurethane-finished wood planks for prolonged periods.
How can I dry soaked umbrellas without creating puddles?
Store wet umbrellas in an open-frame metal stand equipped with a dedicated drainage tray or water-absorbing diatomaceous earth base. The open framework allows circulating air to dry the canopies quickly.
Leave umbrella canopies slightly unfurled rather than tightly strapped shut while they shed water inside the stand. Air circulation prevents mildew growth and eliminates musty odors on waterproof nylon fabrics.
Can I build mudroom storage in a narrow hallway?
Yes, narrow corridors benefit from vertical storage solutions like wall-mounted peg rails and ultra-slim floating boot racks. Mounting items flush against the wall preserves essential walking clearance down the hallway.
Look for wall racks that project six inches or less from the finished drywall surface. Staggering coat hooks at multiple heights prevents bulky winter parkas from bunching together into walkways.
How do I remove white salt stains from entryway wood floors?
Combine equal parts white vinegar and warm water in a spray bottle, then mist the solution onto a microfiber towel. Rub the salt lines gently until the mineral deposits dissolve completely.
Buff the wood dry immediately with a clean, dry cloth to prevent liquid from soaking into joints. Apply a wood floor conditioner to restore moisture and luster to the dried finish.
Takeaway & Next Steps
Managing winter slush, wet boots, and dripping umbrellas protects your home from expensive structural floor repairs. Implementing dedicated moisture zones keeps your entryway safe, organized, and welcoming through every wet season.
Select the design concept that best matches your home’s layout, available square footage, and seasonal moisture levels. Even small upgrades make a dramatic difference in containing outdoor grime at your front door.
Take action today by measuring your entryway footprint and ordering a deep boot tray with river stones. Pick up corrosion-resistant hardware and cedar lumber this weekend to build your floating wall storage.
Share photos of your completed entryway drop zones with our renovation community or subscribe for weekly home improvement updates.