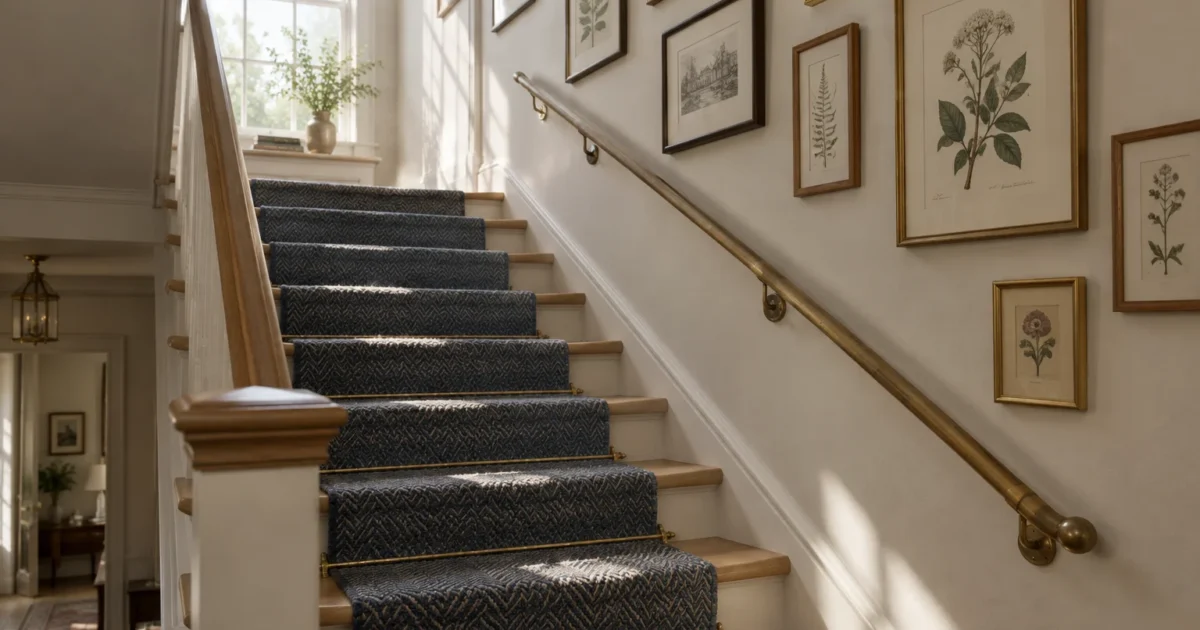
Transforming an uninspired staircase instantly elevates your entire interior aesthetic. Correcting common styling missteps creates a safe, beautifully appointed architectural focal point that ties your living levels together seamlessly.
Staircases endure relentless daily foot traffic, yet homeowners routinely treat them as functional afterthoughts. Strategic updates restore generous illumination, visual balance, and welcoming warmth to this hardworking central circulation zone.
Learn how to resolve seven frequent staircase decor mistakes using straightforward, practical techniques. You can easily turn a dark, neglected flight of steps into an intentional showcase that balances comfort, code compliance, and style.
Project Overview & Why It Matters
Your staircase serves as a prominent vertical highway connecting the private and public zones of your house. When you overlook its styling, the entire entryway feels incomplete and tired.
Visual neglect rarely stops at aesthetics; it frequently conceals genuine safety hazards. Dim spaces, slippery treads, and loose carpets directly jeopardize your household.
Data from the National Electronic Injury Surveillance System published in The American Journal of Emergency Medicine indicates roughly 1 million Americans receive emergency treatment each year for stair-related injuries.
Tripping hazards, poor illumination, and inadequate traction cause the vast majority of these domestic accidents. Smart stairway design tips solve both safety deficits and aesthetic shortcomings simultaneously.
A deliberate staircase makeover creates visual continuity between floors and increases overall property value. You establish an engaging focal point while preserving structural integrity and household wellness.
Addressing these common staircase decor mistakes requires minimal structural disruption. Most corrections involve paint, proper fasteners, refined lighting, and balanced wall arrangements.
By viewing your staircase as a full design project rather than an awkward corridor, you transform daily transition into a delightful architectural experience.
Tools, Materials, and Prep Checklist
Before revamping your stairway, gather the appropriate supplies to execute each update cleanly. Working on an incline requires specialized tools to ensure precision and personal safety.
Essential Tools and Equipment
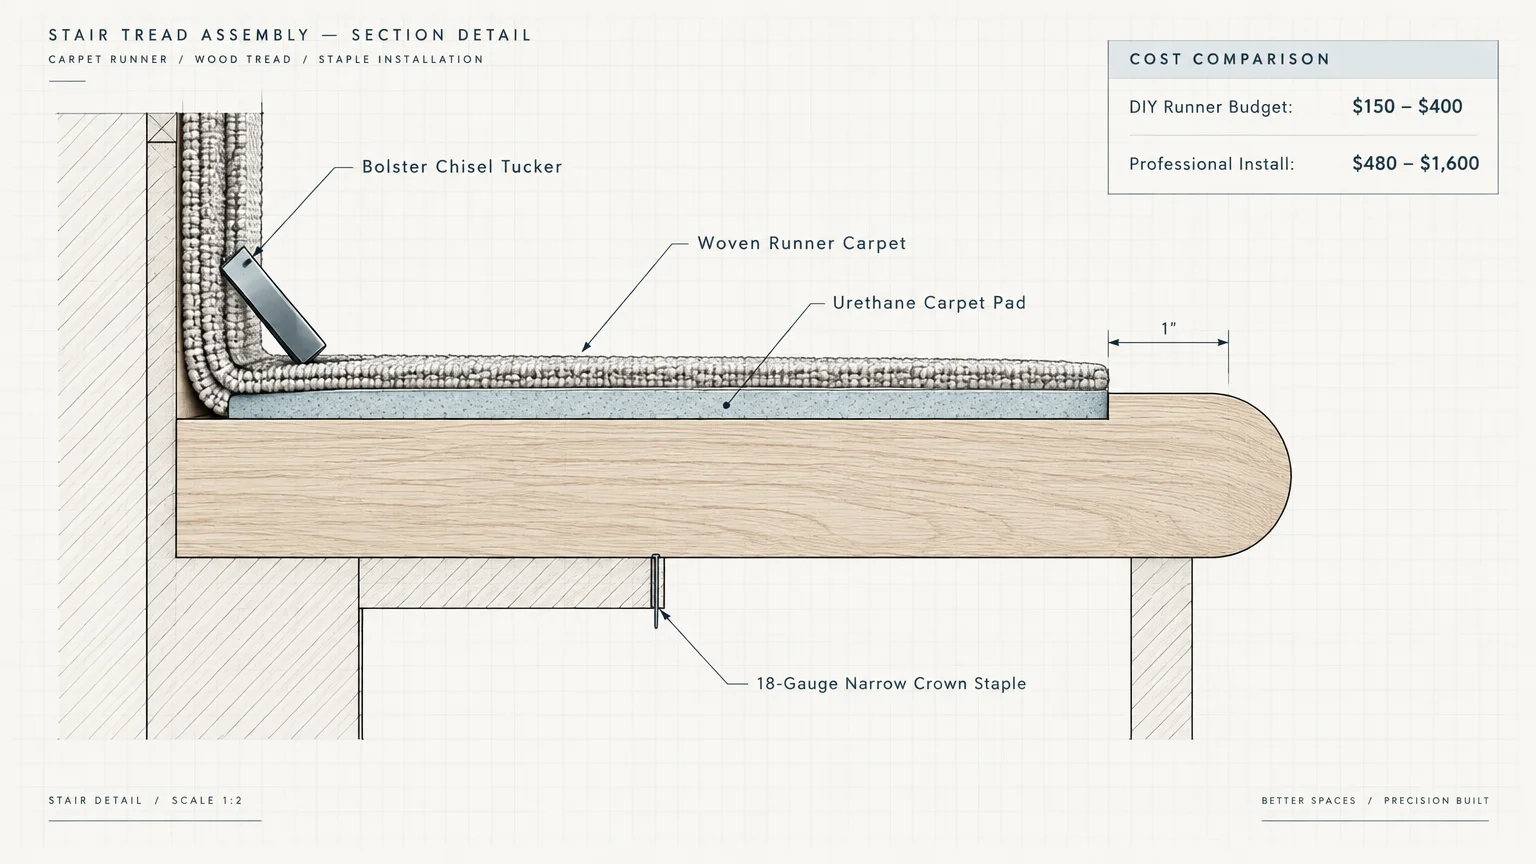
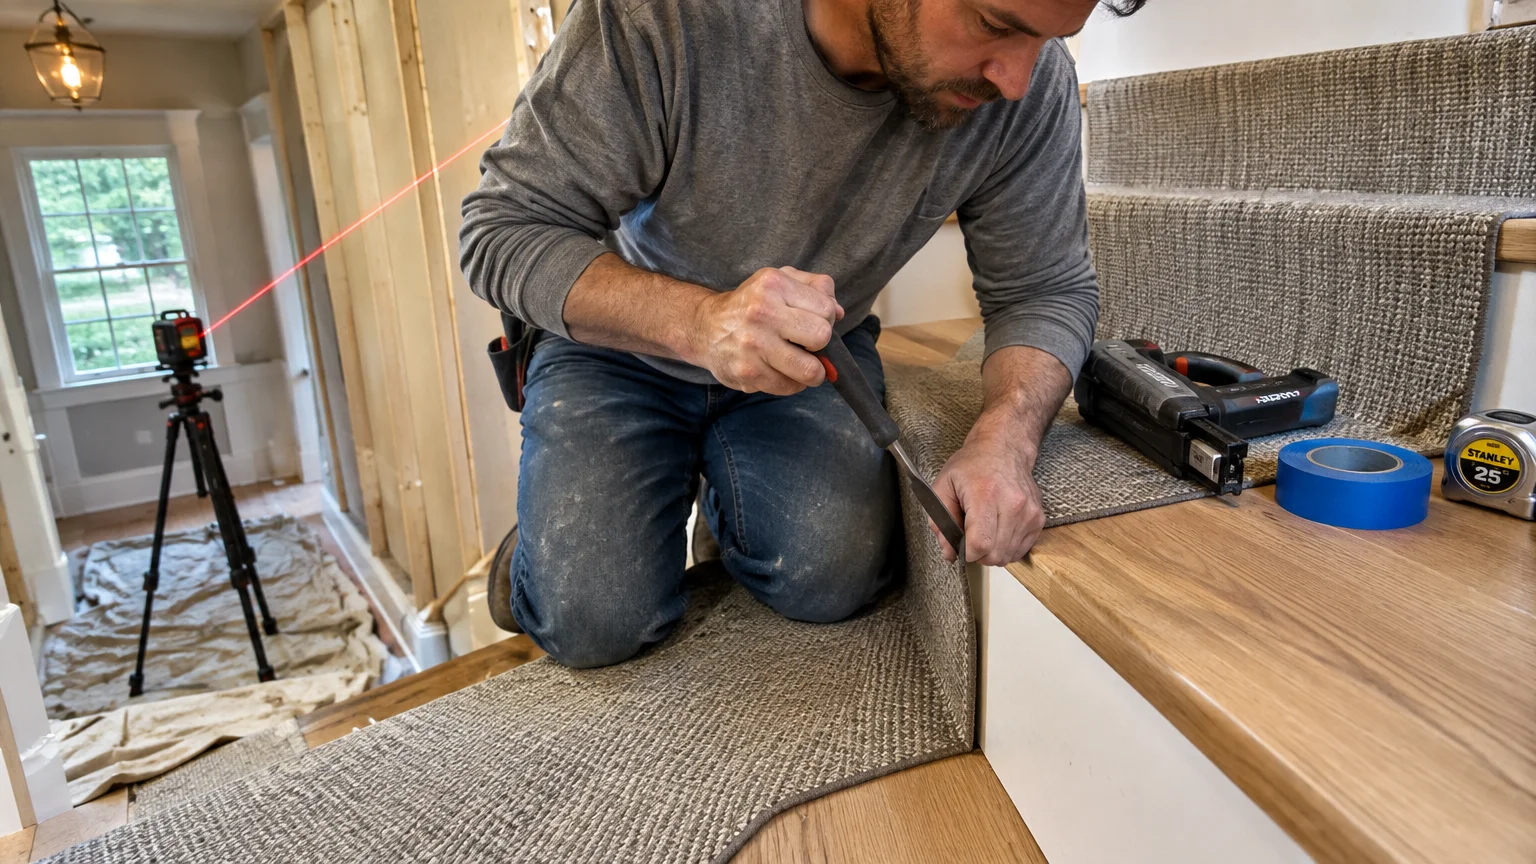
Narrow Crown Stapler: A pneumatic or electric 18-gauge stapler secures runner carpet firmly beneath tread nosings.
Laser Level and Stud Finder: A self-leveling cross-line laser projects consistent diagonal rake angles across your stair wall.
Measuring Tape and Bolster Chisel: Use steel tape for exact tread measurements and a carpet tucker to drive fabric into tight riser crevices.
Quality Paint Applicators: Angled sash brushes and high-density foam rollers yield brush-mark-free finishes on stringers and risers.
Materials and Estimated Budget
Woven Carpet Runners: Budget-conscious DIY runner projects using pre-made runners cost between $150 and $400. Professional installations typically range from $480 to $1,600.
Urethane Carpet Pad: Install a dense, low-profile carpet cushion to absorb foot impact and prevent runner shifting.
Enamel Trim Paint: Select semi-gloss or satin polyurethane enamel engineered to resist scuffs and frequent cleaning.
D-Ring Picture Hangers: Heavy-duty hardware keeps frames flat against vibrating drywall as family members traverse the steps.
Surface Preparation Steps
Clean all wooden treads, risers, and handrails with a mild degreaser before applying paint or carpet. Grease and dust prevent adhesives, staples, and primers from bonding.
Inspect existing wood for squeaks or structural movement. Drive countersunk trim screws into squeaking tread joists before laying down any decorative materials.
Calculate exact yardage by measuring tread depth, riser height, and nosing curvature. Add ten percent to your total yardage to accommodate pattern matching and end-of-run waste.
Step-by-Step Instructions
Correcting these seven common oversights will immediately revive your stairwell. Follow these systematic phases to blend decorative refinement with established residential safety standards.
Phase 1: Correcting Inadequate Staircase Illumination
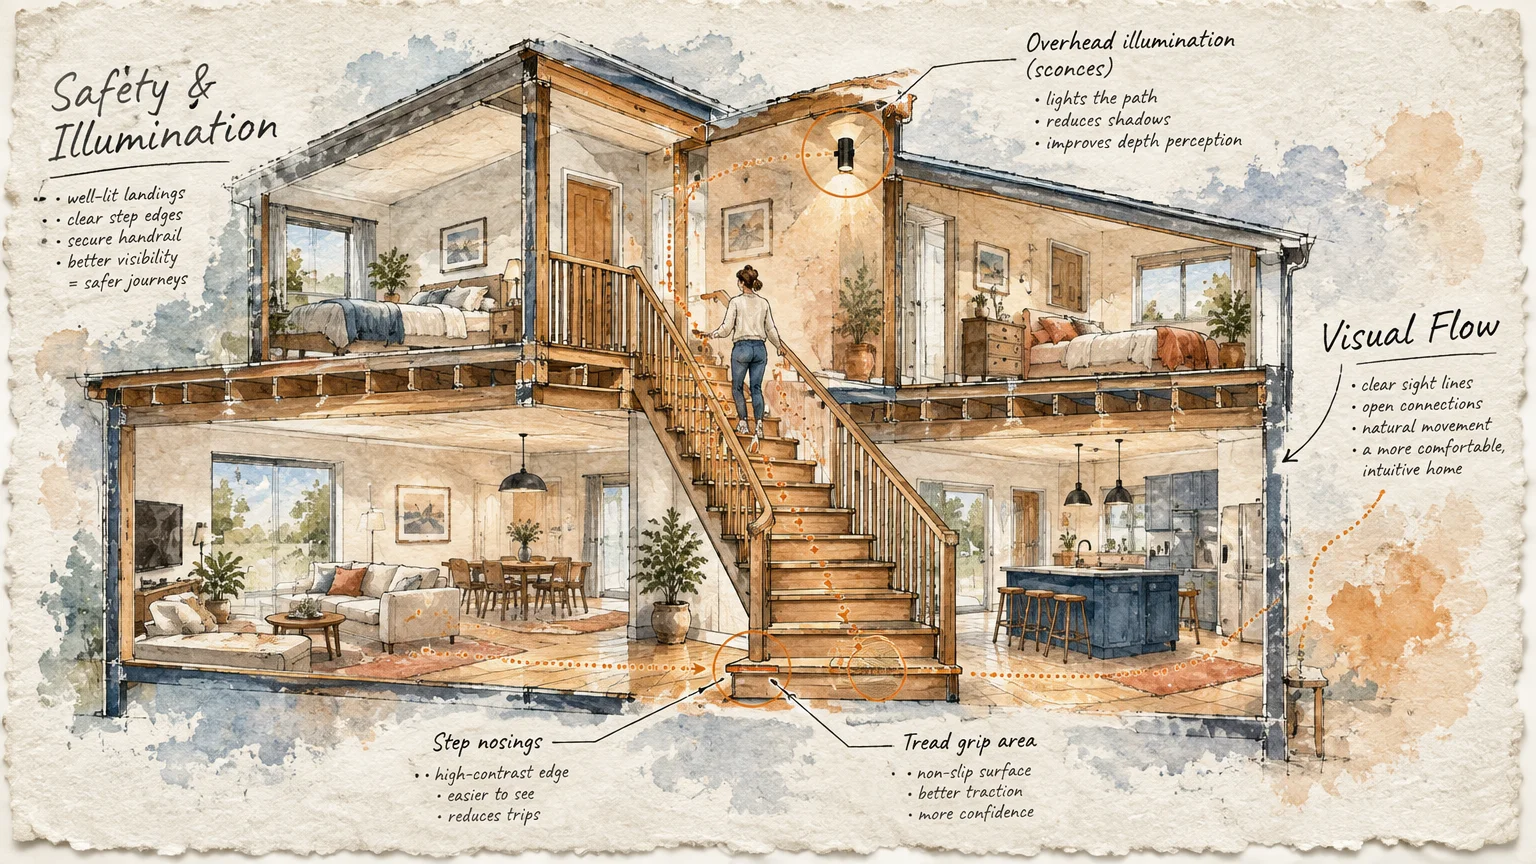
Dim stairwells rank among the most dangerous design failures in residential properties. Shadows obscure tread nosings, making missteps and severe falls far more likely.
The International Residential Code (IRC Section R303.7) mandates an artificial light source providing at least 1 foot-candle (11 lux) across all tread centers and landings.
Staircases with six or more risers legally require three-way wall switches at every floor level. This wiring ensures you never navigate dark steps to reach a light switch.
Replace undersized ceiling fixtures with wide-beam flush mounts or multi-bulb pendants. Alternatively, install low-voltage LED step lights recessed into stringers for modern, glare-free pathway guidance.
Phase 2: Aligning Staircase Wall Decor to the Proper Pitch Line
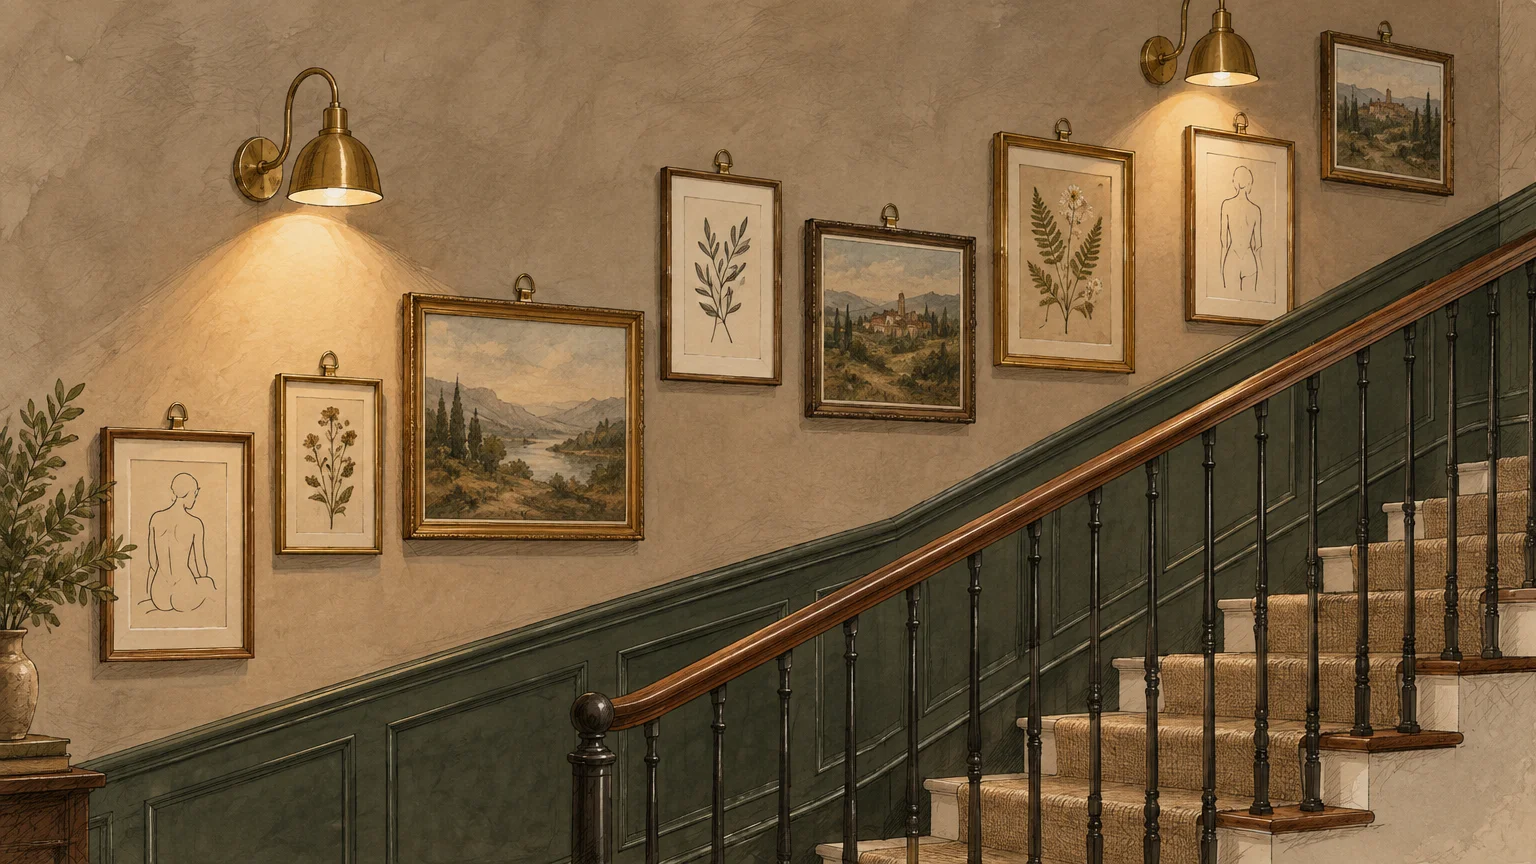
Hanging artwork along a flat horizontal line makes staircase walls appear chaotic and unbalanced. Frames must follow the ascending slope of your staircase architecture.
Professional interior designers calculate the stair pitch line, which is an imaginary angled line connecting the nosing tips of each tread.
Position the center of your staircase wall decor between 56 and 60 inches above this pitch line. This placement keeps gallery frames parallel to the steps and naturally aligned with the human gaze.
Use a laser level aligned to the stair rake to mark consistent nail heights. Mount frames using dual D-rings to prevent frames from shifting when doors slam.
Phase 3: Fitting and Securing Carpet Runners Correctly
Bare hardwood stairs generate substantial acoustic echo and present slipping hazards. However, a poorly chosen or misaligned runner looks cheap and introduces trip risks.
Adhere to standard design proportions by maintaining 3 to 5 inches of exposed wood tread on either side of the carpet runner.
Leaving this perimeter border frames the runner beautifully and keeps the flight from feeling visually cramped or suffocated.
Fasten the runner securely beneath each tread nosing and into the riser crotch with an 18-gauge narrow crown stapler. Never rely exclusively on double-sided carpet tape.
Trim carpet padding one inch narrower than the runner on all sides. This step prevents unsightly pad exposure while keeping the runner edges sitting flat against the wood.
Phase 4: Eliminating Clutter on Steps
Treating steps as a temporary drop zone for laundry baskets and shoes creates an unkempt appearance. Clutter turns a central architectural feature into a hazardous obstacle course.
Dedicate a sturdy woven basket at the base or landing of the stairs to hold items awaiting transport upstairs. Keep the tread path completely clear of loose objects.
Educate family members to clear personal belongings from steps immediately. Unobstructed treads maintain pristine visual lines while preventing devastating slip-and-fall incidents.
Phase 5: Restoring Handrail Clearances and Finishes
Over-decorating stairs can encroach on vital handrail space. Hanging wide picture frames or bulky wall sconces near handrails creates dangerous obstructions.
Building standards under IRC Section R311.7.8 require handrails to sit between 34 and 38 inches vertically above tread nosings.
You must maintain a minimum clearance of 1.5 inches between the finished wall and the handrail. Never mount art or millwork where it restricts continuous finger grip.
Refresh weathered handrails with dark gel stain or hard-wearing enamel paint. Upgrading outdated mounting brackets to matte black or brushed brass hardware modernizes the stairway instantly.
Phase 6: Revitalizing Scuffed Risers and Woodwork
Daily shoe impacts quickly leave unsightly black scuff marks across painted risers and stringers. Ignored scuffs signal neglect to anyone entering your home.
Scrape loose paint and fill gouges with sandable wood filler before vacuuming the staircase thoroughly. Apply an oil-modified or waterborne alkyd enamel paint for maximum durability.
Consider painting risers a deep charcoal or navy to disguise future scuffs while adding contrast. Alternatively, install peel-and-stick decorative tile panels for added visual interest.
Phase 7: Intentional Styling for Stair Landings
Mid-flight landings often become dead spaces that collect random clutter or remain starkly bare. An unstyled landing halts visual momentum through your home.
Treat the landing as a distinct architectural pause point. Hang an eye-catching statement mirror or an oversized art piece to draw the eye upward.
If space permits without obstructing the mandatory 36-inch walkway clearance, add a slender demi-lune table or sculptural ceramic urn. Keep accessories firmly anchored against walls.
Style & Finishing Touches
Selecting cohesive materials ensures your staircase updates complement the surrounding architecture. Explore these smart stairway design tips to build a unified aesthetic.
Color Palettes and Contrast
Create crisp contrast by pairing dark stained treads with pure white risers and stringers. This timeless combination reflects ambient light while grounding the architecture.
For contemporary interiors, explore monochrome schemes using saturated moody tones like forest green or deep graphite. Paint risers, balusters, and railings identical hues for dramatic modern flair.
Warm greige or creamy off-white tones soften transitional homes without feeling clinical. These neutrals bridge vibrant main-floor living areas with quieter upstairs bedroom corridors.
Runner Textures and Patterns
Herringbone and flatweave runners offer clean lines while standing up to heavy hallway traffic. Natural fibers like wool provide superior resilience and natural stain resistance.
Avoid synthetic loop pile rugs if you have household pets with claws. Cut-pile nylon or polypropylene runners offer durable, snag-free alternatives for active families.
Subtle vertical stripes visually lengthen short flights of steps. Horizontal geometric patterns widen narrow stairways, giving compact townhomes a more expansive feel.
Lighting Fixture Upgrades
Replace dated builder-grade fixtures with sculptural lanterns or modern drum pendants. Choose fixtures that cast downward illumination across treads rather than throwing distracting shadows sideways.
Select warm white LED bulbs with a 2700K to 3000K color temperature. This spectrum flatters wood grains and wall paint while delivering crisp, safe visibility.
Maintenance & Long-Term Care
Preserving your updated staircase requires simple, regular care. Consistent maintenance protects your investment and ensures year-round household safety.
Weekly Cleaning Routines
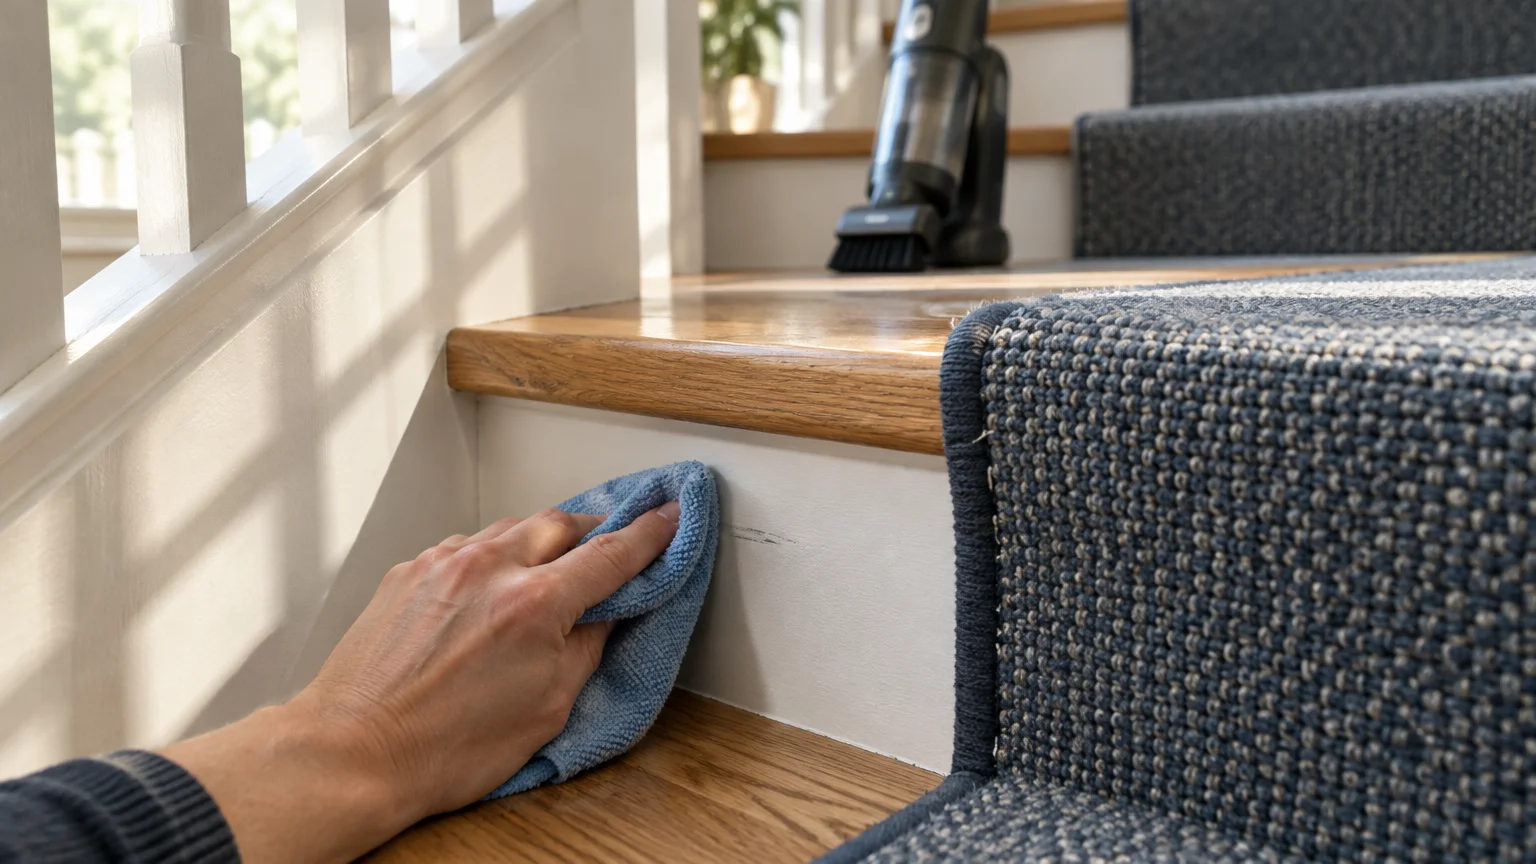
Vacuum carpet runners weekly using a handheld vacuum or motorized upholstery brush. Regular vacuuming prevents abrasive grit from settling deep into rug fibers.
Wipe painted risers and wood treads with a damp microfiber cloth and pH-neutral cleaner. Avoid oil-based soaps that leave slippery residues on bare hardwood steps.
Dust frame glass and balusters with electrostatic microfiber dusters. Keeping frames clean preserves natural light reflection along stair walls.
Seasonal Hardware Inspections
Inspect handrail mounting brackets every six months. Tighten loose wall screws immediately to prevent railing wobble and maintain structural stability.
Check carpet runner edges along stair nosings for loosening staples. Use your staple gun to secure any pulled fabric immediately before someone trips.
Managing Seasonal Wood Movement
Indoor humidity swings during winter heating seasons can cause treads to contract, triggering squeaks. Maintain indoor humidity levels between 35 and 50 percent with humidifiers.
If squeaks develop beneath a runner, dust dry powdered graphite into accessible wood joints. Avoid WD-40, which stains untreated lumber and attracts airborne dust.
FAQ
How wide should my stair carpet runner be?
Standard stair runners measure 27 to 32 inches wide for residential staircases. Always leave 3 to 5 inches of bare wood exposed on each tread side to maintain proper design balance.
How can I hang family photos on stairs without clutter?
Use identical frame finishes and uniform white matting to maintain visual calm. Align frame centers along the 56 to 60-inch pitch line rather than scattering them haphazardly.
Limit gallery walls to a single side of the stairway. Leaving the opposite wall bare preserves spatial breathing room and keeps stairways from feeling claustrophobic.
What is the most durable paint finish for stair risers?
Apply a waterborne satin or semi-gloss alkyd enamel on risers and trim. These resilient finishes resist scuffs from shoes and allow effortless wipe-down cleaning without wearing thin.
How do I illuminate stairs if rewiring is not an option?
Install battery-powered, rechargeable motion-sensor puck lights under handrails or along baseboards. These units provide necessary foot-candle illumination without cutting into drywall.
Choose rechargeable fixtures with magnetic base plates for quick recharging. Set sensors to thirty-second shutoff delays to preserve battery lifespan between charging cycles.
When should I hire a licensed professional?
Hire a licensed carpenter if treads flex, rot, or squeak excessively from structural stringer failure. Always hire a licensed electrician to install code-mandated 3-way switches or hardwired fixtures.
Takeaway & Next Steps
Transforming your staircase from neglected to celebrated creates an inviting first impression and safeguards your family. Simple adjustments eliminate safety risks while boosting aesthetic value.
Correcting lighting deficits, anchoring runners securely, and properly aligning wall decor turns this functional transition into a standout architectural feature.
Your 3 Immediate Action Steps
Audit Your Lighting: Check that your existing fixtures deliver at least 1 foot-candle of illumination across all steps without casting harsh shadows.
Clear the Runway: Remove all temporary shoe baskets, packages, and stray objects from tread corners immediately to eliminate severe tripping risks.
Measure Your Art and Handrails: Verify handrails provide 1.5 inches of clearance and realign wall frames to the angled 56-to-60-inch stair pitch line.
Have you completed a recent staircase makeover in your home? Share your before-and-after photos with our design community or subscribe for weekly home renovation tips.