Step-by-Step Instructions
Follow this comprehensive roof inspection checklist to identify visible defects across your home exterior and interior attic spaces.
Phase 1: Ground-Level Exterior Evaluation
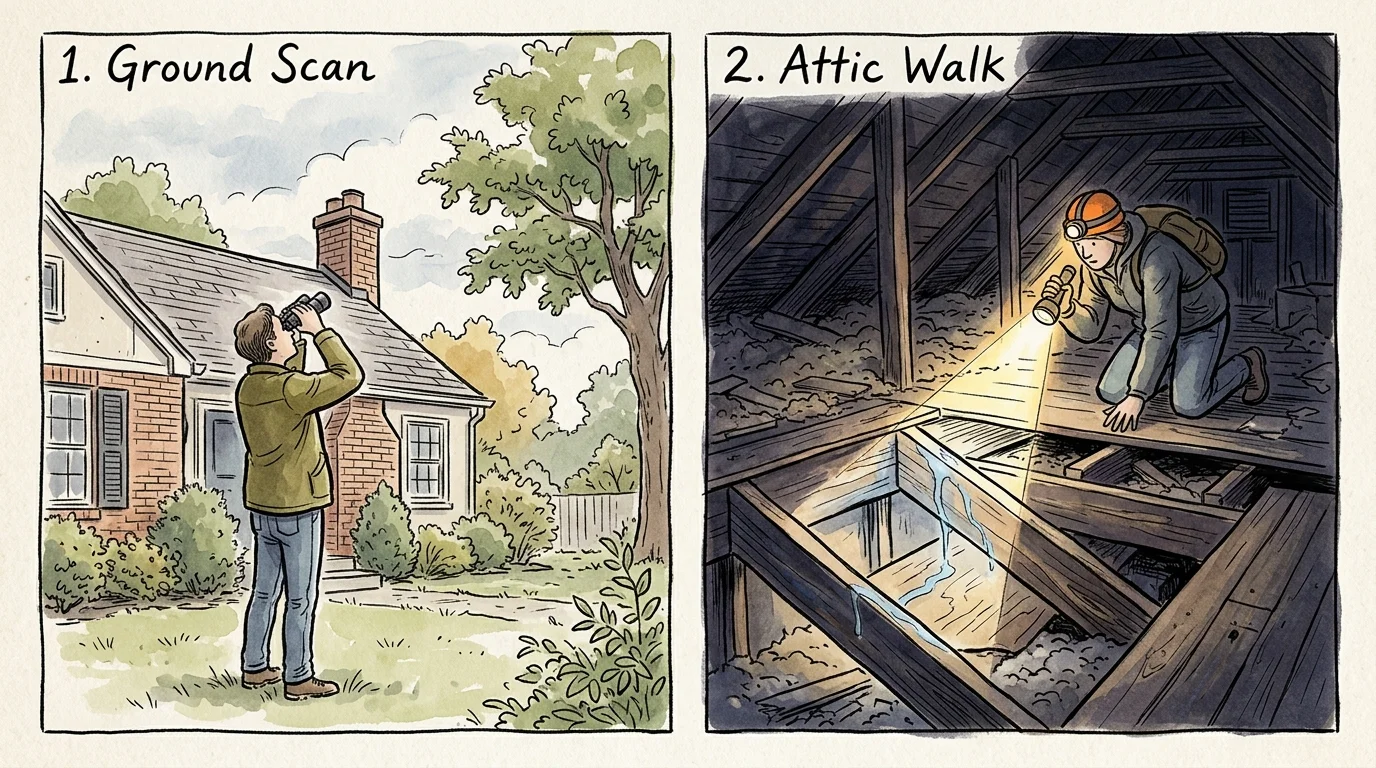
Sign 1: Curled, Cupped, or Cracked Shingles: Stand across the street and use your binoculars to scan roof planes. Shingles curling upward at the edges (cupping) or bowing in the center (clawing) indicate advanced thermal distress and drying asphalt binder. Horizontal or vertical cracks across the shingle body occur when volatile oils evaporate, leaving the fiberglass mat brittle and vulnerable to wind uplift.
Sign 2: Granule Accumulation in Gutters and Downspouts: Check your gutter troughs and downspout discharge zones for dense accumulations of dark, sand-like ceramic granules. While minor granule shedding is normal on brand-new roofs, extensive bald patches on older shingles expose the underlying asphalt substrate to accelerated ultraviolet deterioration.
Sign 3: Damaged, Corroded, or Loose Flashing: Inspect the sheet metal transitions installed around chimneys, dormers, plumbing vent pipes, and roof valleys. Flashing creates a mechanical barrier at high-risk junctions. Look for rusted galvanized metal, separated solder joints, lifting step flashing, or cracked polyurethane sealant. Flashing failures account for the majority of residential roof leaks.
Sign 4: Sagging Roof Decking or Uneven Ridge Lines: Step back to evaluate the horizontal profile of your roof ridges and eaves. Any noticeable dip, swayback curve, or localized depression suggests compromised decking, cracked rafters, or prolonged moisture saturation within the structural framing. Structural sagging requires immediate professional structural engineering analysis.
Sign 5: Heavy Moss, Lichen, or Algae Colonization: Dark streaks caused by airborne algae (Gloeocapsa magma) primarily cause cosmetic discoloration; however, thick green moss and lichen cushions present serious functional threats. Moss roots anchor into the shingle surface, lifting shingle tabs and trapping moisture against the underlayment. During winter, this trapped water freezes, expands, and dislodges fasteners.
Phase 2: Interior Attic Diagnostic Walk
Sign 6: Attic Light Penetration and Ventilation Gaps: Enter your attic on a bright, sunny afternoon and switch off your flashlight. Scan the roof deck for visible daylight shining through sheathing boards or around vent stacks. If sunlight can penetrate the roof assembly, wind-driven rain and snow can enter just as easily.
Sign 7: Dark Water Staining, Mold, and Damp Insulation: Turn on your high-lumen flashlight and examine the underside of the plywood sheathing, rafters, and ceiling joists. Look for dark streaks, white powdery efflorescence, rusty roofing nails protruding through the deck, and compressed, soggy insulation. Remember that water often enters at a high point along a ridge or flashing seam and travels down rafters before dripping onto ceilings.
Phase 3: Age Assessment and Professional Consultation
Sign 8: Material Nearing the End of Its Design Life: Check your home purchase records or municipal building permit history to calculate your roof age. If your standard three-tab shingles are approaching 18 to 20 years old—or your architectural shingles are entering year 25—routine thermal expansion has likely compromised the self-sealing adhesive strips across multiple courses.
When you spot multiple signs of roof wear and tear, contact a licensed professional. A standard professional roof inspection costs between $150 and $400, while advanced evaluations utilizing drone photography or infrared thermal moisture detection range from $300 to $600. Many reputable local contractors also offer free visual assessments after major wind or hail storms to assist with initial insurance evaluations.