You can nourish your garden with rich nutrients without spending a dime at the commercial garden center. Everyday kitchen scraps and pantry staples provide cost-effective solutions for vibrant outdoor flowerbeds and flourishing potted houseplants.
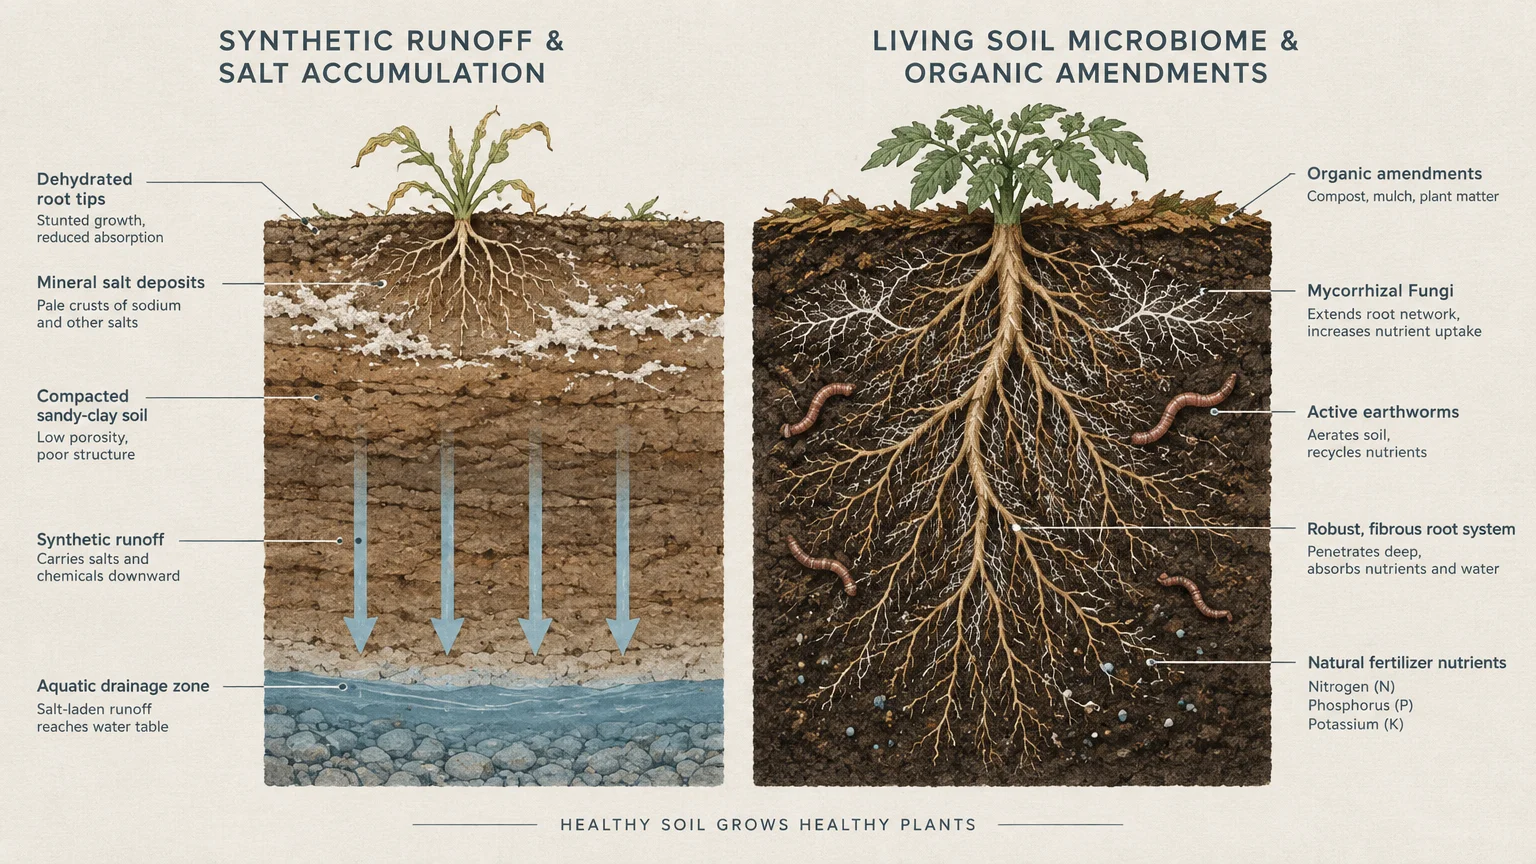
Commercial synthetic feeds often cause mineral salt accumulation in container soils; natural alternatives feed the living soil microbiome instead. Repurposing clean waste reduces household trash while steadily improving your garden soil structure over time.
Discovering smart DIY fertilizer ideas transforms routine kitchen waste into potent plant food. You will boost plant growth safely using simple items right inside your cabinets.
Project Overview & Why It Matters
Chemical fertilizers deliver fast bursts of nitrogen, phosphorus, and potassium, but they frequently bypass long-term soil biology. In contrast, homemade garden fertilizer breaks down slowly to supply essential micro and macronutrients to hungry root systems.
Using natural fertilizers at home protects local waterways from toxic chemical runoff. According to the U.S. Environmental Protection Agency, nutrient pollution from synthetic fertilizers damages downstream aquatic ecosystems significantly.
Repurposing organic household items for garden fertilizer also reduces your annual home landscaping budget. You cut curb-side waste production while creating customized soil conditioners for specific plant varieties.
Synthetic plant foods often leave behind stubborn salt deposits that dehydrate delicate feeder roots. Natural amendments encourage beneficial earthworms and mycorrhizal fungi to establish dense, healthy underground networks.
Ideal spaces include raised vegetable beds, ornamental borders, container gardens, and indoor greenery. Each micro-environment benefits uniquely from targeted organic inputs.
Natural amendments improve the moisture retention capacity in sandy profiles; they also loosen compact clay structures. Your plants develop resilient, fibrous root systems that withstand heat stress and seasonal drought.
Tools, Materials, and Prep Checklist
Essential Collection Tools
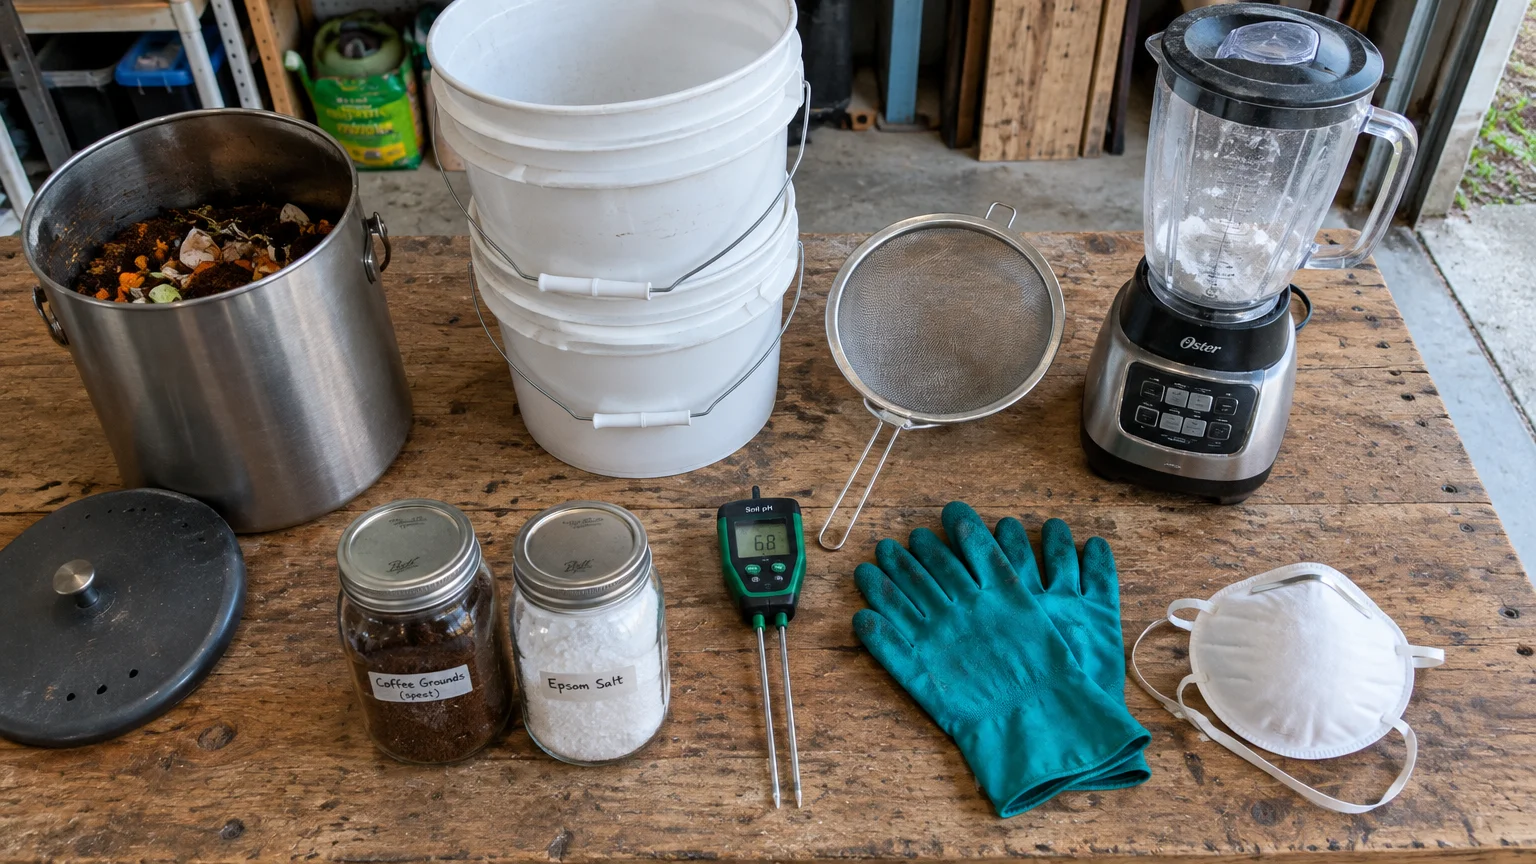
Dedicated 5-gallon buckets: Keep two clean buckets with tight-fitting lids on hand for brewing liquid solutions and mixing solid ingredients. Cost: $8 to $12 total.
Stainless steel scrap bin: Store your daily kitchen scraps in an odor-sealed counter bin before processing. Cost: $15 to $25.
Fine mesh strainer: Use metal strainers or natural cheesecloth to separate solid organic matter from liquid fertilizer teas. Cost: $5 to $10.
Standard countertop blender: Dedicate an inexpensive blender for pulverizing dried eggshells and tough peels into quick-dissolving powders. Cost: $20 to $40.
Household Ingredients and Prep
Kitchen scraps: Collect coffee grounds, eggshells, banana peels, and unsalted pasta cooking water throughout the week. Cost: $0.
Pantry minerals: Gather unflavored gelatin packets, unsulfured blackstrap molasses, white vinegar, and standard Epsom salt crystals. Cost: $10 to $15 combined.
Yard materials: Collect dry wood ash from untreated firewood and fresh green lawn clippings from herbicide-free turf. Cost: $0.
Safety and Testing Equipment
Digital soil pH tester: Check root zone acidity before applying pH-altering inputs like ash or vinegar. Cost: $15 to $30.
Nitrile gloves and dust mask: Protect your lungs and skin when handling fine hardwood ash and dry mineral powders. Cost: $10.
Airtight glass mason jars: Store blended dry powders in quart jars to lock out ambient moisture and humidity. Cost: $10 to $15 per pack.
Step-by-Step Instructions
1. Used Coffee Grounds
Spent coffee grounds contain roughly two percent nitrogen along with trace amounts of potassium and magnesium. Work them directly into the top two inches of garden soil to improve aeration.
Mix grounds with dry shredded leaves before applying them to container plants. This simple step prevents the coffee grounds from forming a water-repellent crust on the surface.
2. Crushed Eggshells
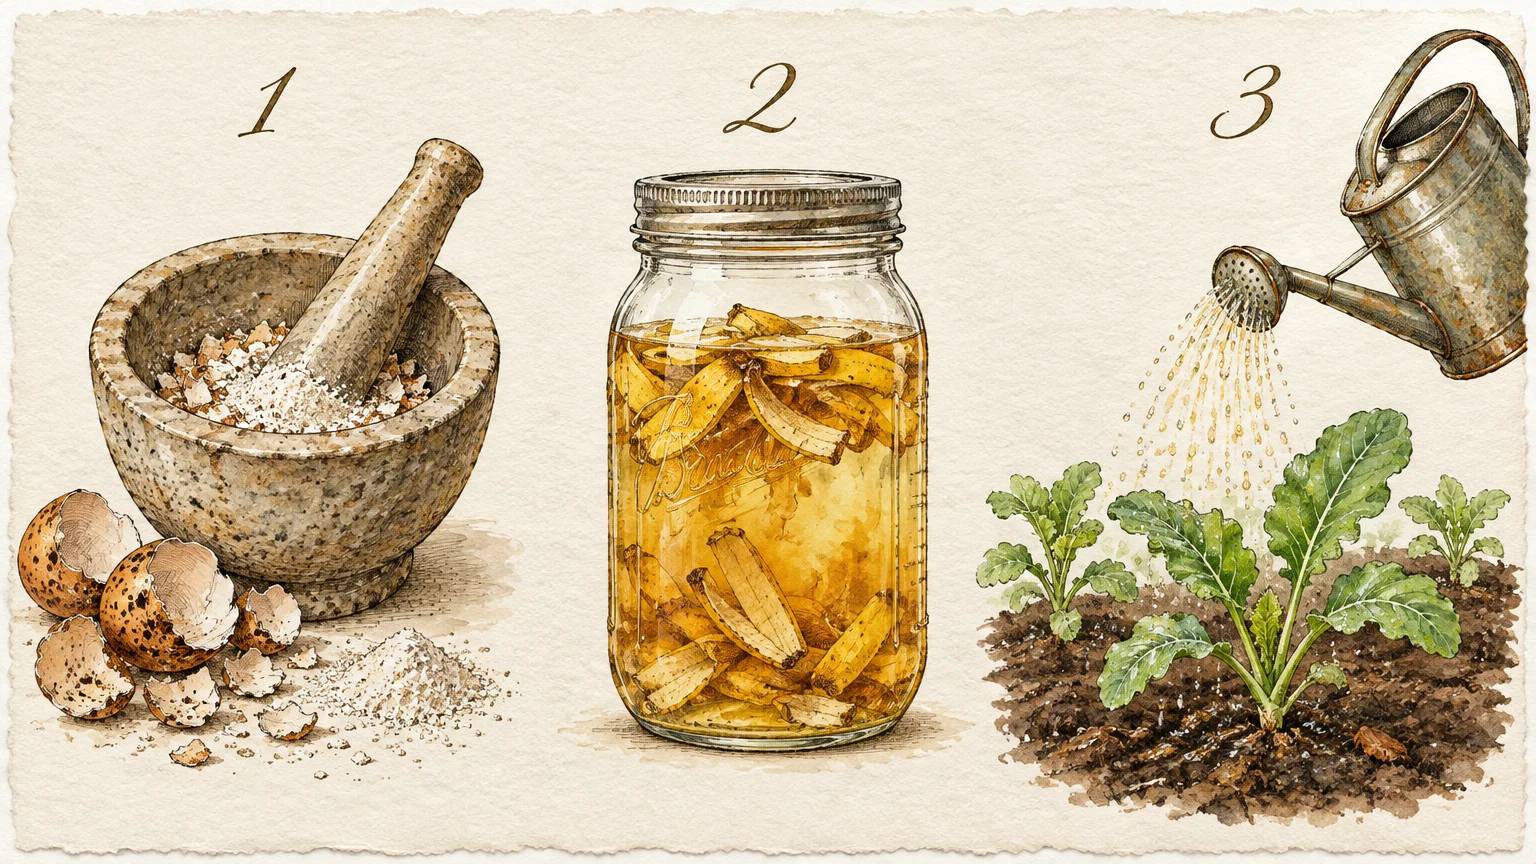
Clean eggshells provide abundant calcium carbonate, which strengthens plant cell walls and prevents blossom end rot in tomatoes. Rinse the shells thoroughly with warm water and let them air-dry completely.
Pulverize dry shells in a blender until they resemble fine flour. Sprinkle two tablespoons around the drip line of heavy-feeding vegetables every month.
3. Banana Peel Steep
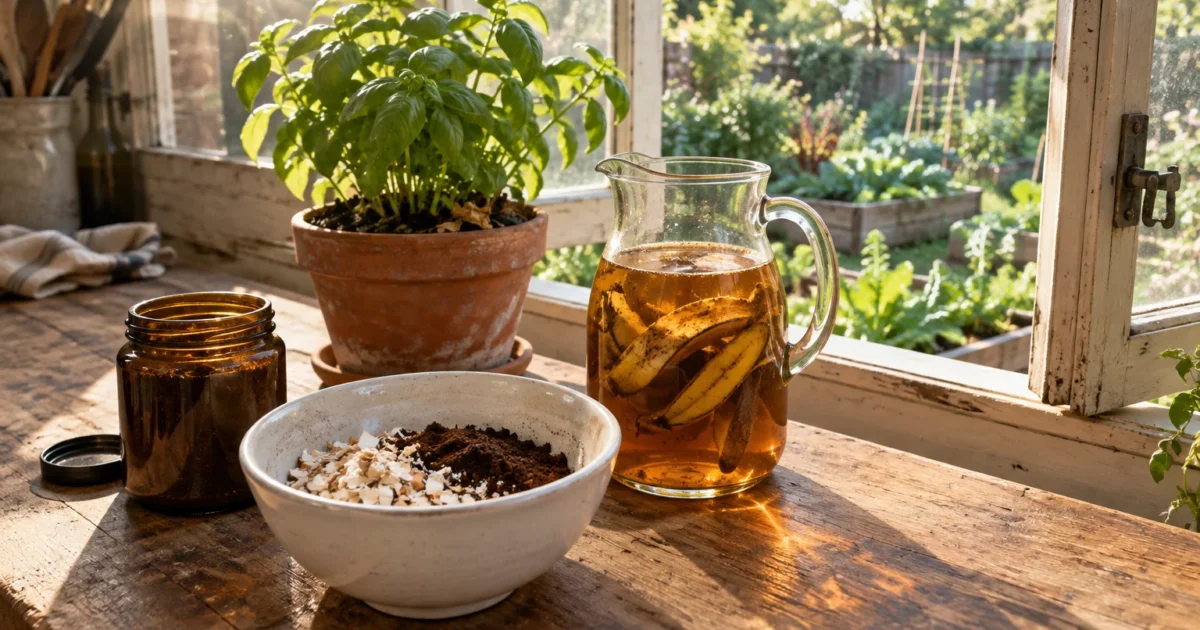
Banana peels deliver potassium and phosphorus, which stimulate prolific flower development and robust root establishment. Chop two fresh banana peels into small half-inch squares.
Submerge the chopped pieces in one quart of clean water for forty-eight hours. Strain the liquid and pour it directly onto the root zone of flowering perennials.
4. Hardwood Fireplace Ash
Ash from clean, untreated hardwood supplies potassium, calcium, and essential carbonate salts. It acts as an organic liming agent to raise acidic soil pH levels naturally.
Lightly dust half a pound per fifty square feet across alkaline-friendly beds. Never apply wood ash around acid-loving shrubs like blueberries, azaleas, or rhododendrons.
5. Epsom Salt Drench
Epsom salt consists of hydrated magnesium sulfate, a compound that spurs chlorophyll production in foliage. Peppers, tomatoes, and roses exhibit remarkable vigor after targeted magnesium applications.
Dissolve one tablespoon of Epsom salt crystals in one gallon of lukewarm water. Apply the solution as a monthly foliar spray or direct root drench during active spring growth.
6. Unsalted Cooking Water
Water left behind after boiling potatoes, pasta, or vegetables contains suspended starches and released micronutrients. These starches feed beneficial soil microbes that process organic matter.
Always allow cooking water to cool completely to room temperature before pouring it onto garden beds. Ensure the water contains zero salt; sodium degrades delicate soil structure quickly.
7. Freshwater Aquarium Water
Dirty water removed during routine fish tank cleanings contains dissolved fish waste, beneficial bacteria, and rich nitrogen compounds. It functions as a gentle, non-burning liquid fertilizer.
Siphon untreated freshwater directly onto potted indoor foliage or outdoor ornamental plants. Never use water from saltwater tanks; marine salinity kills garden crops instantly.
8. Steeped Tea Leaves
Used green and black tea leaves contain low levels of nitrogen and valuable tannic acid. They build rich humus within depleted garden soils when worked into planting holes.
Slit tea bags open and discard synthetic mesh wrappers or stapled paper tags. Lightly scratch loose leaves into the soil surrounding acid-tolerant perennials.
9. Fresh Lawn Grass Clippings
Freshly cut green turf clippings pack high concentrations of nitrogen and moisture. They break down rapidly, returning critical nutrients directly into topsoil layers.
Scatter thin one-inch layers over garden beds as an active mulch. Avoid thick, matted layers, which block air circulation and create foul anaerobic odors.
10. Unflavored Gelatin Powder
Plain powdered gelatin acts as an exceptional nitrogen booster because collagen consists entirely of protein amino acids. It slowly releases organic nitrogen to thirsty root tips.
Dissolve one packet of gelatin into one cup of boiling water; stir thoroughly until dissolved. Dilute the concentrate with three cups of cold tap water and apply once monthly.
11. Blackstrap Molasses Solution
Blackstrap molasses contains carbon, iron, sulfur, and potash that supercharge native microbial activity. Feeding indigenous soil fungi promotes faster nutrient cycling throughout the root zone.
Whisk two tablespoons of unsulfured blackstrap molasses into one gallon of warm water. Drench planting beds prior to spring planting to jumpstart microorganic reproduction.
12. Diluted White Vinegar
White distilled vinegar provides an immediate boost of acidity that unlocks bound iron in high-alkaline soils. It helps acid-loving plants absorb stubborn nutrients efficiently.
Mix one single tablespoon of standard five-percent vinegar into one gallon of clean water. Water gardenias and hydrangeas with this mild mixture once every two months.
Safety Callouts and Troubleshooting
Always monitor your plants closely for signs of nutrient burn, such as yellowing leaf edges or stunted new growth. If foliage wilts unexpectedly, flush the soil thoroughly with plain water.
Consult your local USDA Cooperative Extension System office for professional soil testing if plants show persistent nutrient deficiencies. Professional lab testing prevents accidental mineral toxicity.
When in doubt, apply homemade solutions at half-strength to test plant sensitivity. Observing individual plant reactions prevents unexpected leaf scorching across delicate outdoor plantings.
Style & Finishing Touches
Homemade plant food programs do not require an unsightly work area in your home. Design a dedicated potting station featuring amber glass jugs and galvanized steel buckets for your liquid concoctions.
Label decorative glass dispensers with waterproof chalk markers to keep various liquid teas organized. Tinted amber glass protects light-sensitive organic compounds from degrading on open garage shelves.
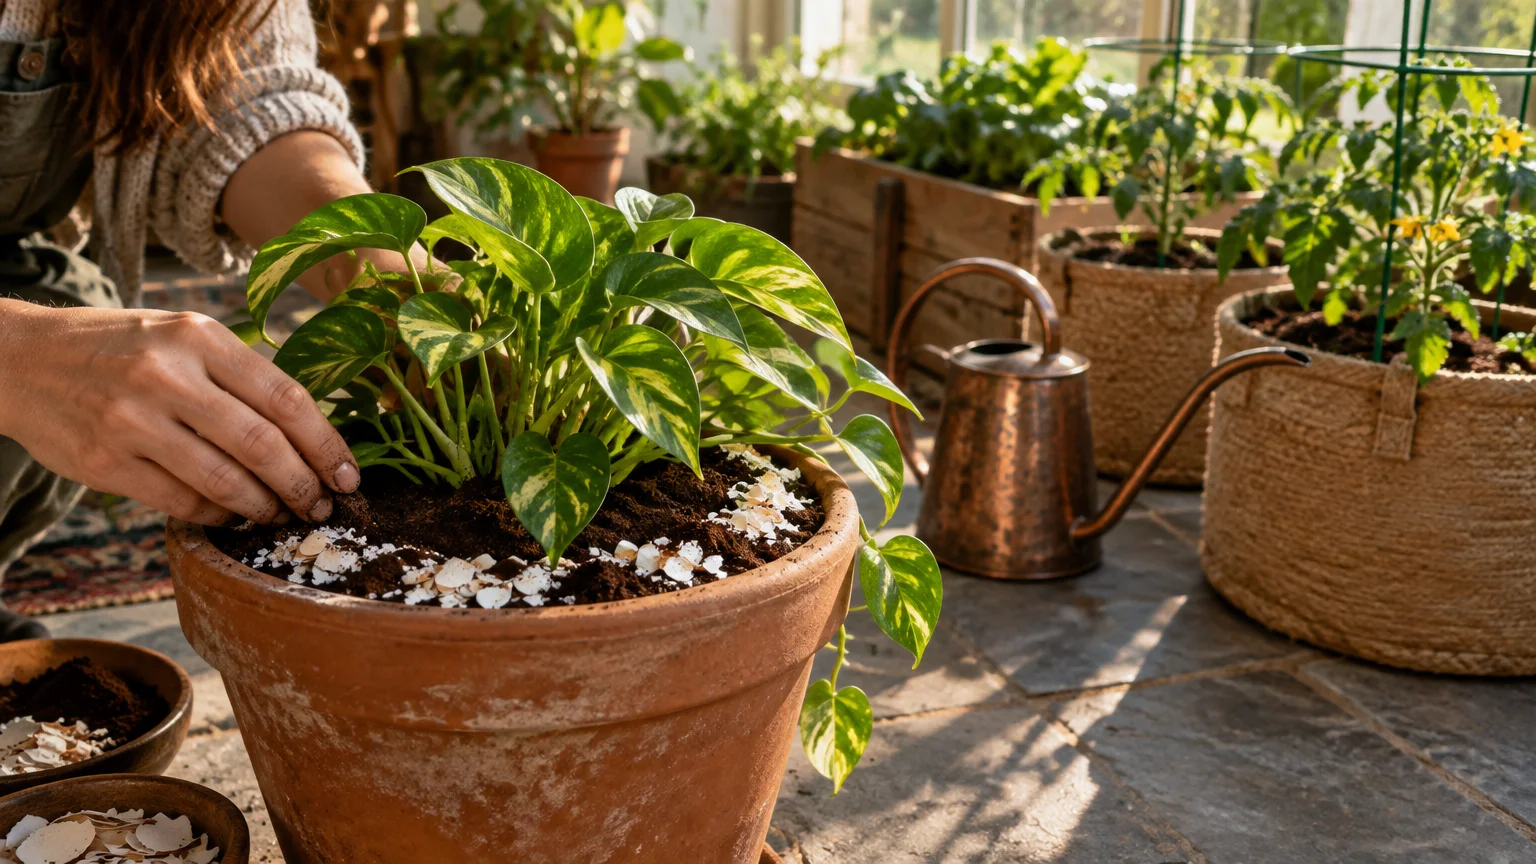
Hide decomposing soil dressings beneath an attractive top layer of cedar mulch or decorative river pebbles. A tidy decorative mulch layer controls moisture while concealing gritty eggshell and coffee grounds.
Coordinate your indoor planter aesthetic by tucking small ceramic compost bins beneath counters. Compact bamboo or matte black bins complement modern kitchens while keeping scrap collection completely out of sight.
Install matching brass hooks along potting shed walls to hang metal strainers and measuring spoons neatly. Organized storage keeps messy preparation phases streamlined and visually appealing.
Integrate these natural ways to fertilize plants into your weekly home maintenance routine. Consistent care produces vibrant, show-worthy garden beds throughout the entire growing season.
Maintenance & Long-Term Care
Practice diligent rotation when applying homemade amendments; alternating nitrogen inputs with mineral teas guarantees balanced plant nutrition. Keep a garden journal to track when each planting bed receives treatment.
Clean all brewing buckets, blenders, and strainers thoroughly with warm soapy water after every use. Lingering organic residues breed unwanted fungus gnats and sour odors indoors.
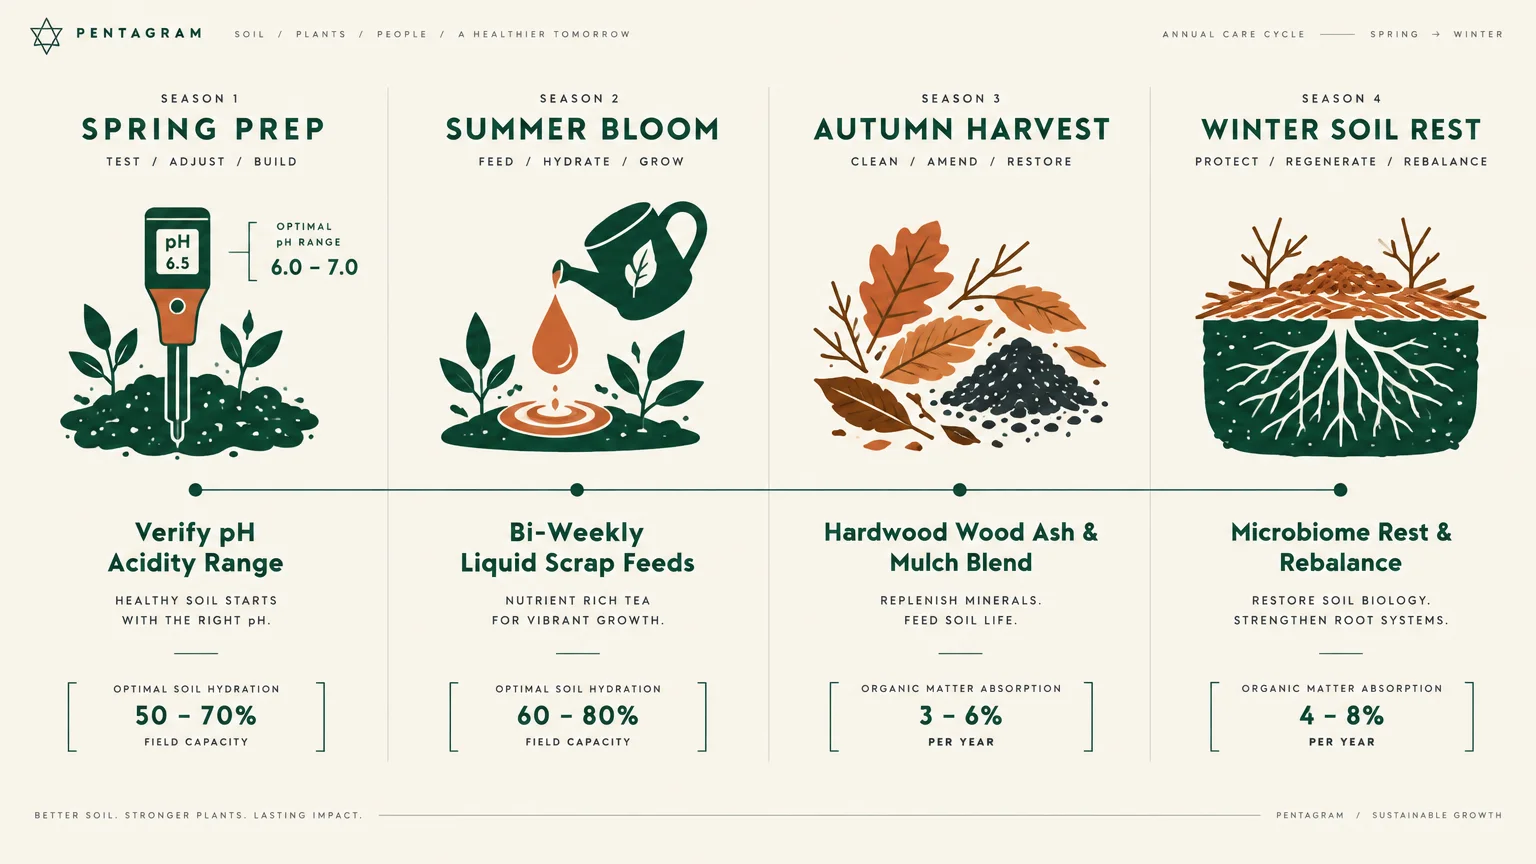
Test your garden soil pH each autumn using a calibrated digital probe or laboratory test kit. Tracking pH shifts helps you regulate applications of acidic vinegar and alkaline wood ash.
Taper off all nitrogen-heavy applications in late summer as perennial plants prepare for winter dormancy. Stimulating tender foliage late in the season leaves outdoor greenery vulnerable to harsh frost damage.
Store dry powders like crushed eggshells and sieved wood ash in airtight plastic totes. Atmospheric moisture turns fine powders into dense, unmanageable clumps over wet winter months.
Aerate outdoor garden soil every spring before top-dressing with homemade organic amendments. Light cultivation allows liquid teas and mineral powders to reach root zones without washing away.
FAQ
Can homemade fertilizers attract outdoor pests or rodents?
Kitchen scraps can attract pests if you leave unwashed food debris resting directly on open ground. Always wash eggshells, grind ingredients finely, and bury them beneath two inches of soil.
Avoid adding meats, oils, or dairy products to your homemade garden fertilizer mixtures. Stick strictly to plant-based scraps and clean mineral compounds to deter nocturnal wildlife.
How often should you apply liquid tea fertilizers?
Apply diluted liquid feeds once every two to three weeks during active spring and summer growing cycles. Dilute all homemade teas until they resemble weak amber iced tea before watering.
Can you mix different homemade fertilizers together?
You can blend organic materials like coffee grounds and eggshells, but avoid mixing alkaline wood ash with high-nitrogen fertilizers. Combining ash with nitrogen creates volatile ammonia gas that wastes valuable nutrients.
Are natural fertilizers safe for indoor houseplants?
Most natural teas work wonderfully indoors, but avoid surface applications of uncomposted food solids in small pots. Solid scraps attract stubborn fungus gnats and develop fuzzy surface molds inside humid homes.
How do you know if your plants have received too much fertilizer?
Over-fertilized plants develop crispy brown leaf margins, sudden lower foliage drop, and white mineral crusts on the soil surface. Flush the root zone immediately with clean tap water if you suspect over-fertilization.
Takeaway & Next Steps
Feeding your landscape with household items saves money and builds biologically active garden soil. You eliminate harsh chemicals while producing stronger root systems and more prolific blossoms.
Start your journey today by saving your morning coffee grounds in a clean kitchen container.
Next, rinse your breakfast eggshells and let them dry on a sunny windowsill for blending.
Finally, pick up a basic soil test kit to check your baseline pH before applying amendments.
Dedicating just a few minutes each week to these DIY fertilizer ideas pays massive dividends in your garden. Your flowers, vegetables, and houseplants will reward your effort with vibrant, vigorous growth.
Have you experimented with homemade fertilizers in your home garden? Share your project photos with our community or subscribe today for weekly home improvement and gardening guides.