Picking the right outdoor shade protects your boundary lines from relentless sun and moisture damage while boosting curb appeal instantly. The best fence paint colors combine resilient mineral pigments with formulas built to resist peeling and premature fading.
When you select colors engineered with high UV stability, you extend the life of your timber and cut weekend repainting chores in half. The right exterior shade also conceals daily splashback from garden irrigation and soil.
Whether you want a bold modern charcoal or an enduring earth tone, choosing proven hues guarantees lasting performance in tough weather.
Project Overview & Why It Matters
Exterior fences endure relentless exposure to sun, driving rain, snowpack, and direct soil contact. Without protective pigments and durable binders, raw timber degrades rapidly under ultraviolet radiation.
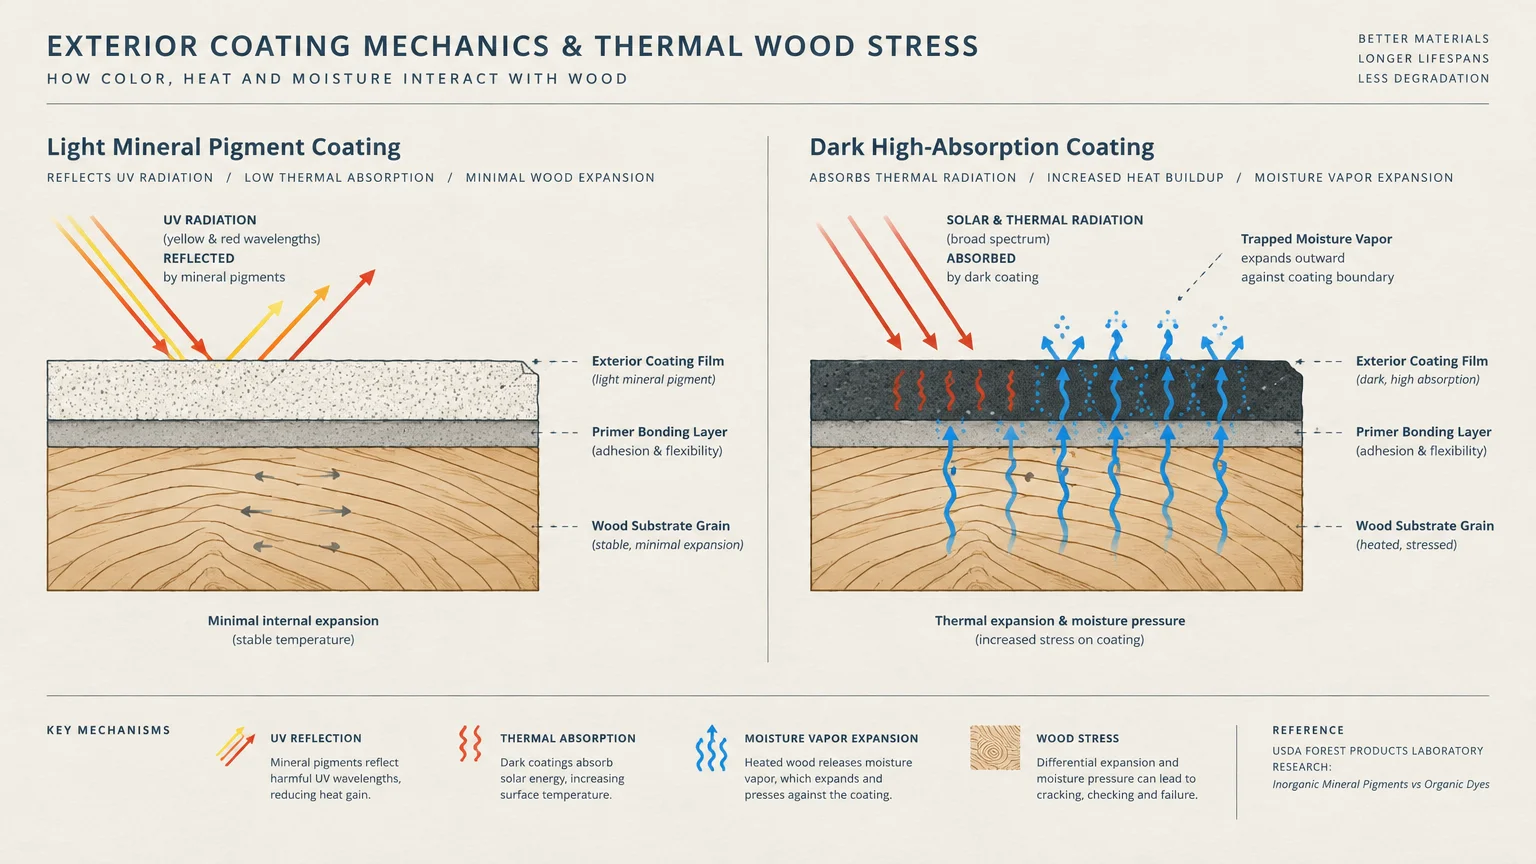
Color selection plays a critical physical role in how well your fence coating holds up over time. Dark colors absorb significant thermal energy, whereas light tones reflect heat away from the wood surface.
Trapped moisture within heated wood turns to vapor and pushes outward against the coating film. This thermal expansion cycle often forces standard exterior paints to bubble, crack, and peel prematurely.
Pigment chemistry dictates whether your fence maintains rich color or turns chalky after two summers. According to research from the USDA Forest Products Laboratory, inorganic mineral pigments resist ultraviolet breakdown far better than organic synthetic dyes.
A well-executed fence makeover safeguards your property perimeter from moisture intrusion and fungal wood rot. It also frames your landscape, turning an ordinary boundary line into an intentional architectural backdrop.
Investing in quality weather resistant paint protects your financial investment in perimeter lumber. Quality exterior coatings seal exposed end grain, preventing seasonal cupping across pickets and structural support posts.
Tools, Materials, and Prep Checklist
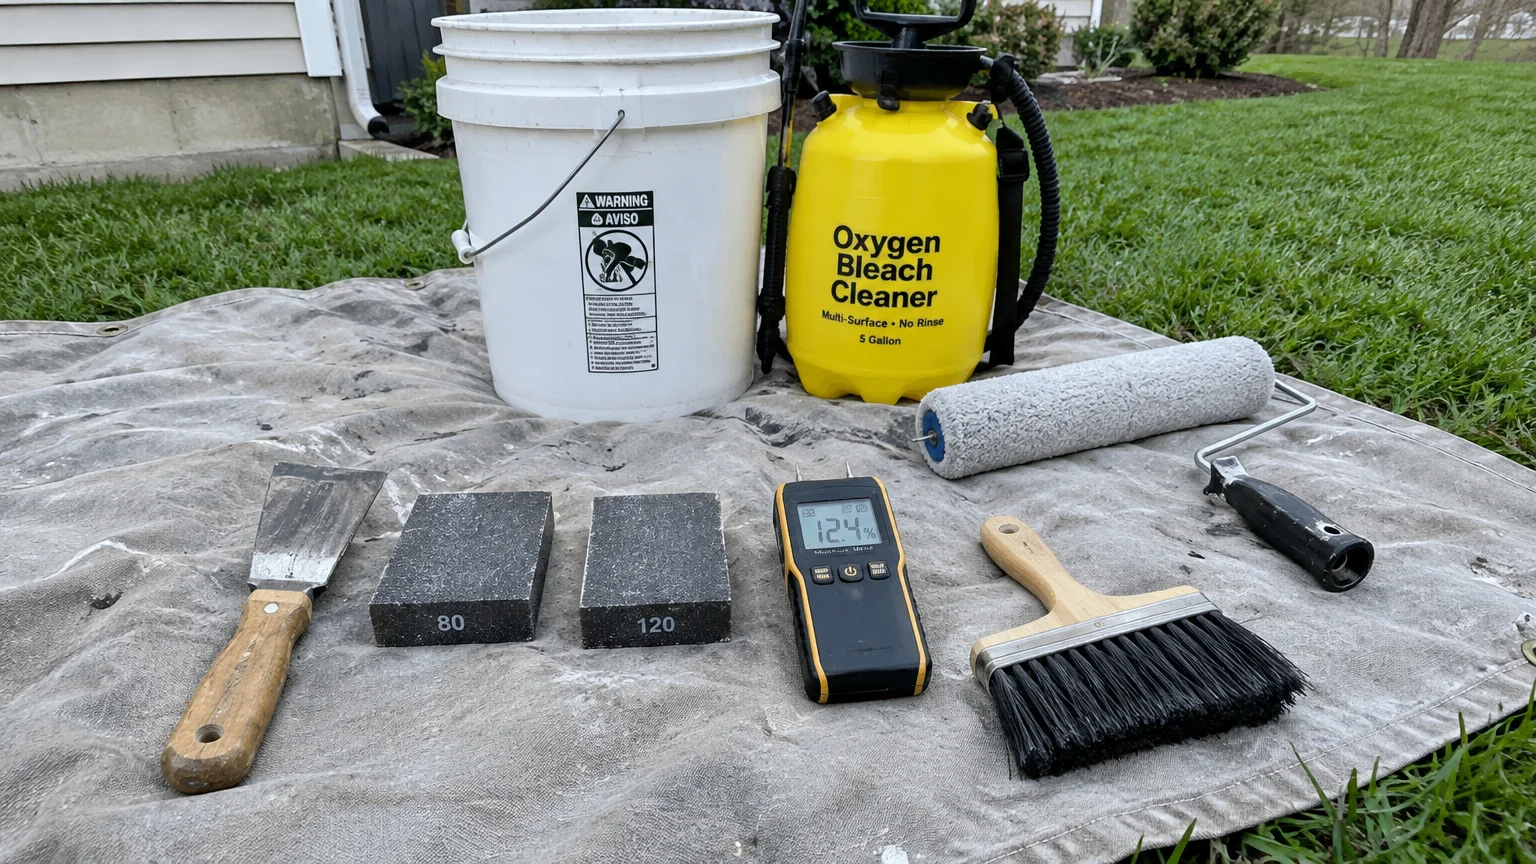
Gathering the proper gear before opening your paint can ensures smooth application and lasting adhesion. High-grade application tools cut your labor time significantly and establish a uniform, protective barrier.
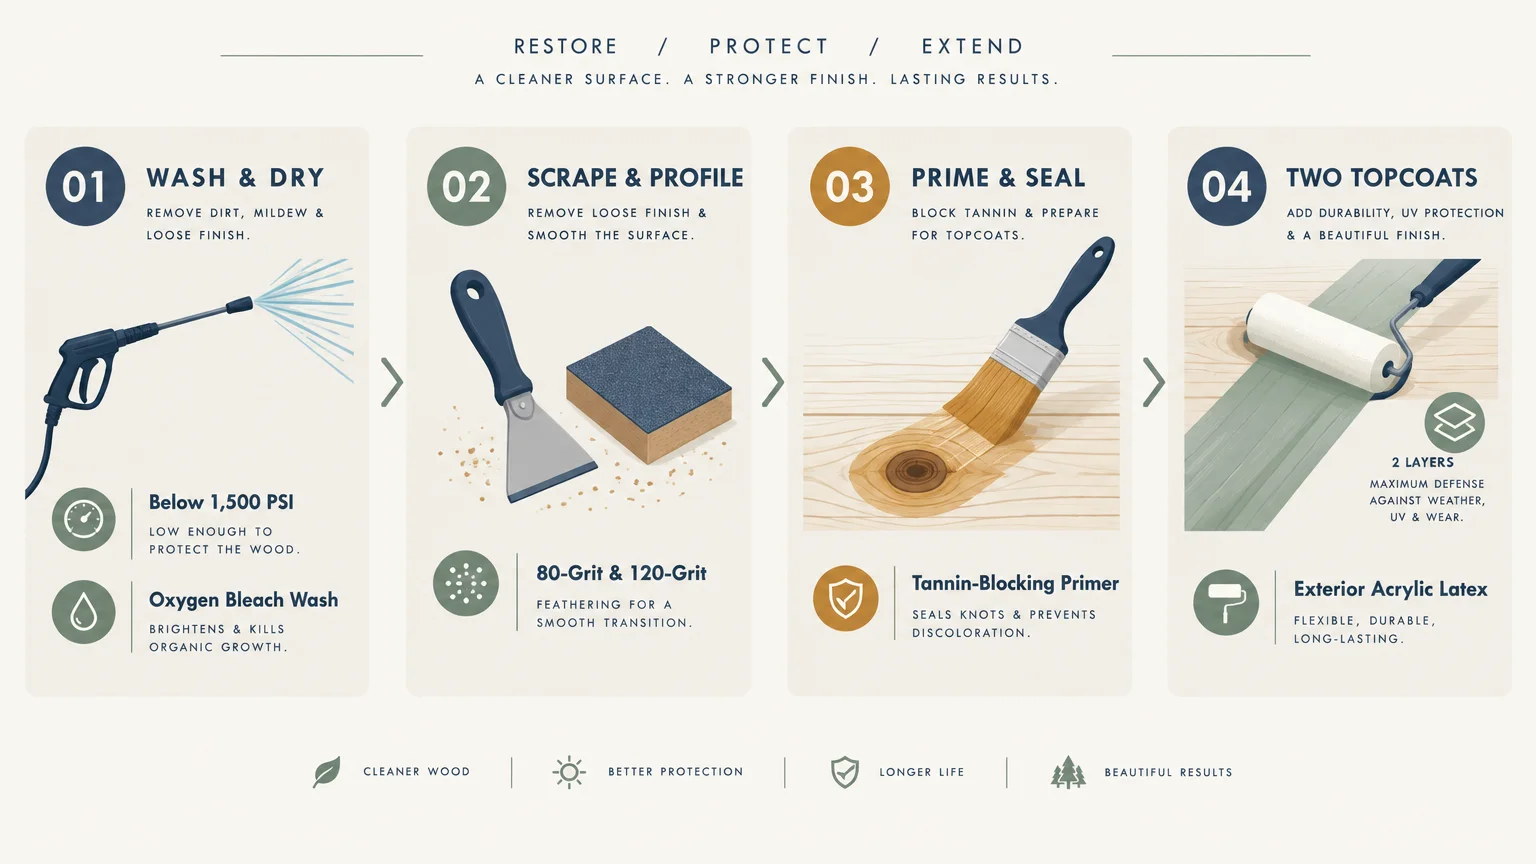
Exterior Acrylic Latex Paint: Plan for two full coats, allocating one gallon per two hundred square feet of rough lumber or three hundred square feet of smooth pickets.
Exterior Wood Primer: Use an oil-based or high-adhesion acrylic exterior primer to block stubborn wood tannins and seal resinous knots.
Oxygen Bleach Cleaner: Choose an outdoor cleaner formulated to remove mildew spores and gray wood fibers without harming surrounding lawn turf.
Pressure Washer or Stiff Brush: A pressure washer operating below fifteen hundred pounds per square inch cleans dirty boards without gouging soft summerwood grain rings.
Hand Scraper and Sanding Sponges: Keep a carbide pull scraper ready alongside eighty-grit and one-hundred-twenty-grit sanding blocks for feathering peeling edges.
Synthetic Paint Brushes: Choose four-inch flat masonry brushes for wide pickets and two-inch angled sash brushes for narrow gaps and gate joints.
Heavy-Duty Drop Cloths: Protect adjacent lawn turf, flowerbeds, and stone paving with heavy canvas drop cloths rather than lightweight plastic sheeting.
Safety Glasses and Work Gloves: Wear protective eyewear when pressure washing and scraping old coatings to shield your eyes from flying timber splinters.
Long-Nap Roller Setup: Select a half-inch to three-quarter-inch synthetic roller cover to drive liquid coating into deep wood pores and textured saw cuts.
Digital Moisture Meter: Use a pin-type moisture gauge to verify the lumber core is dry before applying any primer coat.
Step-by-Step Instructions
Executing an exterior paint project requires patience and methodical preparation. Follow these sequential phases to build a weather-resistant finish that will not blister or peel after a stormy winter season.
Prioritize site safety before beginning any exterior work. Always wear eye protection when pressure washing, and consult local boundary guidelines from the International Code Council regarding residential fence standards.
Phase 1: Surface Cleaning and Decontamination
Inspect your fence line for signs of moss, mildew, and accumulated soil along bottom picket edges. Trim back all overhanging shrubs to provide at least twelve inches of working clearance.
Apply your diluted exterior wood cleaner across the pickets using a garden pump sprayer. Allow the solution to dwell for fifteen minutes so the active foaming agents lift biological grime.
Scrub stubborn algae deposits with a stiff synthetic brush, working along the grain. Rinse the pickets thoroughly with low water pressure to avoid gouging or splintering soft wood grain.
Allow the lumber to dry completely before applying any coating. Test moisture content with your digital moisture meter; wood must read below fifteen percent moisture before proceeding.
Phase 2: Mechanical Scraping and Fastener Repairs
Remove loose or flaking paint with a sharp carbide scraper using steady, even pressure. Feather edges between bare wood and sound paint with eighty-grit sandpaper to eliminate raised ridges.
Check structural fasteners along horizontal runner rails and main support posts. Drive in popped nails or replace corroded hardware with exterior-grade stainless steel or ceramic-coated deck screws.
Replace damaged pickets or warped boards that show signs of severe checking or rot. Sand freshly cut replacement timber smooth so it absorbs primer evenly without excessive suction.
Fill deep splits or gouges with an exterior polyurethane wood filler. Sand cured patches flush with eighty-grit paper so repaired spots disappear seamlessly under your finish coat.
Phase 3: Priming for Maximum Adhesion
Apply a dedicated exterior primer over all bare wood sections and weathered knots. Primer establishes a flexible adhesive bridge that allows weather resistant paint to grip the substrate securely.
Pay close attention to exposed bottom end grains where moisture wicks up from standing ground water. Seal these cut edges generously with primer to prevent bottom-up coating failure.
Let the primer cure according to manufacturer instructions, typically four to eight hours in dry weather. Avoid priming in direct midday sunlight when surface temperatures exceed ninety degrees Fahrenheit.
Phase 4: Applying Weather-Resistant Topcoats
Stir your topcoat thoroughly with a paddle to redistribute dense pigments settled at the container bottom. Follow professional coating guidelines from the Painting Contractors Association by maintaining a continuous wet edge while working.
Cut in joints, picket tops, and narrow gaps first using your two-inch angled brush. Follow immediately with a thick-nap roller to coat the broad vertical face of each board.
Back-brush wet paint into cracks, knots, and grain crevices immediately after rolling. This mechanical working forces the liquid coating deep into wood pores for maximum adhesion.
Allow the first coat to dry for four hours before applying the second coat. Two thin, uniform layers cure thoroughly and resist weathering far better than a single heavy coat.
Pause work immediately if rain threatens within twelve hours. Rain falling on fresh acrylic paint causes surfactant leaching, streaking, and water-spotting blemishes.
Style & Finishing Touches
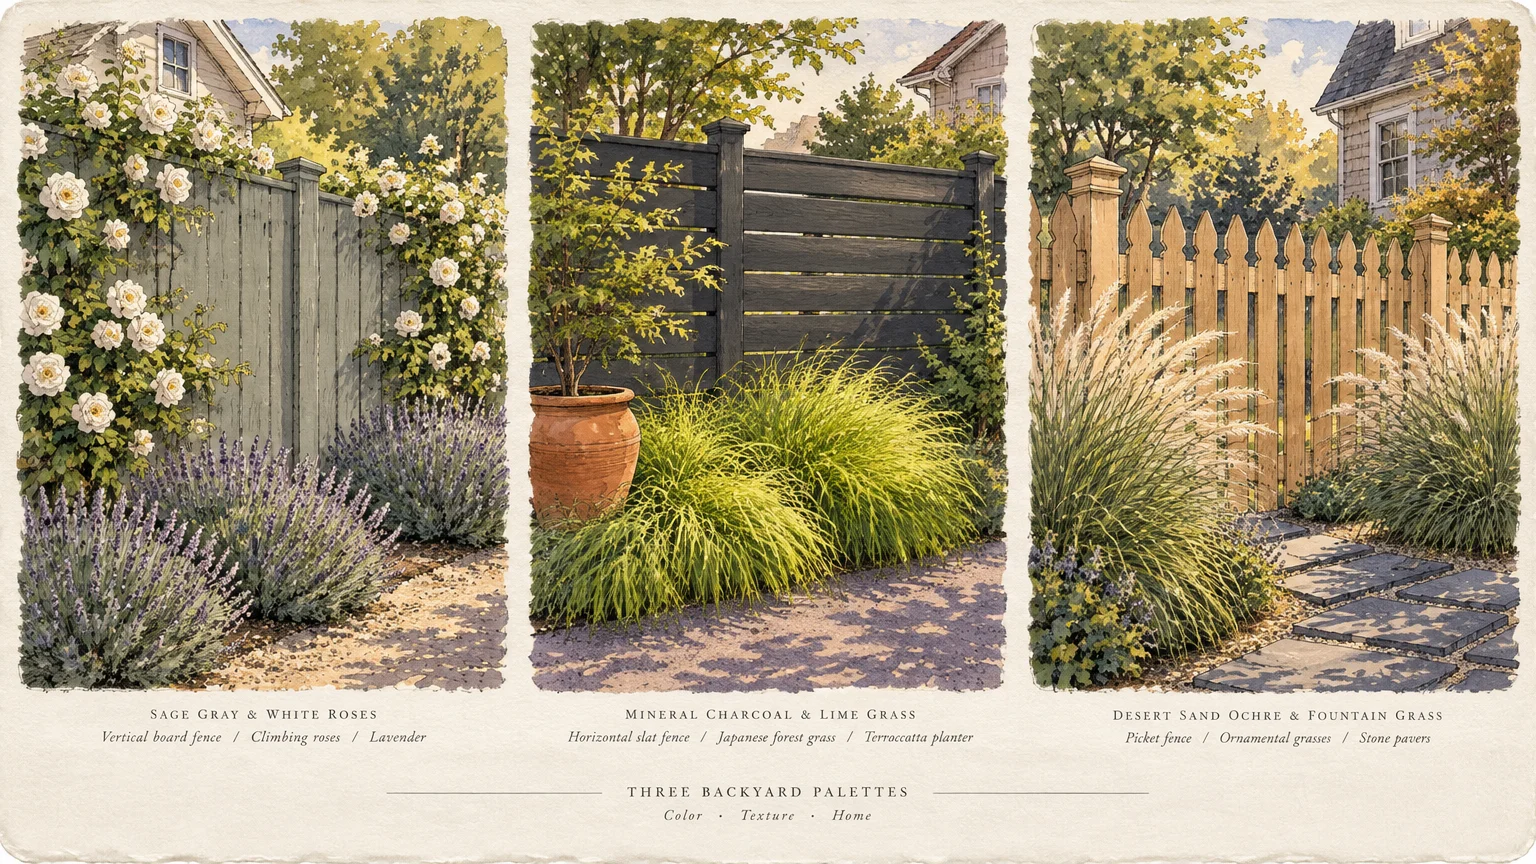
Selecting the right tone transforms your backyard boundary into an intentional design feature. Below are nine proven fence paint colors engineered to hold their depth and beauty against harsh elements.
1. Slate Gray
Slate gray delivers a refined, neutral appearance that complements stone masonry and lush landscaping. Because it sits squarely in the mid-range of reflectance values, it avoids excessive solar heat buildup.
Formulated with inorganic black and white pigments, slate gray resists ultraviolet fade remarkably well over years of exposure. It hides airborne dust and splashback from rain far better than pure white or dark black.
Pair slate gray pickets with cool concrete pavers, galvanized steel planters, and deep green boxwood hedges. It provides a crisp architectural backdrop that lets flowering perennials take center stage.
2. Warm Taupe
Warm taupe blends natural brown undertones with subtle gray warmth, creating an understated earth-toned boundary. Its formulation relies heavily on raw umber and iron oxide pigments that resist solar degradation.
This color excels in arid and prairie climates where windblown dust quickly discolors darker fence surfaces. It blends seamlessly with crushed gravel pathways, ornamental grasses, and natural sand textures.
Taupe harmonizes effortlessly with traditional brick facades and warm stone masonry cladding. It delivers an upscale look without demanding constant power washing or frequent seasonal wipe-downs.
3. Barn Red
Barn red remains an American classic because ferric oxide pigments are practically impervious to sun bleaching. Historically chosen for agricultural outbuildings, this mineral pigment locks onto wood fibers with exceptional resilience.
The earthy red tone provides striking visual contrast against winter snowscapes and summer gardens alike. Its natural mineral composition shields underlying cellulose fibers from destructive ultraviolet degradation.
Use barn red on post-and-rail fences or vertical pickets surrounding traditional cottage or farmhouse architectures. Black wrought-iron latches and rustic copper gate hardware pair exceptionally well with this heritage shade.
4. Deep Charcoal
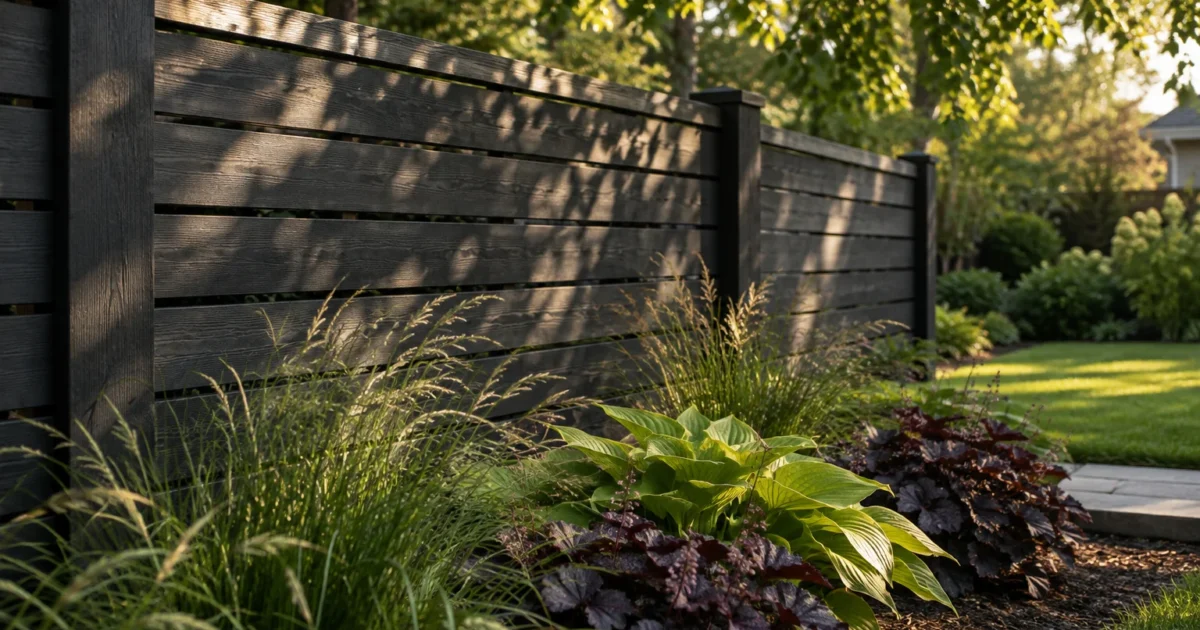
Deep charcoal provides a dramatic, modern aesthetic that makes green foliage and colorful blooms visually pop. High-grade charcoal formulations utilize stabilized carbon black, which withstands intense solar radiation without fading.
While dark tones absorb more radiant heat, quality acrylic binders flex during thermal expansion without rupturing. Always apply charcoal paint over properly cured, dry wood to prevent heat-induced blister formation.
This color makes boundary fences visually recede into shadows, making modest suburban yards feel considerably larger. Combine it with warm string lighting, light wood decking, and architectural ornamental grasses.
5. Forest Green
Deep forest green connects your built structures directly to surrounding tree canopies and mature shrubbery. Formulated with stable chromium oxide greens, this shade resists yellowing and chalking under severe weather.
The deep botanical hue masks pollen accumulation, garden splashing, and minor algae spots along damp fence lines. It represents one of the best fence colors for rainy climates and heavily shaded properties.
Forest green looks stunning on traditional lap fencing, lattice privacy screens, and garden enclosures. Pair it with brass gate hardware and natural limestone accents for an elegant woodland aesthetic.
6. Rich Espresso Brown
Espresso brown gives standard pressure-treated pine the luxurious appearance of exotic tropical hardwoods. Dense burnt-umber pigments provide outstanding hiding power that blankets knots and surface imperfections completely.
The rich, saturated hue protects lumber against driving rains and heavy snowdrifts common in northern zones. It reflects minimal glare, making sunny backyard patios feel comfortable and visually grounded.
Upgrade an espresso brown fence with modern matte black post caps and downward-facing solar step lights. It works beautifully alongside modern horizontal slat designs and warm cedar deck boards.
7. Soft Alabaster White
Stark titanium white often feels harsh and highlights every trace of splashed garden mud. Soft alabaster white introduces warm cream undertones, offering timeless colonial charm with far better practical durability.
With a high Light Reflectance Value, soft white reflects intense heat away from your fence boards. This thermal defense prevents thin wood pickets from cupping, splitting, and warping during record summer heatwaves.
Alabaster white provides the quintessential backdrop for climbing roses, hydrangeas, and perimeter flowerbeds. Choose a semi-gloss sheen to shed rainwater droplets and prevent dirt particles from clinging.
8. Weathered Cedar
A solid outdoor fence stain in weathered cedar provides the organic look of aged timber with modern chemical protection. It balances warm amber tones with subtle gray notes, mimicking premium kiln-dried western red cedar.
This shade uses iron oxide pigments to filter harsh ultraviolet light while letting natural wood grain textures show. It ages gracefully, disguising surface wear and small scuffs from lawnmowers or string trimmers.
Weathered cedar pairs naturally with craftsman bungalows, rustic cabins, and contemporary naturalistic landscape plans. It requires zero color-matching stress when adding new fence sections or companion pergolas later.
9. Coastal Navy Blue
Coastal navy blue brings seaside sophistication and rich architectural presence to suburban perimeter fencing. Formulated with heavy-duty exterior acrylic resins, marine-grade navy pigments resist fading under salty air and intense sunshine.
Navy creates an unexpected, upscale backdrop that makes yellow perennials and bright white outdoor furniture stand out. It hides dark water marks and organic stains far better than lighter pastels.
Anchor coastal navy fencing with polished chrome or brushed nickel gate hardware for crisp nautical elegance. It offers a memorable fence makeover that stands out in any neighborhood.
Design Upgrades and Material Pairings
Elevate your chosen color scheme by upgrading functional hardware and perimeter accessories during your fence makeover. Swapping zinc-plated latches for powder-coated stainless steel hardware prevents unsightly rust stains from dripping down pickets.
Add protective copper or aluminum post caps over exposed end grains atop each vertical support post. These caps divert rain runoff away from vulnerable end grain while introducing contrasting architectural metal accents.
Integrate low-voltage post lights or solar cap fixtures to highlight your new paint color after dusk. Downward-facing perimeter lighting casts soft shadows across textured wood surfaces without blinding adjacent neighbors.
Maintenance & Long-Term Care
Even the most durable paint system requires ongoing attention to deliver a full decade of service. Simple seasonal habits prevent organic matter from degrading your topcoat prematurely.
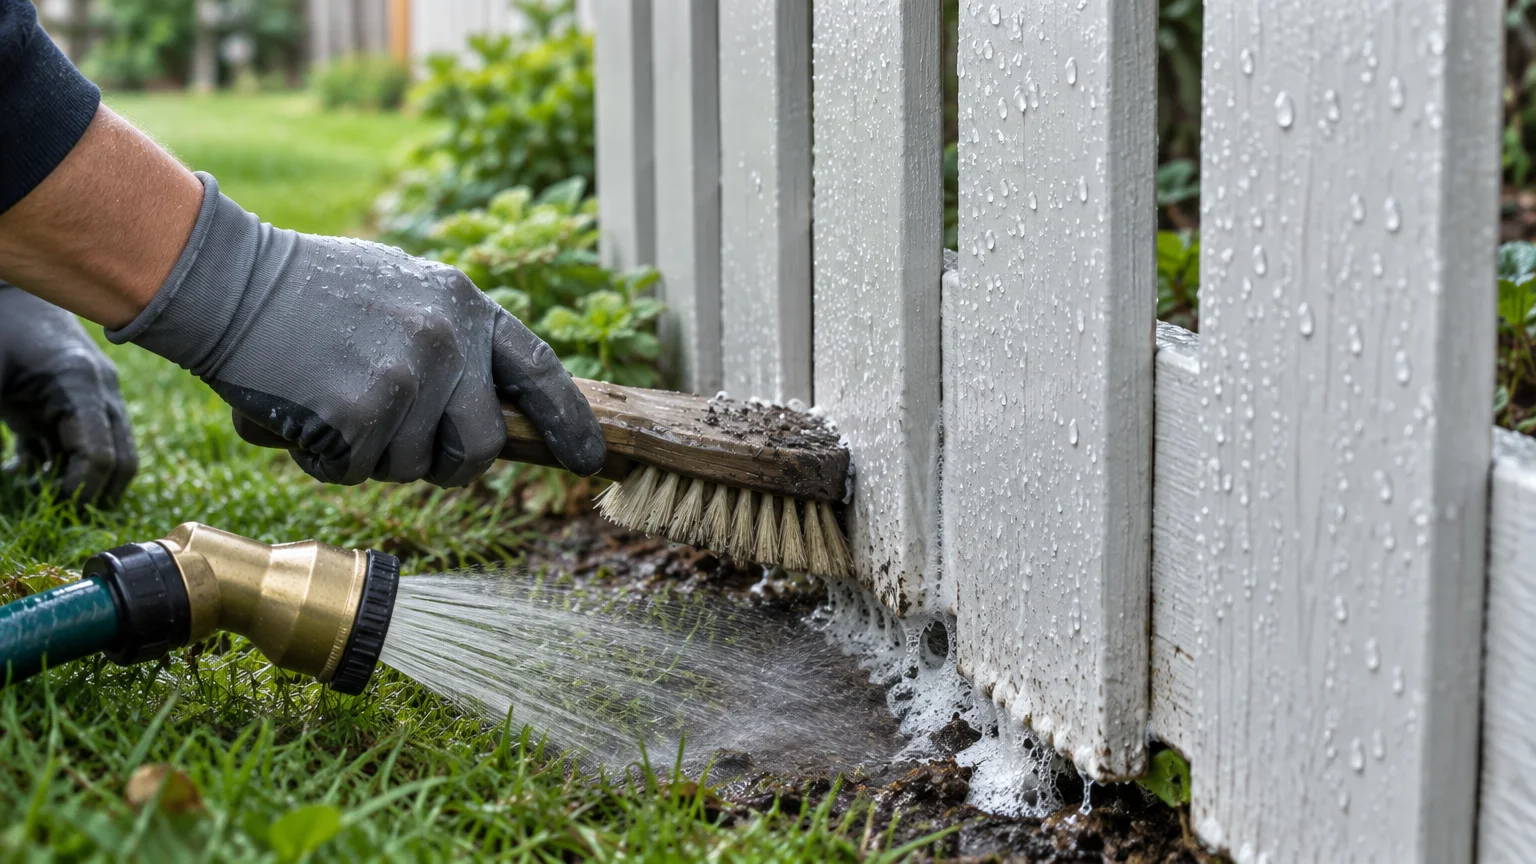
Wash your fence once a year every spring with a gentle garden hose sprayer and mild dish soap. Removing accumulated dust, salt deposits, and pollen preserves binder flexibility and delays pigment oxidation.
Maintain at least two inches of clear air gap between the bottom of your pickets and mulch beds. Direct contact with organic mulch traps dampness against painted wood, accelerating rot and blister development.
Inspect gate posts and high-friction hinge points every autumn for minor surface abrasions or hairline cracks. Spot-prime exposed timber immediately with an angled brush before freezing winter temperatures arrive.
Check fasteners annually to ensure shifting ground frost has not backed mounting screws out of runner rails. Tightening loose hardware promptly stops gate sagging and reduces physical stress on adjacent painted pickets.
FAQ
Is paint or outdoor fence stain better for wet climates?
High-quality acrylic latex paint creates a thicker film barrier that shields wood from continuous rain and fungal spore growth. However, penetrating stain never peels; it simply fades gradually, making eventual recoating easier without intensive mechanical scraping.
What Light Reflectance Value lasts longest outdoors?
Colors with a medium Light Reflectance Value between thirty and fifty generally endure weather best. They reflect sufficient radiant solar energy to avoid warping wood while containing enough protective pigments to resist ultraviolet degradation.
How many coats of weather resistant paint should you apply?
Always apply one dedicated exterior primer coat followed by two full topcoats on bare or weathered wood. Two topcoats ensure consistent film thickness, complete color saturation, and dependable weatherproofing performance across all exposed lumber faces.
Can you paint a brand-new pressure-treated pine fence immediately?
Never paint fresh pressure-treated lumber right after installation; it contains heavy chemical moisture that pushes paint off. Wait two to six months until water droplets soak into the wood rather than beading on the surface.
What paint sheen works best on exterior wood fences?
Satin and semi-gloss finishes perform best on exterior fences because their smoother surface repels moisture and airborne grime effectively. Flat finishes absorb dirt too easily, while full gloss finishes highlight every structural flaw and knot in the wood.
Takeaway & Next Steps
A fresh coat of resilient paint does more than elevate your home exterior; it preserves your timber investment for years. Selecting time-tested fence paint colors backed by inorganic pigments shields boundary lines against moisture, heat, and seasonal decay.
Follow the proper application sequence to lock in lasting weather protection across every square foot of your perimeter. Thorough surface prep, tannin-blocking primer, and dual topcoats guarantee a finish that survives the harshest seasons.
Step 1: Check Timber Moisture: Inspect pickets with a digital moisture meter to confirm water levels stay safely under fifteen percent before opening any paint can.
Step 2: Procure Weatherproof Supplies: Purchase high-grade acrylic exterior primer, durable topcoat paint, synthetic brushes, and replacement stainless fasteners.
Step 3: Sample Test Swatches: Paint small sample patches directly onto scrap pickets to observe color depth under full midday sun and twilight shadows.
We want to see your backyard transformations! Share your finished fence makeover photos with our community or subscribe for weekly renovation ideas and expert outdoor guidance.