Step-by-Step Instructions
Follow these four distinct phases to execute an accurate radon screening that meets established industry standards.
Phase 1: Location Selection and Device Preparation
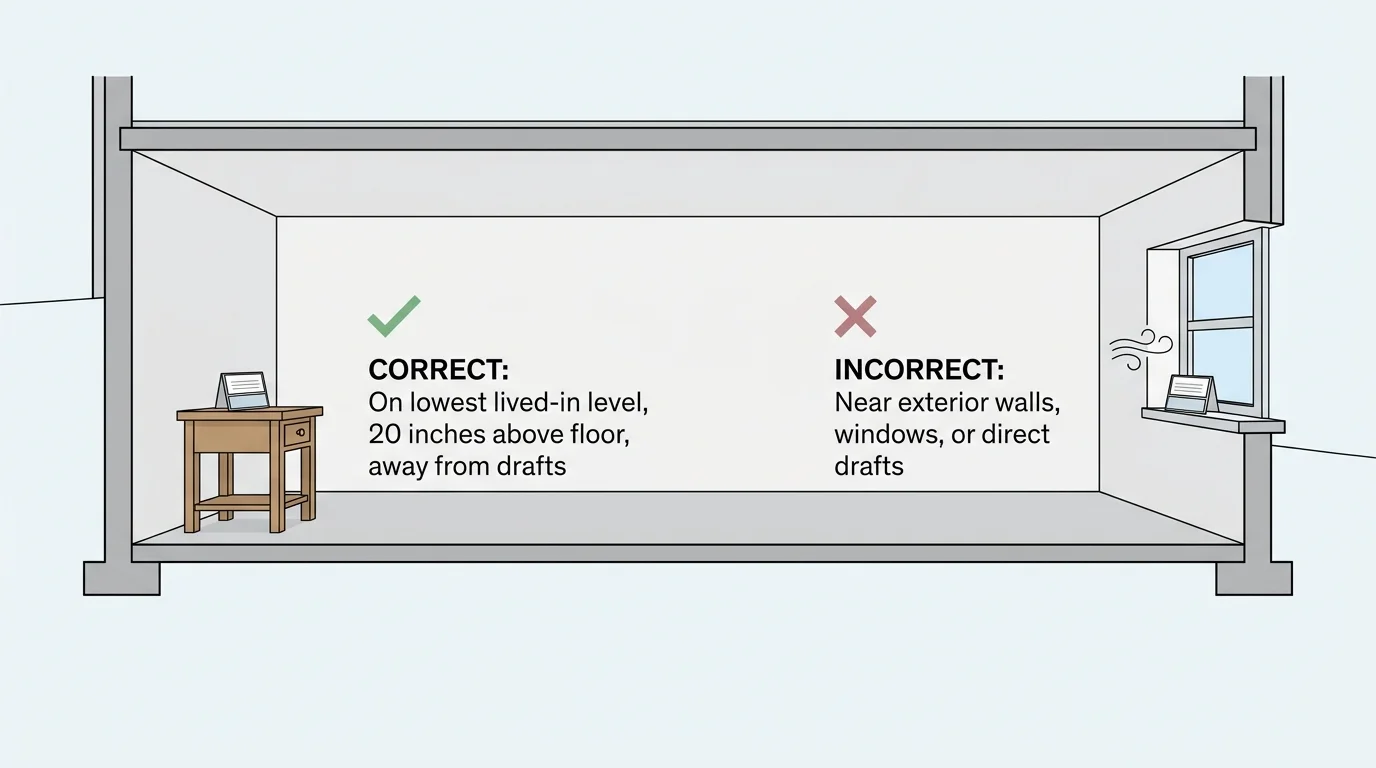
Select the lowest lived-in level of your home, such as a finished basement, a ground-floor living room, or an unfinished basement you plan to renovate soon. Avoid placing testing devices in kitchens, bathrooms, laundry rooms, closets, crawl spaces, or hallways. High humidity and high-velocity drafts distort charcoal absorption readings. Position the test canister at least 20 inches above the finished floor, at least 3 feet away from exterior walls, and at least 4 inches away from other objects. Keep the unit away from direct sunlight, baseboard heaters, forced-air supply registers, and drafty windows.
Phase 2: Initiating the Exposure Window
Open the test packaging carefully and record the exact start date, hour, and minute on the laboratory information form. Place the container securely on a table, shelf, or suspended wire stand within your designated breathing zone—typically between 2 and 6 feet above the floor. Leave the testing device undisturbed for the precise duration specified by the manufacturer, which usually ranges from 48 to 72 hours for short-term charcoal canisters.
Phase 3: Sealing and Expedited Laboratory Mailing
Once the exposure period concludes, seal the test kit immediately using the provided adhesive tape or airtight cap. Note the exact stopping time on the paperwork. Radon decays quickly with a half-life of roughly 3.8 days; therefore, you must mail the package to the processing laboratory immediately via priority mail or hand-deliver it to an accredited local testing facility within 24 to 48 hours of closure.
Phase 4: Interpreting Results and Executing Corrective Measures
Review your official laboratory test report against national environmental health guidelines:
Under 2.0 pCi/L: Your indoor radon concentration sits near normal ambient levels. No mechanical mitigation is necessary; simply re-test your home every two years.
2.0 to 3.9 pCi/L: Your home falls below the federal action limit but carries elevated levels compared to outdoor air. Consider proactive mitigation if you have family members who smoke or if you spend extended hours in lower-level living spaces.
4.0 pCi/L and Above: Your test confirms dangerous indoor concentrations. Contact a certified radon mitigation professional immediately to design and install an active sub-slab depressurization system. Standard active mitigation systems cost between $800 and $2,500, with the national average falling around $1,200 to $1,500 depending on foundation footprint, structural complexity, and local labor rates.