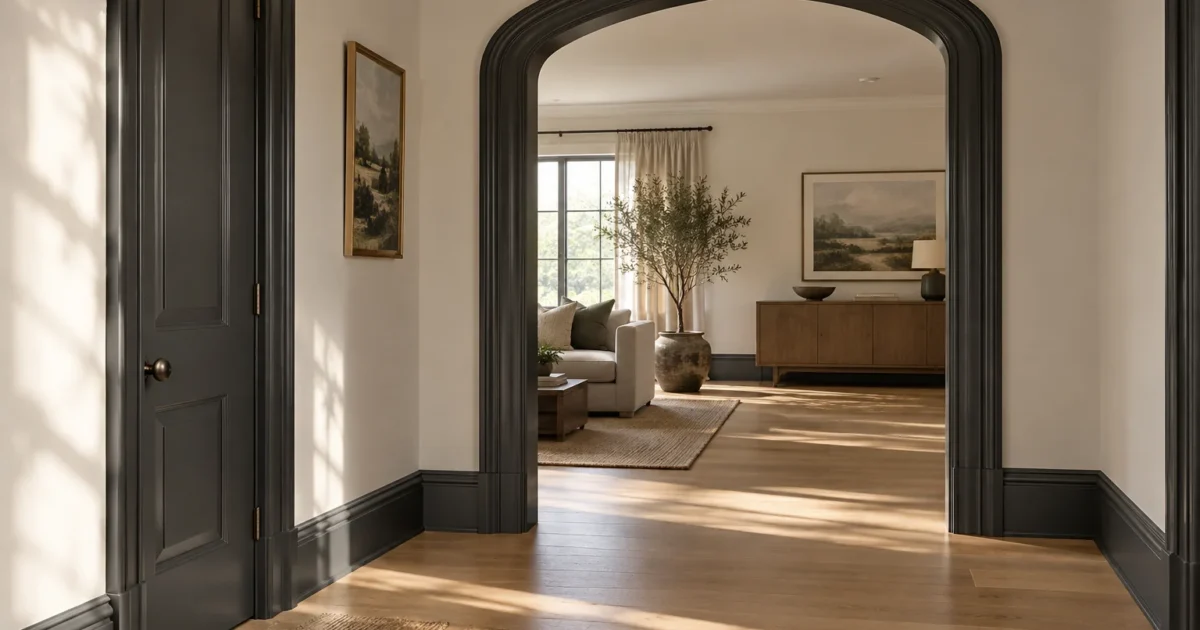
Refreshing your interior woodwork with bold paint transforms flat, builder-grade architecture into a custom focal point. Choosing the right contrasting trim colors instantly draws the eye and highlights distinctive moldings without the expense of a full structural remodel.
Whether you want to modernize baseboards or frame a window like artwork, unexpected trim paint colors establish immediate depth. This visual anchor pulls your existing wall shades into crisp focus throughout your home.
Our guide details eleven designer-tested paint shades that make architectural details command attention; we also outline every prep step for lasting results. Discover how high-impact accent trim ideas bring professional polish to your living space.
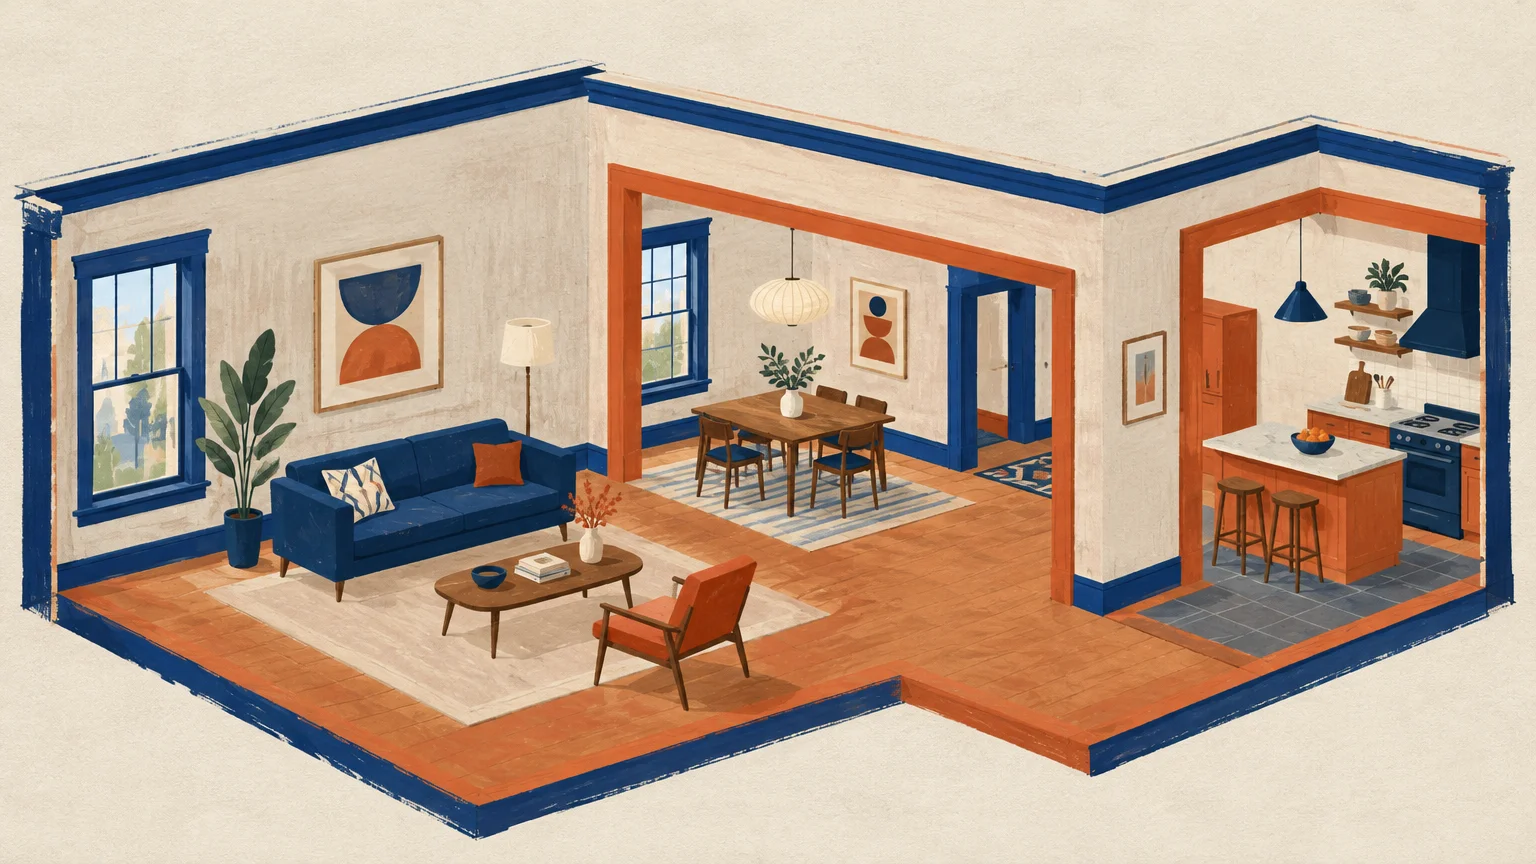
Project Overview & Why It Matters
Most interior spaces default to standard off-white woodwork out of habit rather than deliberate design. You miss a massive opportunity to define room boundaries when you treat casing as an invisible boundary.
Choosing vibrant paint colors trim pop strategies allows you to accentuate high ceilings, crown molding, and deep window reveals. Highlighting these structural assets immediately increases perceived architectural value.
Painting baseboards and door casings demands less total paint than coating an entire room; therefore, it delivers maximum visual return for your investment. You can easily complete a standard living area over a single weekend.
Beyond aesthetics, quality interior trim paint protects vulnerable woodwork from everyday scuffs, vacuum cleaner dings, and moisture intrusion. A durable enamel acts as a physical shield against household wear.
Contrasting trim also lets you experiment with striking hues without overwhelming your everyday sightlines. You ground bright wall surfaces while introducing bespoke color accents that reflect your personal taste.
11 Dynamic Paint Colors That Make Trim Pop
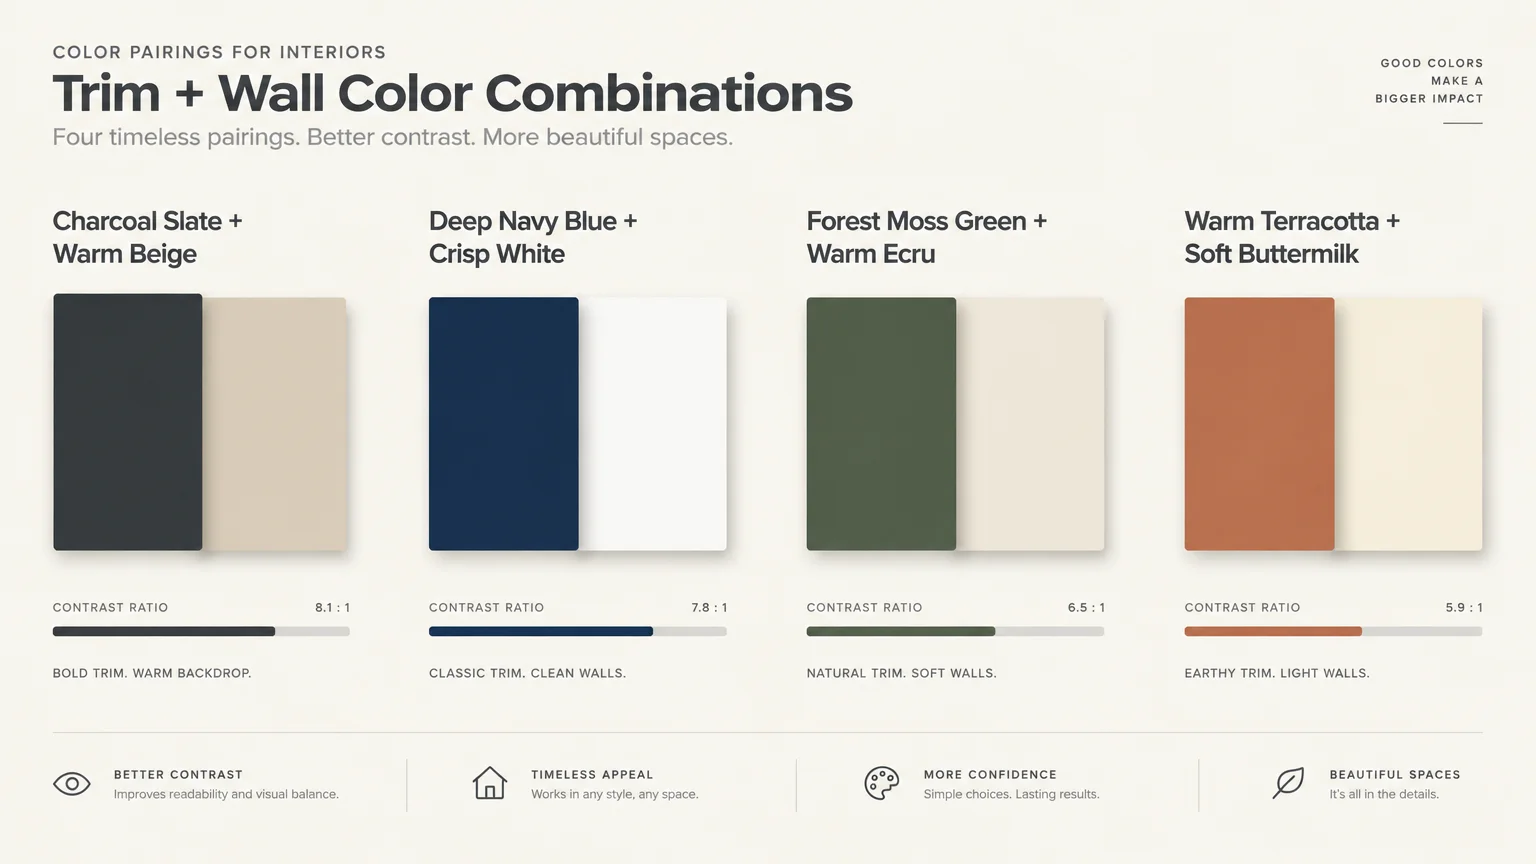
These eleven curated shades demonstrate how thoughtful contrast revitalizes interior spaces across traditional, transitional, and modern designs. Each selection pairs strategically with complementary wall tones to maximize visual energy.
1. Charcoal Slate
Charcoal slate delivers a grounded, moody edge without the stark severity of pure black. Its subtle undertones shift between cool graphite and gentle blue under changing natural sunlight.
Apply charcoal slate against warm beige, creamy off-white, or soft taupe walls. This contrast frames doorways crisply and lends historical millwork an updated, tailored presence.
2. Deep Navy Blue
Classic navy provides dignified elegance that works exceptionally well in dining rooms, home libraries, and primary bedrooms. The deep sapphire undertone adds sophistication without clashing against neutral wall surfaces.
Pair navy interior trim paint with crisp white or pale ivory walls for a timeless coastal aesthetic. Alternatively, balance it with warm wood furniture to craft a cozy, tailored den.
3. Forest Moss Green
Deep moss green establishes an earthy organic connection that softens rigid architectural lines. It reflects foliage from outdoor views while infusing interior hallways with serene visual depth.
This rich botanical tone looks radiant beside warm ecru, light linen, or blush wall paints. It emphasizes the intricate profiles of historic baseboards and Craftsman-style window frames.
4. Warm Terracotta
Earthy terracotta injects warmth, vitality, and southwestern flair into otherwise subdued living quarters. Its clay undertones brighten rooms that suffer from cold northern window exposure.
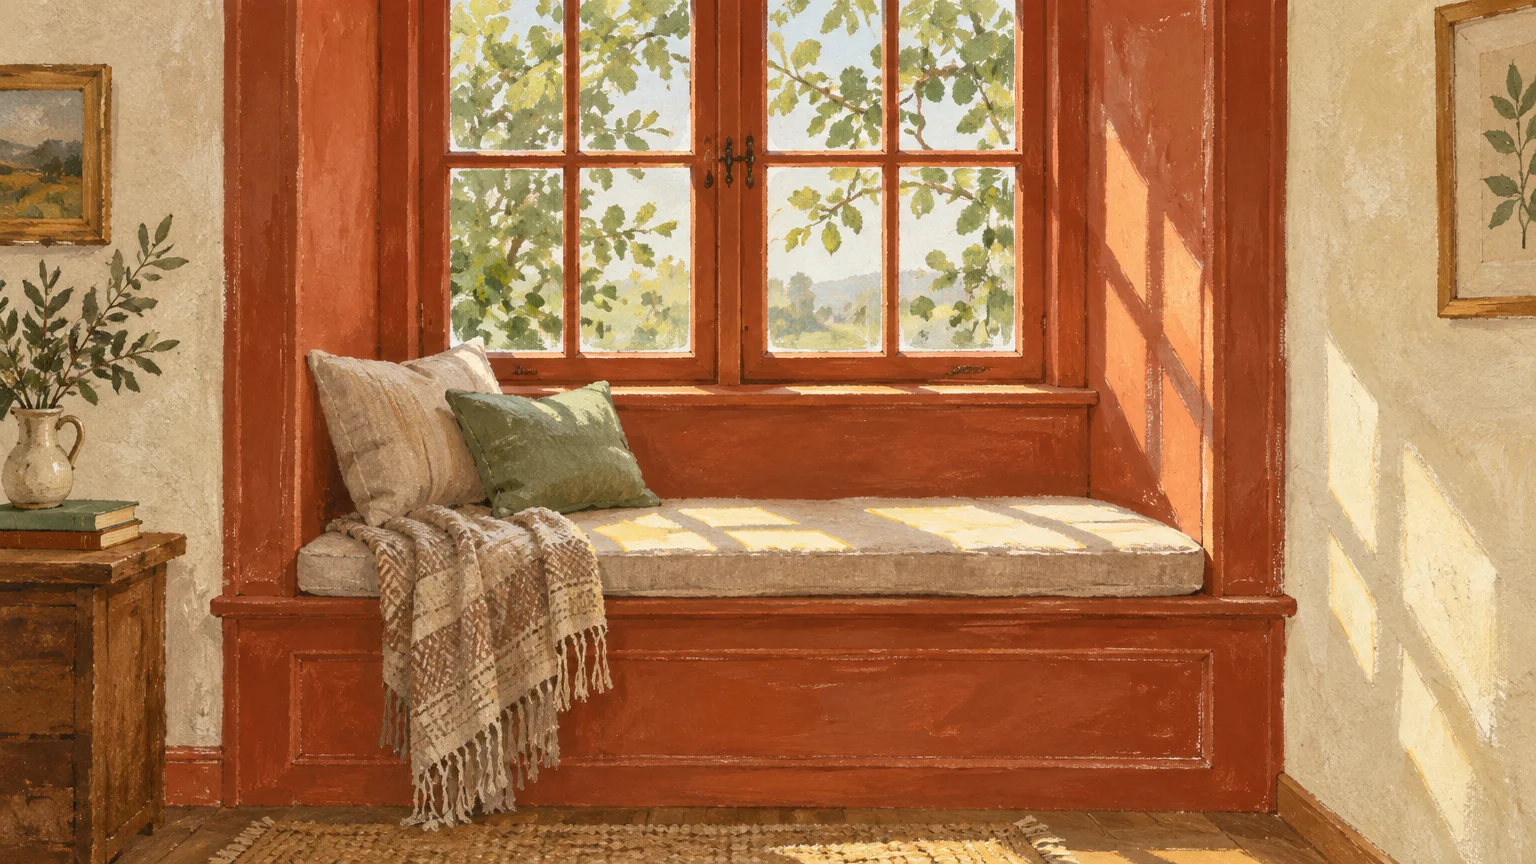
Combine terracotta woodwork with soft buttermilk, sandy white, or pale sage walls. This cheerful balance creates a sun-drenched feel across family gathering areas and entry vestibules.
5. Crisp Pure White
While white remains standard, a stark, ultra-clean white trim creates sensational contrast when paired with rich, dark walls. The brilliant reflection sharpens border definition against navy, forest green, or charcoal.
Select a pure base with zero yellow undertones to ensure maximum distinction. This combination delivers clean borders that make rich, dramatic wall shades stand out boldly.
6. Muted Greige
Greige combines the calming neutrality of gray with the inviting warmth of classic beige. Painting trim slightly darker than your walls creates an elegant, tone-on-tone effect known as reverse contrast.
Layer greige millwork against chalky white or pale cream walls in open-concept living rooms. The subtle shift defines architectural planes without breaking room continuity.
7. Dramatic Pitch Black
True black trim acts like heavy mascara for your home, framing windows and entry passages with unapologetic drama. It creates a sleek, industrial edge that instantly modernizes standard drywall returns.
Keep walls light—such as alabaster, pale gray, or crisp white—to preserve balanced illumination. This pairing turns ordinary window grids into striking graphic art pieces.
8. Soft Powder Blue
Soft powder blue introduces tranquil, vintage-inspired charm into breakfast nooks, nurseries, and laundry areas. It creates an airy perimeter that mimics sunny morning horizons.
Pair this gentle pastel trim with bright white, warm cream, or pale biscuit walls. The quiet contrast offers refreshing character without dominating adjacent furnishings.
9. Rich Ochre Gold
Mustard and ochre tones evoke historic European manor style with daring, contemporary warmth. This saturated golden hue brings warmth and cheerful energy to compact foyers and guest powder rooms.
Display ochre millwork alongside muted navy, dove gray, or crisp white surfaces. The warm trim balances cool wall shades and catches lamplight beautifully during evening hours.
10. Plum Aubergine
Aubergine trim delivers an unexpected, luxurious statement that radiates creative confidence. Its purple and brown undertones produce a velvety backdrop suitable for creative studios or dining areas.
Position deep plum baseboards against pale sage, parchment white, or dusky rose walls. This opulent scheme evokes boutique hotel design right inside your own residence.
11. Sage Gray
Sage gray offers a soothing, versatile hue that blends quiet herbal tones with silver undertones. It creates a gentle contrast that suits farmhouse, coastal, and mid-century interiors alike.
Pair sage gray casing with clean warm white or soft greige walls. The botanical whisper highlights window mullions without competing against surrounding artwork or textiles.
Tools, Materials, and Prep Checklist
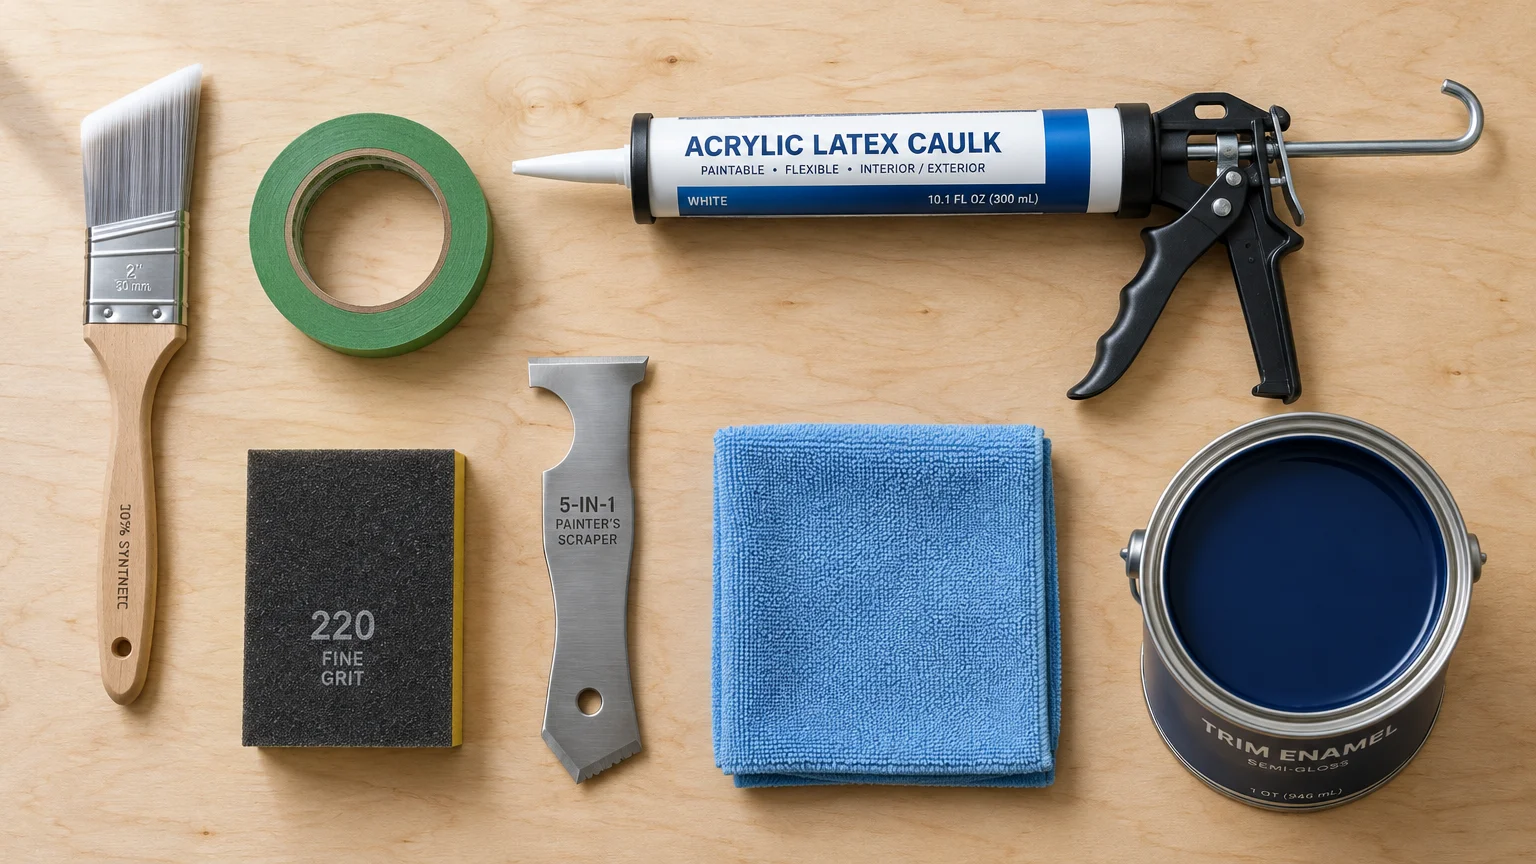
Flawless trim painting demands thorough prep work and the right specialty tools before you open a paint can. Woodwork displays brush strokes and drips far more easily than drywall surfaces.
Enamel trim paint: Purchase semi-gloss or satin interior enamel formulated specifically for doors and millwork. A single gallon covers roughly four hundred square feet of standard casing.
Bonding primer: Use an acrylic or oil-based primer to seal bare wood and lock down existing finishes. Bonding primers ensure maximum adhesion over slick old coats.
Sanding supplies: Gather medium 120-grit sanding sponges for smoothing bumps and fine 220-grit paper for scuffing between coats. Sanding creates mechanical grip for fresh enamel.
Painter tape: Invest in high-performance delicate surface tape with edge-lock technology. Quality tape stops dark trim paint from bleeding backward onto your finished walls.
Paintable caulk: Select an elastomeric acrylic caulk to seal gaps along baseboards and drywall joints. Clean caulking lines make finished paint appear seamless and professional.
Brushes and mini rollers: Keep a two-inch angled sash brush for detailed cuts and a four-inch microfiber mini roller for broad baseboard expanses.
Heavy canvas drop cloths: Lay thick canvas drop cloths along floor perimeters rather than slippery plastic. Canvas absorbs paint drips immediately and protects hardwood from ladder scrapes.
Cleaning supplies: Mix trisodium phosphate substitute or mild degreaser with clean water to wipe away body oils, grime, and dust. Surfaces must remain spotless prior to priming.
Handheld paint pail: Use a lightweight plastic paint pail equipped with disposable liners and an integrated magnetic brush holder. This accessory keeps your brush clean while climbing stepladders.
Step-by-Step Instructions
Transform your woodwork through a deliberate, structured application process. Rushing your timeline causes runs, lap marks, and peeling paint later on.
Phase 1: Surface Preparation and Cleaning
Vacuum baseboards with a brush attachment to remove loose dirt and pet hair along floor perimeters. Wipe all trim using a microfiber cloth dampened with degreaser solution.
Scrape away loose, peeling layers using a stiff putty knife. Sand glossy existing paint with 120-grit abrasive sponges until the sheen appears entirely dull.
If your home was constructed before 1978, test for lead before scraping or dry sanding. Review the EPA Lead Renovation Guidelines to handle vintage coatings safely.
Ensure adequate air exchange throughout your workspace while sanding and painting. Follow OSHA Indoor Ventilation Standards by opening windows and using box fans.
Phase 2: Caulking and Masking
Wipe down the sanded trim with a damp tack cloth to capture airborne dust particles. Fill nail holes with wood filler, scraping the surface flush with your putty blade.
Run a continuous, pencil-thin bead of paintable caulk along joints where molding meets drywall. Smooth the wet caulk using a moistened fingertip; wipe away excess immediately with a rag.
Allow caulk to cure fully according to label instructions before applying painter tape. Premature taping pulls wet caulk away from the seam, ruining your clean border.
Apply painter tape along adjoining wall boundaries and floor edges. Press the tape edges down firmly using a clean putty knife to ensure leak-free seals.
When painting baseboards over carpeting, slide a wide metal paint shield beneath the lower wood edge. Depress the carpet pile firmly as you apply brush strokes along the base.
Phase 3: Priming and Applying the Enamel
Brush a smooth coat of bonding primer over bare timber, repaired nail holes, and heavily contrasted surfaces. Let the primer dry for two hours before lightly scuff-sanding with 220-grit sandpaper.
Pour your chosen trim paint colors into a handheld cut bucket. Dip the angled brush one-third into the enamel and tap off excess paint against the interior bucket wall.
Apply paint using smooth, directional brush strokes following the wood grain pattern. Maintain a wet edge along running boards to prevent lap marks from forming mid-span.
For flat baseboards and wide casings, lay on paint with a mini microfiber roller first; tip it off lightly with your brush tip. This technique leaves a flawless, factory-grade finish.
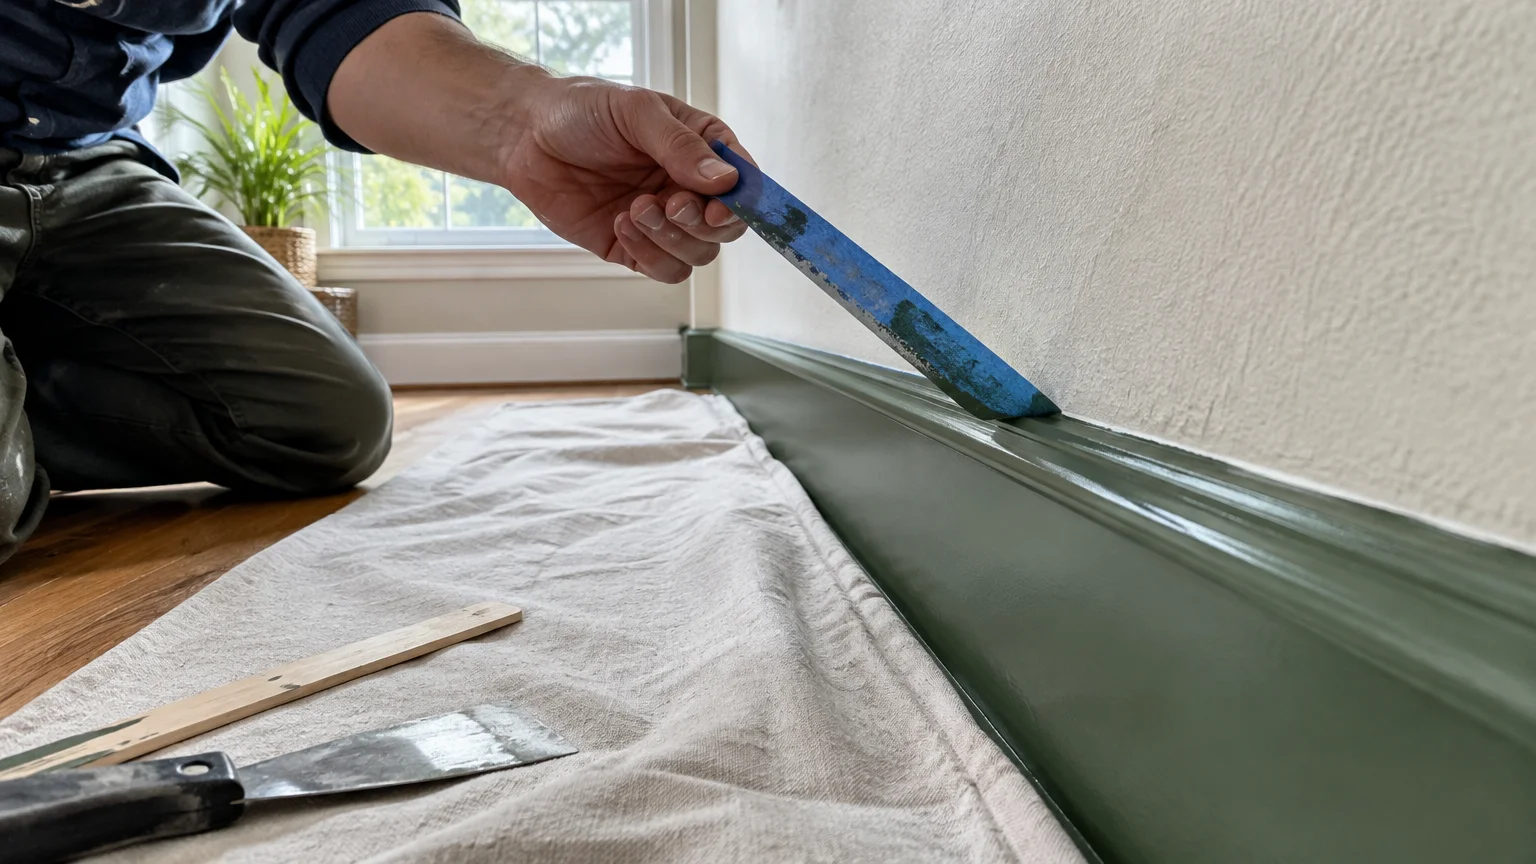
Allow the first coat to dry four full hours before applying the second coat. Remove painter tape while the second coat remains slightly tacky to prevent tearing dried paint skin.
Pull painter tape backward at a sharp forty-five-degree angle toward yourself. This clean angle slices the paint line neatly, yielding an immaculate, razor-sharp edge.
Style & Finishing Touches
Sheen plays a vital role when implementing accent trim ideas throughout your home. Semi-gloss reflects light crisply, framing openings and highlighting woodwork details with sophisticated contrast.
Satin enamel provides a softer, velvety finish that conceals minor surface imperfections on older, dented wood. Satin works exceptionally well for deep charcoal, terracotta, or matte black trims.
Coordinate your trim color with architectural hardware such as door hinges, strike plates, and passage knobs. Deep navy or forest green trim pairs magnificently with unlacquered brass hardware.
Matte black trim pairs naturally with brushed nickel or matte black fixtures for an integrated industrial look. Polished chrome shines bright against crisp white and cool gray woodwork.
Consider painting interior doors the same bold hue as your trim for an enveloping, architectural statement. This intentional treatment makes small entryways and narrow hallways feel customized and grand.
Carry trim accents upward onto ceiling beams and crown moldings to visually expand vertical volume. Mirroring baseboard colors on ceiling framework anchors high spaces with cozy symmetry.
Pay attention to room lighting temperature when finalizing your contrasting trim paint. Warm incandescent bulbs enhance yellow ochre and terracotta, while cool natural daylight flatters navy and slate.
Test your selected hue across multiple lighting conditions before committing to an entire room. Paint large test swatches directly onto scrap trim pieces and view them morning, noon, and night.
Maintenance & Long-Term Care
Allow new interior trim paint thirty days to achieve maximum chemical cure and durability. Avoid harsh scrubbing or abrasive cleaners during this initial curing window.
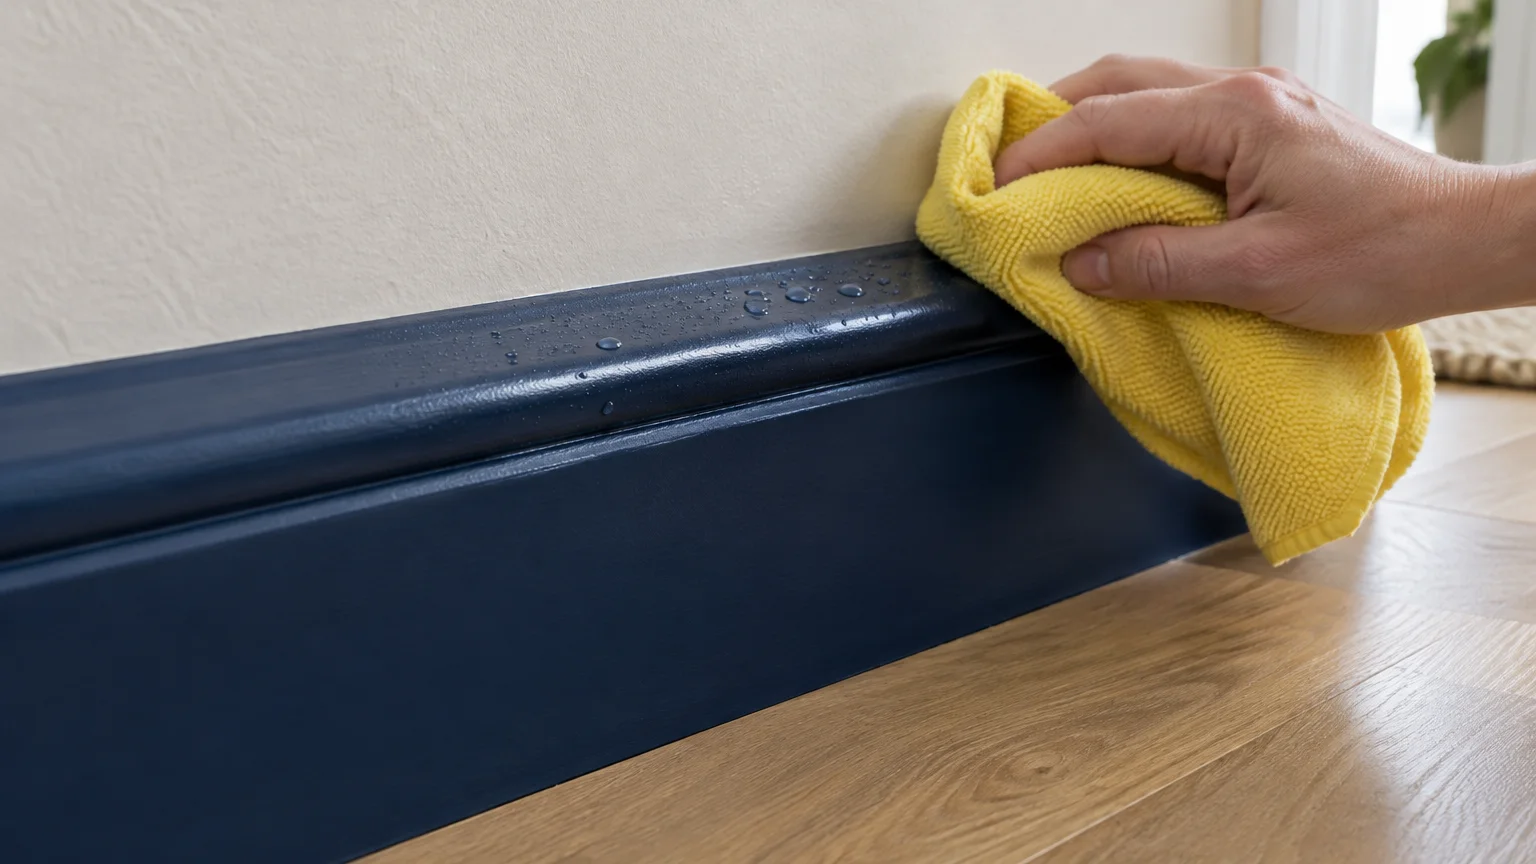
Dust your baseboards weekly using a soft microfiber wand or vacuum brush attachment. Regular dusting stops airborne debris from bonding to the paint film.
Clean scuffs and handprints using warm water and a few drops of mild dish soap. Use soft cotton rags rather than abrasive scrub sponges to protect the enamel finish.
Store leftover trim enamel inside airtight glass jars labeled with the color formula and room location. Keep touch-up foam brushes handy for instant repairs when furniture scuffs occur.
When applying touch-ups, feather the paint edges using a nearly dry artist brush. Blending the perimeter prevents noticeable flash spots on older cured paint.
Inspect high-traffic doorways annually for pet scratches or vacuum strikes. Touching up chipped corners promptly prevents moisture from penetrating the underlying timber substrate.
FAQ
Should trim always be lighter than wall paint?
Not at all; painting trim darker than walls creates reverse contrast that frames room boundaries with striking sophistication. This modern design strategy adds depth while highlighting handsome architectural moldings.
What paint sheen works best for interior trim?
Semi-gloss and satin sheens work best for interior woodwork and door casings. Both options provide the scrub resistance and moisture protection required for high-contact surfaces.
Do I need to sand finished trim before painting?
Yes, you must scuff-sand glossy surfaces with 120-grit or 220-grit abrasives before painting. Scuffing creates mechanical profile so your new primer and enamel adhere firmly without peeling.
How many coats of trim paint are necessary?
Plan on one coat of quality bonding primer followed by two thin coats of enamel paint. Two topcoats ensure rich color saturation, even sheen, and maximum resistance against scuffs.
Can I paint baseboards without removing them?
You can paint baseboards in place by masking adjacent flooring and walls with high-grade painter tape. Shield your carpet with a wide metal putty knife as you work along the bottom edge.
Takeaway & Next Steps
Transforming your living space with contrasting trim paint delivers dramatic architectural elevation on a modest weekend budget. Thoughtfully matched hues frame rooms beautifully while protecting hard-working surfaces.
Start by picking three sample pots from our eleven featured colors to test against your baseboards under natural daylight. Notice how morning light and evening lamplight transform each hue.
Next, inspect your existing trim for loose paint, caulk cracks, and rough joints needing repair. Gather your sanders, primers, and brushes so you can prep thoroughly.
Finally, mask off a single test doorway to perfect your brush technique before tackling the whole house. Share your completed trim renovation photos with our reader community, or subscribe below for weekly remodeling insights.