The American House
  • Home
  • DIY
  • Garden
  • Tips & Tricks
  • Expert Tips
Home / Home

8 Front Door Colors That Feel Fresh: What Most People Never Realize

June 26, 2026 · 14 min read
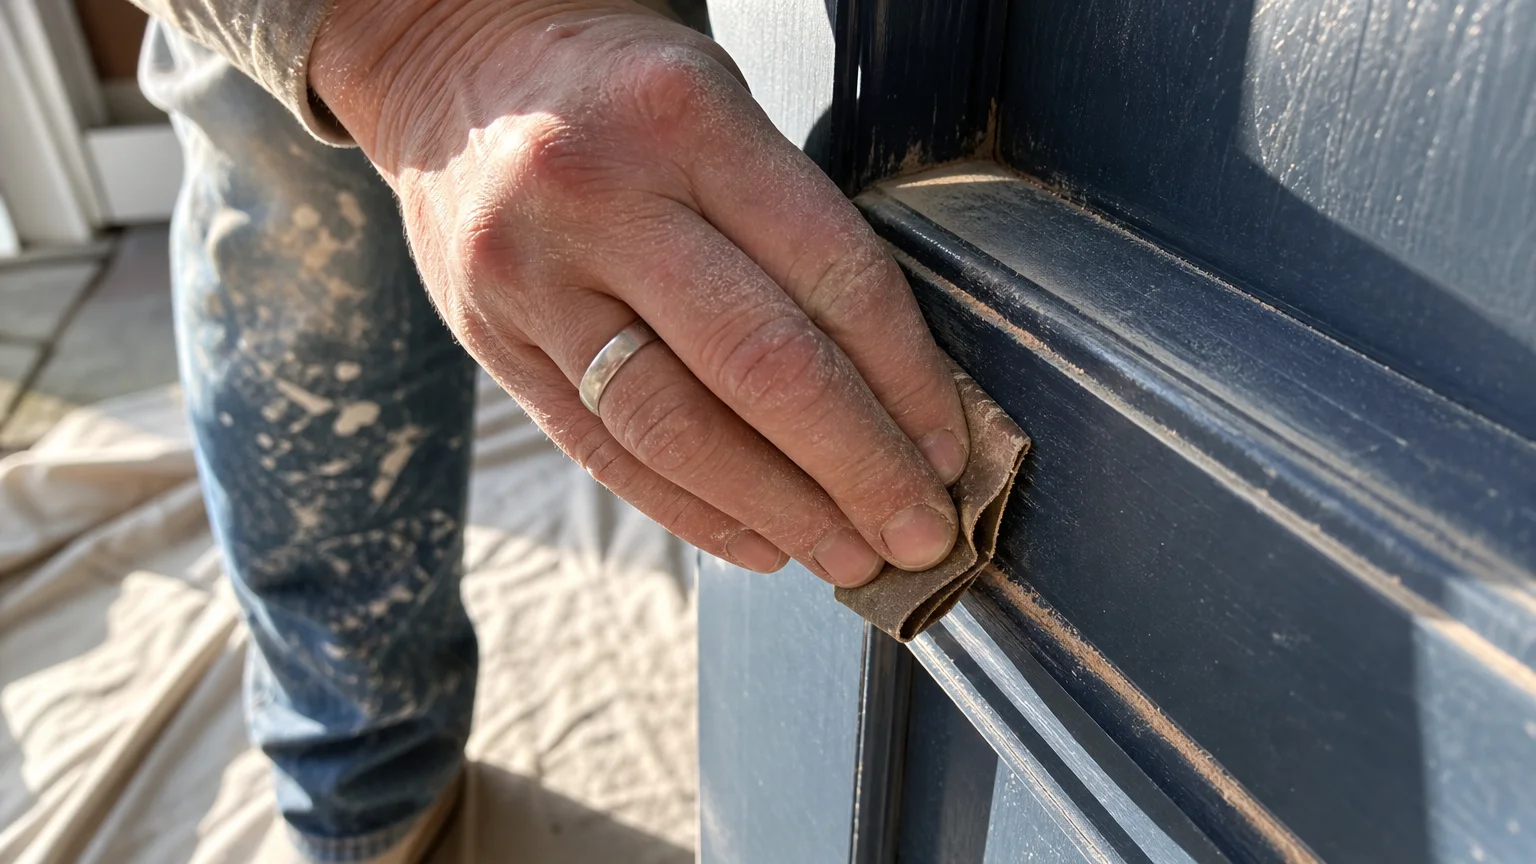
A close-up shot of hands sanding a door frame with 220-grit sandpaper, with wood dust catching the morning light.
Sanding your blue front door by hand is the essential first step for a flawless paint finish.

Step-by-Step Instructions

Painting a door while it hangs on the hinges is possible, but removing it guarantees professional results by preventing runs and drips. Start your project early in the morning so you have ample daylight to observe your progress and allow the paint to dry before reinstalling the door for overnight security.

Phase 1: Removal and Hardware Stripping

Open the door and place a wedge underneath the bottom edge to support the weight. Tap the hinge pins out using a hammer and a nail punch, starting from the bottom hinge and working your way up. Carefully lift the door and lay it flat across two sturdy sawhorses covered in drop cloths. Remove the doorknob, deadbolt, knocker, peephole, and weatherstripping. Taping around hardware always leaves a tiny ridge of exposed old paint or uneven edges; completely removing the hardware takes ten extra minutes but ensures a flawless, edge-to-edge finish.

Phase 2: Cleaning and Sanding

Mix your TSP with warm water according to the package directions and scrub the entire door using a coarse sponge. Wipe it down twice with clean water to remove any chemical residue. Once dry, take your 120-grit sandpaper and lightly scuff the entire surface. You do not need to sand down to bare wood or fiberglass; you only need to remove the glossy sheen so the primer has a rough microscopic texture to grab onto. Wipe away all sanding dust with a slightly damp microfiber cloth or a specialized tack cloth.

Phase 3: Priming the Canvas

Apply an even coat of exterior primer. The order in which you paint matters immensely, particularly for paneled doors. Always start with the recessed panels using your angled brush. Move on to the horizontal rails, then finish with the vertical stiles that run the length of the door. This sequence ensures that any wet brush marks from the horizontal sections are smoothed out by your final vertical strokes. Allow the primer to dry completely—usually one to two hours depending on humidity—then lightly run 220-grit sandpaper over the surface to knock down any raised fibers or dust nibs. Wipe clean again.

Phase 4: Applying the Color

Follow the same order of operations for your chosen exterior paint: panels first, horizontal rails second, and vertical stiles last. Use the foam roller on the flat sections immediately after brushing the recesses to blend the wet edges together. Apply thin, even coats. A common mistake is piling on thick layers of paint to achieve immediate coverage, which invariably leads to sagging and a soft, easily chipped finish. Let the first coat dry for at least four hours. Sand extremely lightly with 220-grit paper, wipe the dust away, and apply the second coat. Once the final coat is dry to the touch but still slightly soft, carefully reinstall your hardware and re-hang the door.

Pages: 1 2 3 4 5 6 7

Share this article

Facebook Twitter Pinterest LinkedIn Email

Leave a Comment Cancel reply

You must be logged in to post a comment.

Search

Latest Posts

  • Bright living room featuring a beige sofa, wooden coffee table with eucalyptus, fireplace, and hardwood floors. Don't Get Rid of These 10 Things If You Want to Sell Your Home Faster, Realtors Say
  • A plastic bin holding chemicals, batteries, motor oil, and a fluorescent bulb sits on a garage workbench. Before You Throw That Away: 12 Items That Need a Different Kind of Disposal
  • A woman sits at a wooden counter working on a laptop surrounded by paperwork and blueprints in a home under renovation. SALT Deduction Gets an Update for 2026 Taxes - Find More Here!
  • Close-up of hands placing a digital radon detector on a wooden shelf in a sun-drenched, cozy living room. 9 Signs Your Home Needs a Radon Test
  • A close-up photo of a hand touching a fogged-up window with condensation, inside a cozy warmly-lit room. 7 Signs Your Windows Are Losing Energy Efficiency
  • A warm gouache illustration of a backyard wooden deck in late spring with a small bucket of tools, evoking home prep before summer. 8 Signs Your Deck Needs Repairs Before Summer
  • A homeowner using a digital moisture meter to inspect a faint water stain on a living room baseboard. 9 Signs Your Plumbing Has a Hidden Leak
  • A close-up photograph of a deep diagonal crack in a concrete basement wall, illuminated by a harsh low-angle flashlight. 7 Signs Your Foundation Needs a Professional Look
  • A woman wrapped in a blanket on a sofa looks towards a drafty winter window, holding a warm mug in a cozy home. 8 Signs Your Home's Insulation Needs an Upgrade
  • A homeowner shines a flashlight on the rusted base of an old basement water heater, searching for leaks. 9 Signs Your Water Heater Is Nearing the End of Its Life

Newsletter

Get the latest posts delivered to your inbox.

Related Articles

eclectic room design

Top Design Predictions for 2025

What is hot for the year ahead? Ready for a fresh, stylish update? The 2025…

Read More →
A sophisticated living room with charcoal-grey wall molding, an emerald velvet sofa, and a large brass chandelier.

12 Designer Secrets for a More Expensive-Looking Home

This detailed diagram shows the professional way to install decorative molding for an expensive-looking home…

Read More →
natural pest control

7 Natural Ways to Keep Pests at Bay

Have you ever tried to search for the term “pest control” on the internet? Generally,…

Read More →
cockroach

Cockroach Infestation? 8 Signs You Have One (and What To Do)

2. Cockroach Egg Casings Since these disgusting insects have short lifespans, they breed very quickly.…

Read More →
brown furniture, deisgn

5 Colors That Go With Brown Furniture, According to Designers

Can we make brown furniture cool again? Do you want to decorate, or maybe redecorate,…

Read More →
A senior man in a home workshop sanding a cedar birdhouse on a sunny afternoon.

8 Beginner Woodworking Projects Seniors Can Build Over a Weekend

Begin your weekend project by carefully marking your wood with a square and pencil for…

Read More →
expensive home

5 Landscaping Ideas to Make Your Home Look More Expensive

Want to make everyone think you have an expensive house? Try these tricks! Most of…

Read More →
Mold

5 Frightening Signs That Mold Lives Inside Your Home

Musty Smell We all know it! Mold has a musty smell, easily compared with wet…

Read More →
never throw in your garbage disposal

10 Items You Should Never Throw in Your Garbage Disposal

There are some things you should never throw in your garbage disposal! Let’s take a…

Read More →
The American House

Inedit Agency S.R.L.
Bucharest, Romania

contact@theamericanhouse.com

Explore

  • Contact
  • Editorial Policy
  • Advertiser Disclosure
  • FAQ
  • Subscribe
  • Unsubscribe
  • Privacy Policy
  • Terms and Conditions
  • Disclaimer
  • Do not sell my personal information
  • Request to Know
  • Request to Delete
  • CA Private Policy

Categories

  • DIY
  • Expert Tips
  • Garden
  • Home
  • Tips & Tricks

© 2026 The American House. All rights reserved.