Step-by-Step Instructions
Executing a flawless paint job requires strict adherence to a specific order of operations. Rushing the preparation phase guarantees a sloppy outcome. Follow these practical steps to ensure your new designer paint colors adhere perfectly and look spectacular.
Phase 1: Swatch Testing and Lighting Evaluation
Never buy gallons of paint based on a tiny paper chip under a hardware store’s fluorescent lights. Purchase sample pots of your chosen paint colors 2026 trends suggest, or order large peel-and-stick swatches. Apply these samples directly to your stark white walls. You must observe the colors at three distinct times: the crisp morning light, the bright afternoon sun, and the warm artificial glow of your evening lamps. Complex colors change dramatically depending on the light source; what looks perfectly warm at noon might pull an unwanted green undertone by dusk.
Phase 2: Deep Cleaning and Surface Preparation
Paint will not adhere to dust, airborne cooking grease, or the natural oils left behind by human hands. Mix a solution of warm water and a heavy-duty degreaser or TSP (trisodium phosphate) substitute. Wearing heavy rubber gloves, wash the walls thoroughly from the bottom up to prevent dirty water streaks, then rinse the walls with clean water. Once dry, inspect the surface with a handheld flashlight. Fill every nail hole, dent, and gouge with lightweight spackle. Overfill the holes slightly, let the spackle dry completely, and sand it flush with your fine-grit sponge. Wipe away the residual dust with a barely damp microfiber cloth.
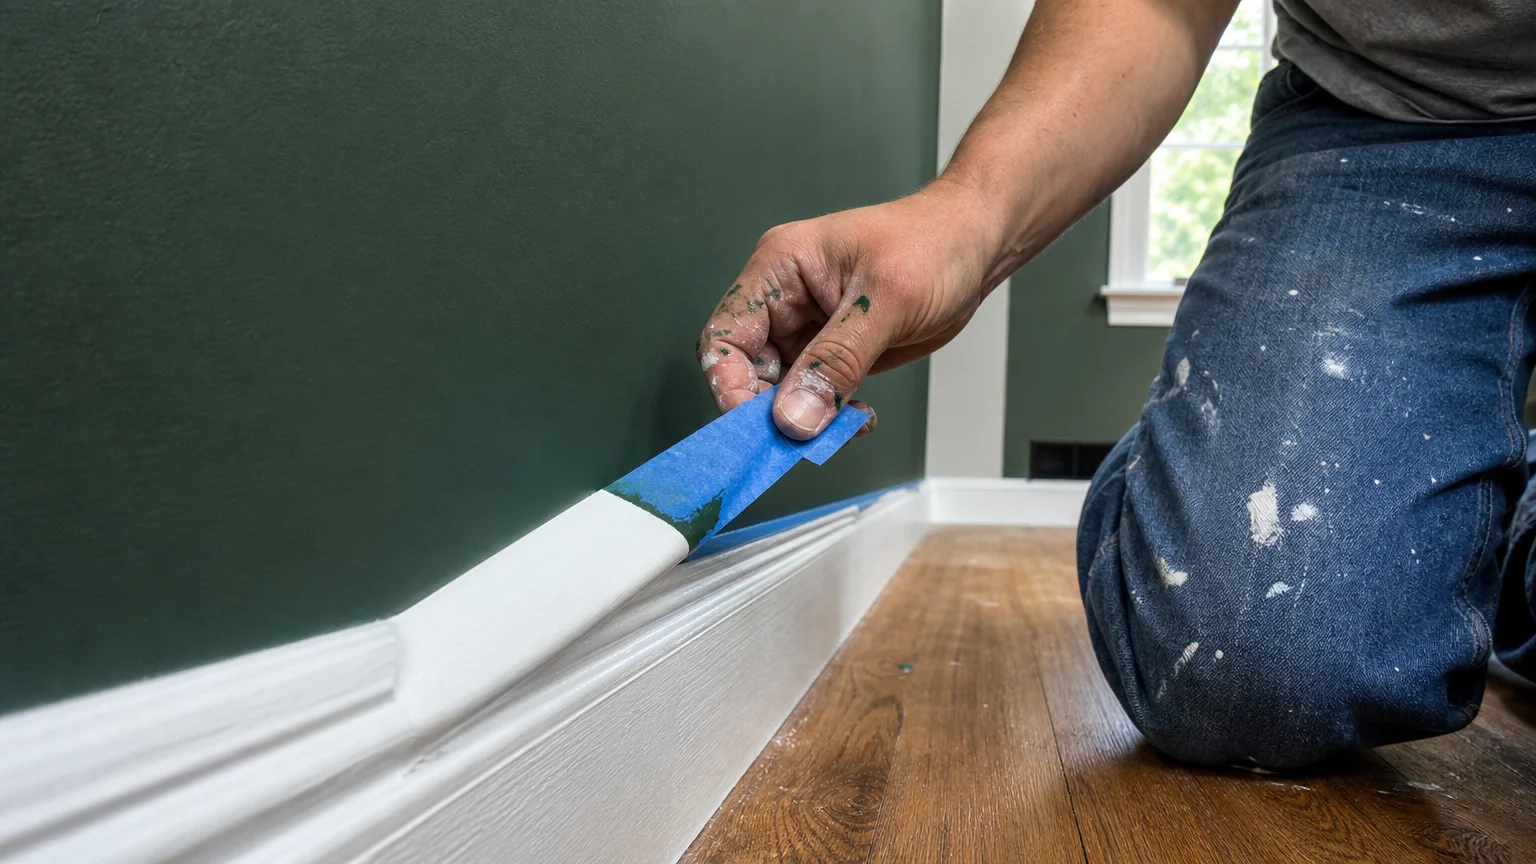
Phase 3: Taping and Priming
Apply your painter’s tape meticulously along the baseboards, window casings, and door frames. Press the edge of the tape down firmly with a putty knife to create an airtight seal. To absolutely guarantee zero bleed-through, paint a very light coat of your existing white wall color over the tape’s edge to seal it. Once dry, apply a uniform coat of your primer. Primer blocks lingering stains, seals the porous dried spackle, and provides a chemically stable surface that allows your expensive topcoat to bond permanently.
Phase 4: Cutting In and Rolling
Begin by cutting in the edges of the room using your angled sash brush. Load only the bottom third of the bristles with paint and drag the brush smoothly along the ceiling line and taped trim. Maintain a wet edge by only cutting in one wall at a time before rolling. Load your microfiber roller generously and apply the paint to the wall using a “W” or “V” pattern. This technique distributes the bulk of the paint evenly across a three-by-three-foot section. Immediately roll back over the pattern in straight, overlapping vertical strokes from the ceiling down to the floor to lay off the paint and eliminate roller marks. Wait the manufacturer’s recommended time—usually two to four hours—before applying your crucial second coat.


Leave a Reply
You must be logged in to post a comment.