
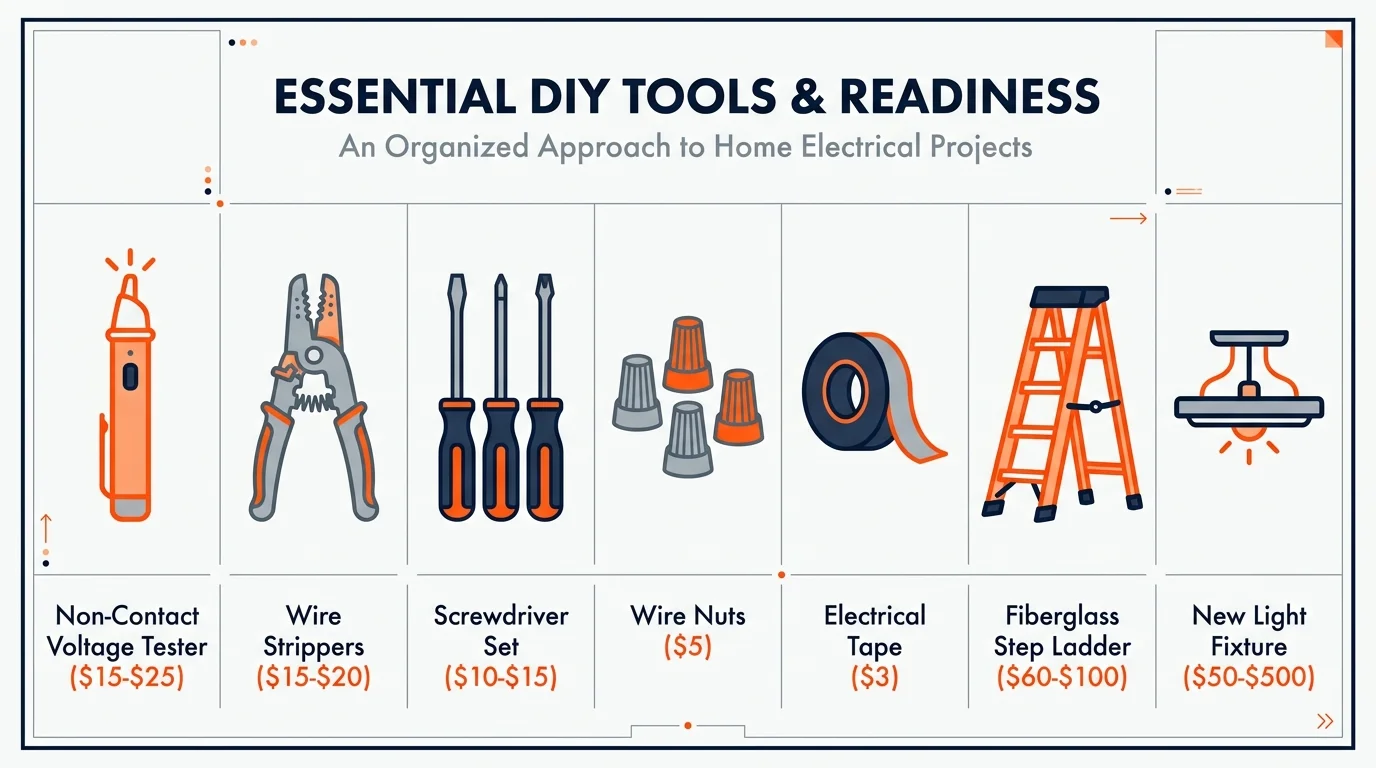
Tools, Materials, and Prep Checklist
Getting organized before you flip a single breaker ensures a smooth installation process. Scrambling for a dropped screw or realizing you lack the proper wire strippers halfway through the job leads to unnecessary frustration. Gather these essential tools and materials to complete your project safely and efficiently.
- Non-Contact Voltage Tester: Costs approximately $15 to $25. This is your most critical safety tool, allowing you to verify that power is entirely shut off before touching any wires.
- Wire Strippers and Cutters: Costs around $15 to $20. You need these to remove the rubber casing from new fixture wires without damaging the conductive copper inside.
- Screwdriver Set: Costs $10 to $15. Keep both a standard Phillips and a flathead screwdriver on hand; older electrical boxes often use slotted screws.
- Wire Nuts: Costs $5 for an assorted pack. Always use new wire nuts that securely grip the exposed wire ends.
- Electrical Tape: Costs $3 per roll. Use this to secure your wire nuts and insulate the connections for extra safety.
- Fiberglass Step Ladder: Costs $60 to $100. Choose fiberglass over aluminum for electrical work, as fiberglass does not conduct electricity.
- Your New Light Fixture: Costs range from $50 to well over $500 depending on the materials and scale.
To prep your workspace, move all furniture out of the immediate area and lay down a drop cloth to catch drywall dust or falling debris. Set up your ladder directly beneath the fixture so you do not have to overreach, which compromises your balance.








Leave a Reply
You must be logged in to post a comment.