Step-by-Step Instructions
Transforming your space into an emerald or midnight blue masterpiece requires patience and adherence to strict construction protocols. Rushing through the structural phases will compromise your finish.
Phase 1: Waterproofing the Canvas
Your beautiful new tiles are only a decorative wear layer; the true protection happens behind them. Cut your cement backer board to fit your wall dimensions and fasten it to the studs using cement board screws spaced every 8 inches. Tape all seams with your alkali-resistant mesh tape and smooth a thin layer of thinset over the joints. Once the thinset cures, apply your liquid waterproofing membrane using a heavy-nap paint roller. Paint the entire enclosure, paying special attention to the corners and the bottom edge where the wall meets the tub or shower pan. Allow the first coat to dry, then apply a second coat perpendicular to the first. Wait until the membrane turns a solid, dark color, indicating it is completely dry.
Phase 2: Establishing the Layout
Never start tiling from the bottom corner without a plan. Walls are rarely perfectly plumb, and tubs are rarely perfectly level. Find the horizontal and vertical center of your main focal wall. Set up your laser level to cast a perfect crosshair on this center point. Dry-lay a row of tiles on the floor to see where your cuts will fall at the edges of the wall. If your layout leaves a sliver of tile less than two inches wide at the corners, shift your vertical center line slightly left or right to ensure you have substantial, aesthetically pleasing cuts on both ends. Screw a straight, level ledger board into the wall just above the tub lip to support your first row of tiles, ensuring a perfectly horizontal start.
Phase 3: Mixing and Troweling Thinset
Pour cool, clean water into a large bucket and gradually add your modified thinset powder. Mix the mortar using a heavy-duty drill and a mixing paddle on a low speed to avoid whipping air into the mud. Aim for the consistency of thick peanut butter. Let the mixture sit undisturbed for 10 minutes—a process called slaking—which allows the chemical polymers to activate. Remix briefly, and you are ready to spread. Scoop the thinset onto the wall using your margin trowel, then use the flat side of your 1/4-inch square-notch trowel to press it firmly into the waterproofing membrane. Flip the trowel to the notched side and hold it at a rigid 45-degree angle. Comb the thinset in straight, parallel lines. Do not swirl the thinset; swirling traps air behind the tile, creating hollow spots that easily crack under pressure.
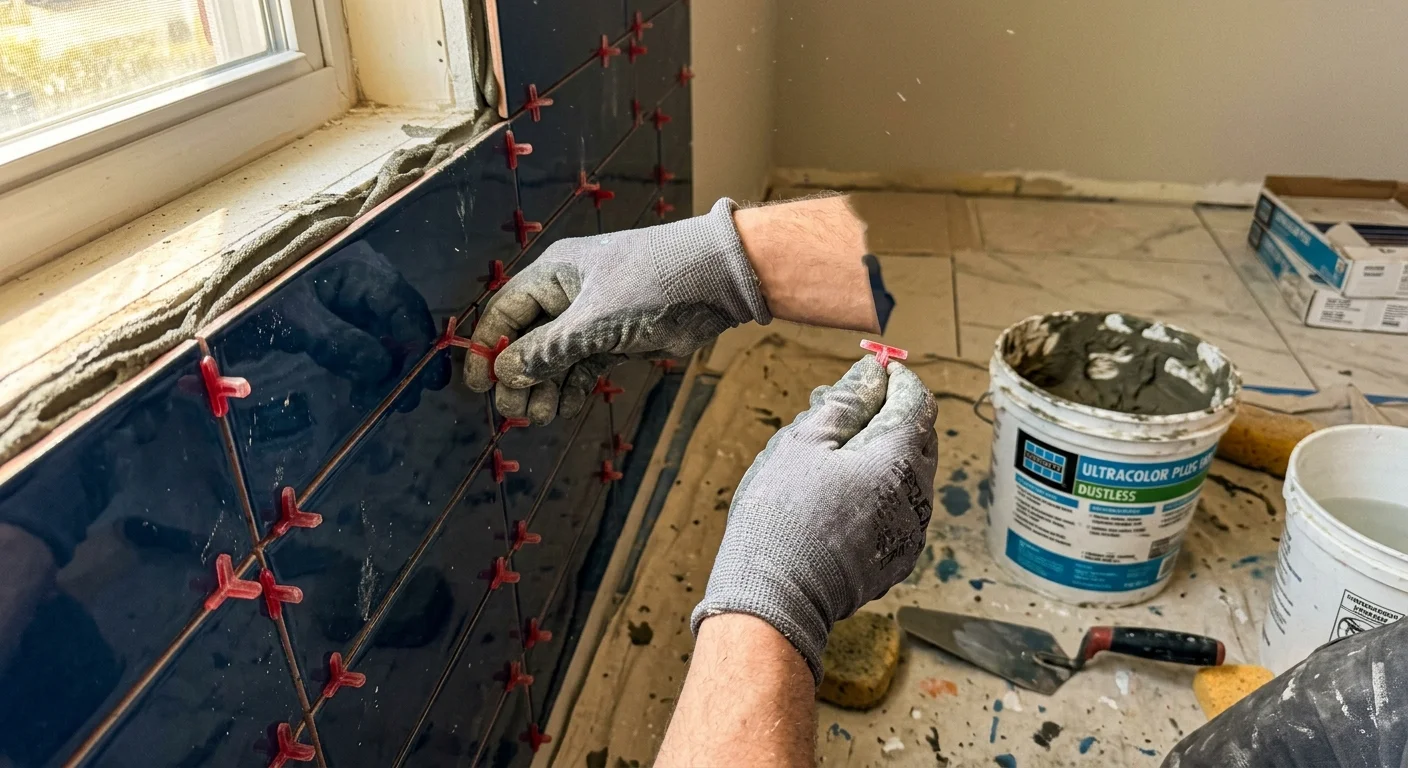
Phase 4: Setting the Jewel-Toned Tiles
Press your emerald or midnight blue tiles into the combed thinset, applying firm pressure while slightly wiggling the tile perpendicular to the trowel ridges. This collapses the ridges and guarantees 100 percent mortar coverage on the back of the tile. Insert your 1/8-inch spacers between each tile to maintain consistent grout joints. Periodically run a damp sponge along the tile faces to remove accidental thinset smudges before they dry—dark, glossy tiles highlight dried mortar aggressively. Step back frequently to check your laser level lines and ensure your courses remain perfectly straight.
Phase 5: Grouting and Haze Removal
Allow the thinset to cure for at least 24 hours before removing your spacers. Mix your grout according to the manufacturer guidelines. Scoop the grout onto the wall and press it deep into the joints using your rubber grout float held at a 45-degree angle to the joint lines. Drag the float diagonally across the tiles to scrape off the excess without digging the grout out of the seams. Wait approximately 15 to 30 minutes for the grout to firm up slightly, then take a barely damp sponge and wipe the tiles in a gentle, circular motion. Rinse your sponge in clean water constantly. Deep emerald and midnight blue tiles are notorious for showing grout haze—a chalky residue left behind after washing. Buff the tiles with a dry microfiber cloth a few hours later to completely eliminate this haze.


Leave a Reply
You must be logged in to post a comment.