
Step-by-Step Instructions
Integrating new interior furniture styles into your home requires more than just dropping a chair into a corner. You must structurally assess, strip, and refinish the piece to guarantee it handles daily household traffic.
Phase 1: Perform a Structural and Safety Assessment
Examine your sourced piece for structural integrity. Wiggle the armrests, press down on the seat frames, and check the drawer glides. If a joint moves, you must repair it. Do not rely on screws to fix loose wooden joints; screws tear through old wood fibers. Instead, gently knock the joint apart with a rubber mallet. Scrape away the crystallized antique hide glue using a chisel. Apply modern wood glue, reassemble the joint, and lock it down with trigger clamps for 24 hours. If the piece features old paint, crush a lead testing swab and rub it on a scratched surface. If the swab turns red, stop immediately. You must use chemical strippers to remove lead paint safely—never sand it.
Phase 2: Strip the Old Finish
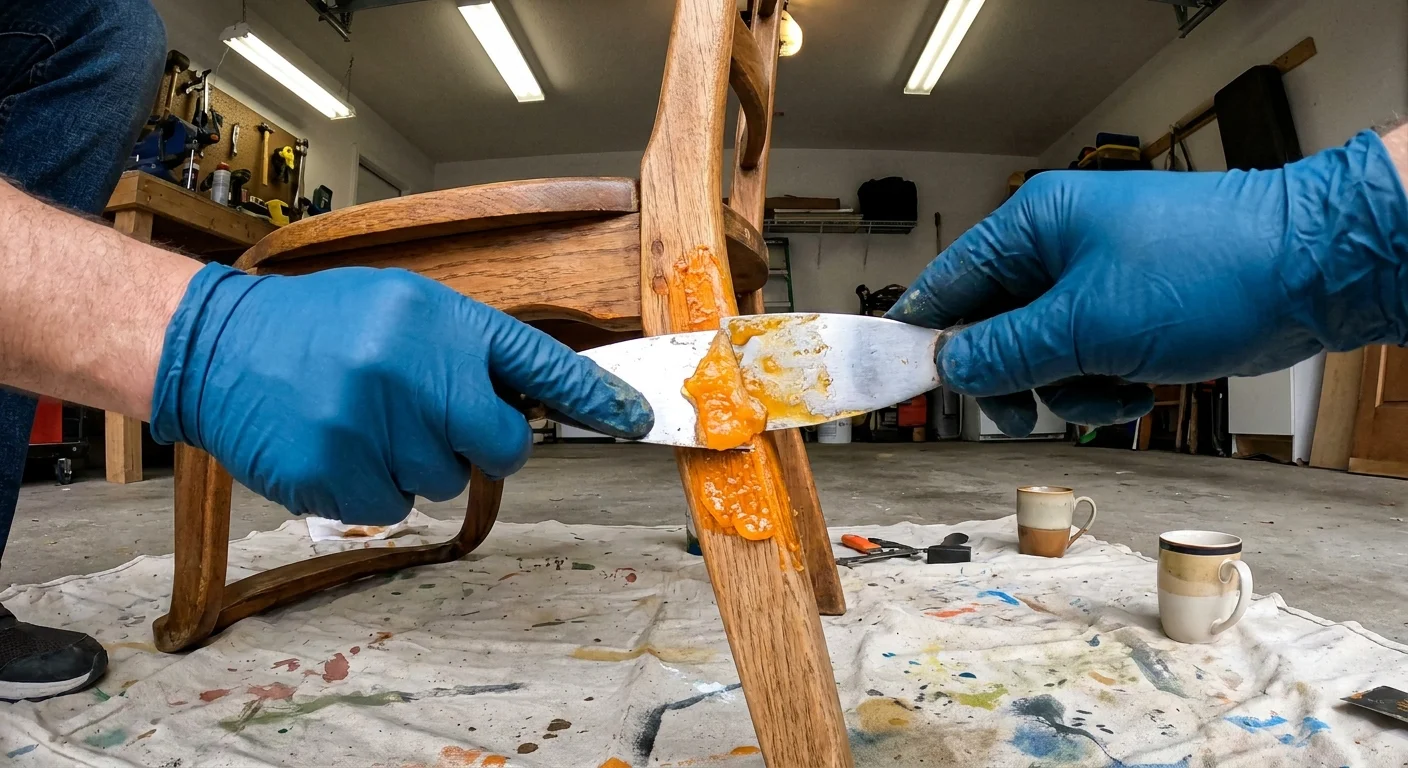
Move your furniture to a well-ventilated garage or lay down heavy canvas drop cloths in an open room. Brush a thick layer of citrus-based gel stripper over the old lacquer or varnish. Let it sit for 30 to 45 minutes until the old finish bubbles. Scrape the sludge away following the direction of the wood grain using a plastic putty knife. Metal scrapers will gouge the softened wood. Wipe the entire piece down with a rag soaked in mineral spirits to neutralize the stripping chemicals.
Phase 3: Sand and Smooth
Attach an 80-grit disc to your orbital sander to remove any stubborn patches of old stain. Keep the sander moving constantly to avoid burning the wood or creating uneven divots. Swap to a 120-grit disc to smooth the surface, and finish with a 220-grit pass to prepare the pores for new stain. Always wipe the piece down with a tack cloth to remove microscopic dust particles before applying liquids.
Phase 4: Apply the New Finish
Brush on your chosen stain using a clean rag or foam brush. Let it penetrate for five minutes, then wipe off the excess. Allow the stain to dry for 24 hours. Finally, seal the piece. Apply three thin coats of water-based polyurethane using a synthetic brush. Lightly sand the piece with 320-grit sandpaper between coats to ensure a glass-smooth final texture.







Leave a Reply
You must be logged in to post a comment.