The American House

  • Home
  • DIY
  • Garden
  • Tips & Tricks

9 Luxury Home Features That Were Once Considered Weird

May 13, 2026 · Home
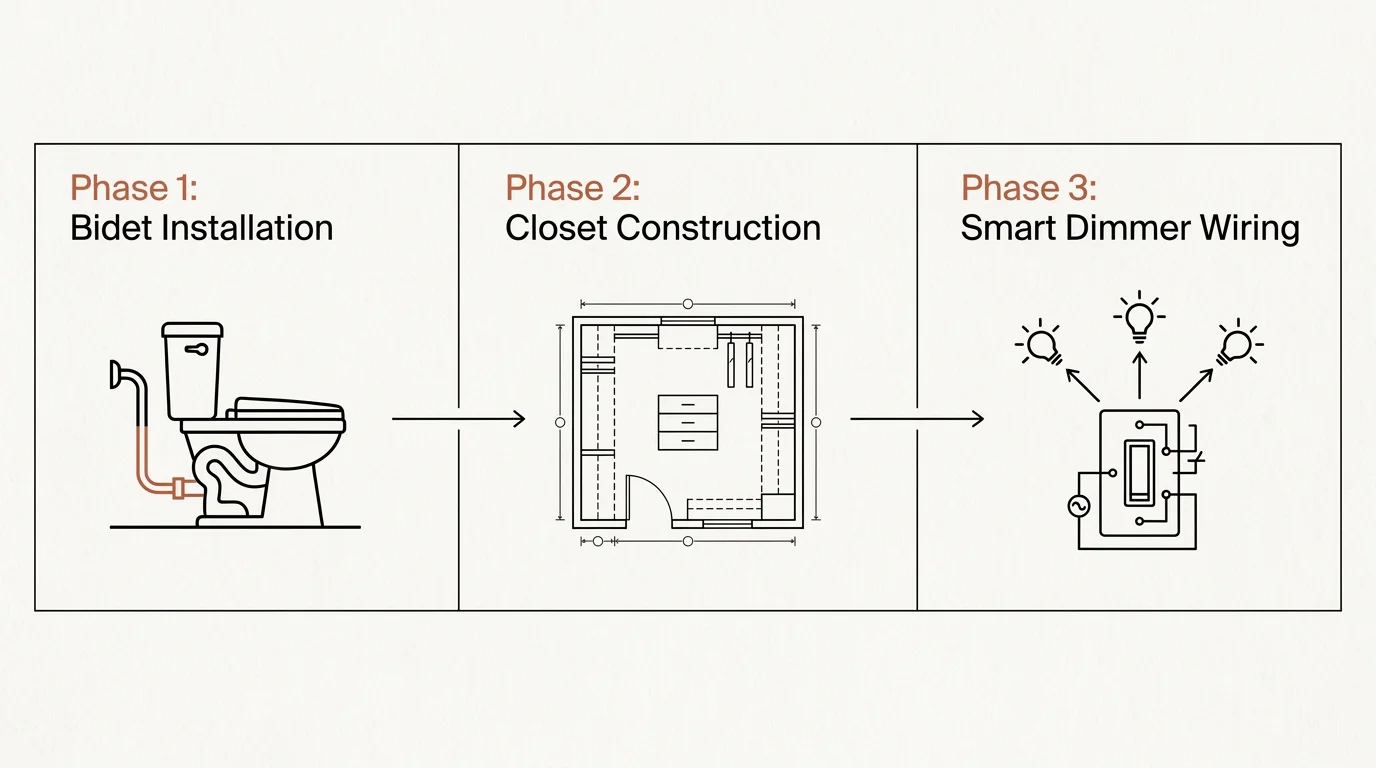
A minimalist three-step horizontal flowchart showing the phases of installing a bidet, closet, and smart dimmers.
Follow these simple steps for bidet installation, closet construction, and smart dimmer wiring in your home.

Step-by-Step Instructions

Executing these upgrades requires patience and a strict adherence to safety protocols. Do not rush the preliminary steps; ensuring your power and water are fully secured is paramount.
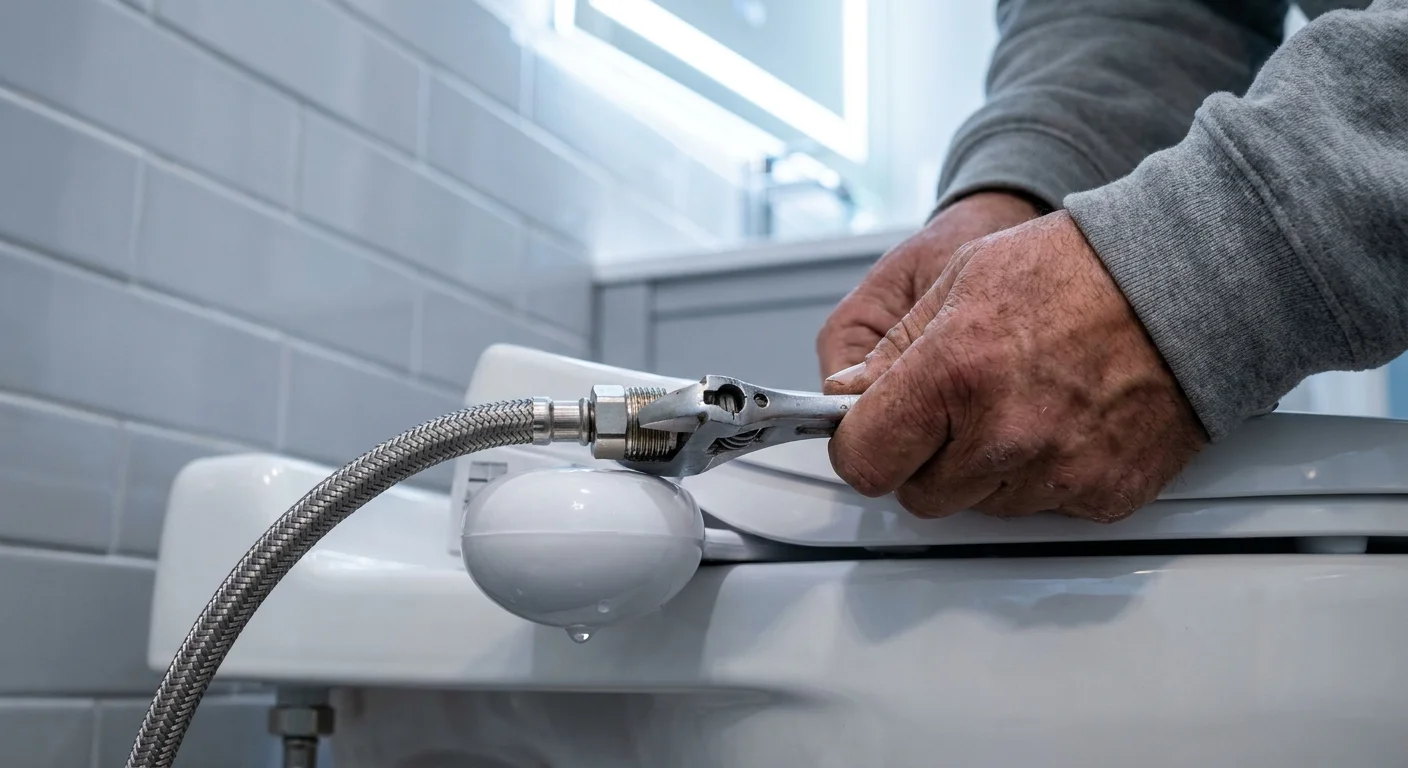
A close-up photo of hands installing a bidet seat water connection in a modern bathroom.
Hands use a wrench to tighten the water supply line for a new luxury bidet seat.

Phase 1: Installing the Luxury Bidet Seat

Begin by locating the shut-off valve behind your toilet and turning it clockwise until it stops. Flush the toilet and hold down the handle to drain the tank completely. Lay a towel beneath the water line and use your adjustable wrench to disconnect the flexible supply hose from the base of the toilet tank. Keep your bucket handy, as a small amount of trapped water will spill out.

Next, remove your existing toilet seat by popping off the plastic hinge covers and unscrewing the mounting bolts. Clean the porcelain surface thoroughly. Position the bidet’s mounting plate over the bolt holes, insert the provided brackets, and tighten them down. Slide the new bidet seat onto the mounting plate until you hear it click securely into place.

Take the provided T-valve and wrap the threads twice with Teflon tape. Attach the T-valve to the base of the toilet tank, hand-tightening it before giving it a final quarter-turn with your wrench. Reconnect your main water supply line to the bottom of the T-valve, and attach the bidet’s specific supply hose to the side port. Slowly turn the water valve back on, monitoring all three connection points for drips. Once verified leak-free, plug the seat into your GFCI outlet and run the manufacturer’s self-cleaning cycle to prime the system.

A candid photo of a person installing walnut shelving in a large walk-in closet during a home renovation.
A craftsman meticulously levels dark wood shelving while constructing a high-end custom walk-in closet.

Phase 2: Building the Custom Walk-In Closet

Clear the entire closet, patching and painting any holes left by the old wire shelving. Starting with a blank, freshly painted canvas instantly elevates the final look. Use your stud finder to locate and mark every vertical wall stud along the perimeter.

Most luxury modular systems utilize a top hanging rail. Measure and draw a perfectly level horizontal line across the wall at the manufacturer’s specified height—usually around 84 inches from the floor. Secure the metal hanging rail to the wall, driving robust structural screws directly into every stud you marked. If a section of the rail does not intersect a stud, use high-capacity toggle bolts to anchor it safely to the drywall.

Once the rail is mounted and verified level, hook the vertical support standards onto the track. Space them according to your specific drawer and shelf widths. Assemble the base drawer units first, sliding them into place and using wood shims beneath the toe kicks to ensure the drawers glide smoothly without binding. Finally, install your shelf brackets, lay the wooden shelves in place, and attach the heavy-duty hanging rods.
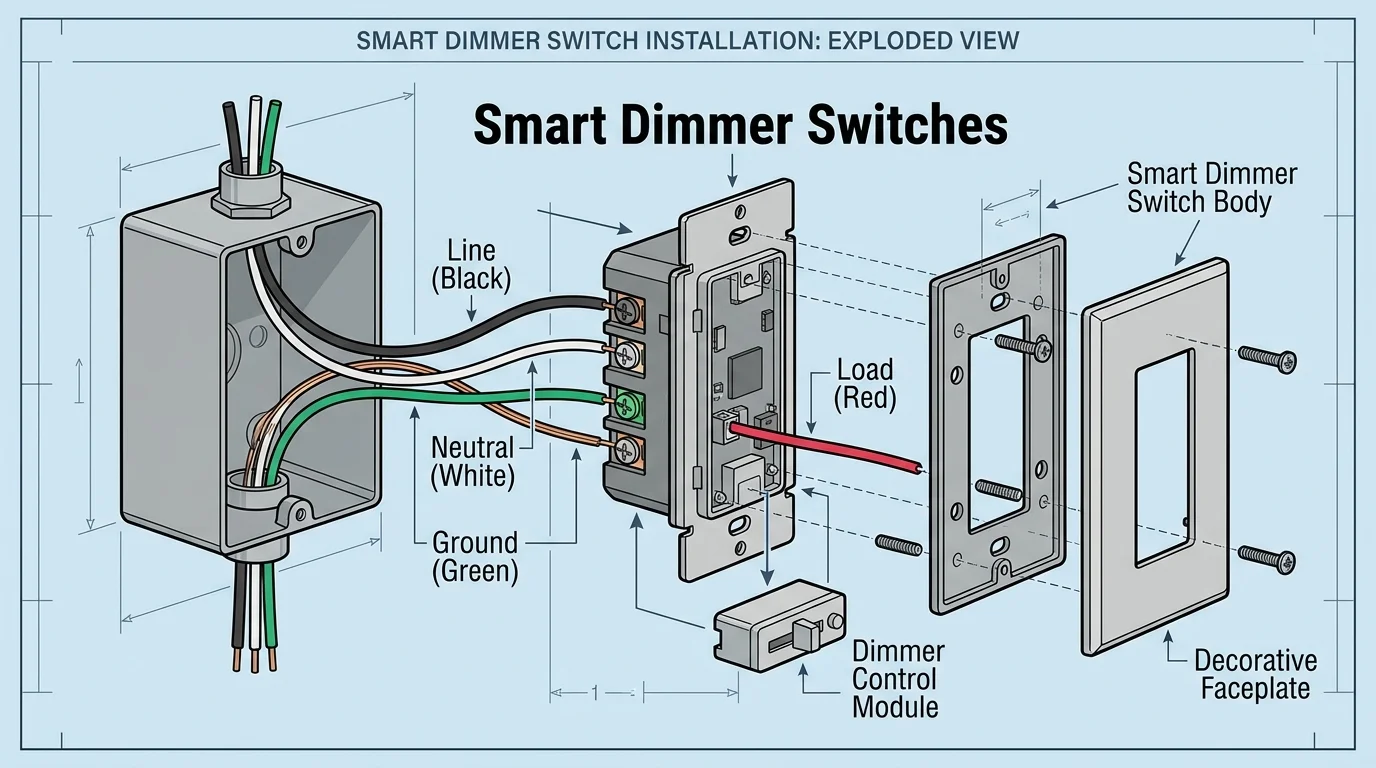
A technical wiring diagram for a smart dimmer switch with color-coded labels for Line, Load, Ground, and Neutral.
An exploded view reveals the intricate wiring and components behind a modern luxury smart dimmer switch.

Phase 3: Wiring Smart Dimmer Switches

Navigate to your main electrical panel and completely shut off the breaker controlling the room’s lighting. Return to the room and test the switch with your non-contact voltage tester to guarantee the power is definitively off. Remove the plastic faceplate and unscrew the old switch from the junction box, pulling it gently forward.

Identify your wires: the bare copper or green wire is your ground, the black wires are your line and load, and the bundle of white wires in the back is your neutral. Disconnect the old switch. Take your new smart switch and connect the green ground wire first using a wire nut. Next, connect the switch’s neutral wire to the bundle of white wires. Connect the line wire to the incoming power wire, and the load wire to the wire leading to your light fixture.

Wrap electrical tape around the base of each wire nut for added security. Carefully fold the wires back into the junction box like an accordion—do not forcefully jam them. Screw the smart switch into the box, attach the modern screwless faceplate, and restore power at the breaker. Follow the manufacturer’s smartphone application instructions to connect the switch to your home Wi-Fi network.

Pages: 1 2 3 4 5 6 7

Share this article

Facebook Twitter Pinterest LinkedIn Email

Leave a Reply Cancel reply

You must be logged in to post a comment.

Latest Posts

  • A close-up photograph of a gardener's gloved hands working in a lush summer garden with fresh mulch under soft morning light. 8 Summer Gardening Tasks Experts Never Skip
  • 6 Most Common Lawn-Watering Mistakes That Could Be Ruining Your Grass 6 Most Common Lawn-Watering Mistakes That Could Be Ruining Your Grass
  • A conceptual gouache and ink illustration of an open microwave on a kitchen counter, with stylized gold sparks radiating from its dark inter Never Use Your Microwave for These 6 Things
  • An ink and watercolor illustration of a house protected from crumbling stone legal documents by a giant county recorder seal. HOAs That Don’t File Properly Lose Their Right To Collect Attorney’s Fees or Interest on Delinquent Accounts
  • A modern living room with neutral walls and a dramatic forest green painted ceiling, captured in warm afternoon light. How to Use Color on Just the Ceiling to Completely Transform a Room Without Painting Walls
  • A warm gouache illustration of a serene, sunlit living room with a linen armchair, potted plant, and neat oak bookshelf. 9 Designer Secrets That Make a Home Feel Calm and Relaxing
  • A clear glass bottle of vinegar stands next to a stack of soft, folded cotton towels on a wooden shelf in a sunlit laundry room. 11 Surprising Ways Vinegar Makes Your Laundry Cleaner and Fresher
  • A stylized screenprint illustration of a cozy craftsman bungalow house nestled safely inside a giant pair of protective hands. The State-by-State Guide to Senior Property Tax Relief Programs Updated for 2026
  • A cozy living room corner featuring a rich sage green accent wall behind a cognac leather armchair and wooden side table. 10 Accent Colors That Will Still Look Right in a Decade
  • A sunlit living room corner featuring a dual-tone accent wall painted in sage green and terracotta peach behind a mid-century modern chair. 20 Color Combination That Works in North-Facing, East-Facing, and South-Facing Rooms

Related Articles

A close-up of bedroom bedding layers featuring terracotta linen, a green velvet throw, and a cream boucle pillow.

8 Bedroom Textile Combinations That’s Been All Over Design Instagram This Year

This three-step illustration shows how to layer your bedding from base sheets to decorative throws.…

Read More →
kitchen windows

10 Solutions to Fix Your Drafty Windows

It’s winter, it’s cold, and we can’t stop making hot cocoa and covering ourselves in…

Read More →
plant

6 Stunning Plants That Will Thrive in the Florida Climate

2. Dahlia Dahlias are lovely flowers that have adapted to the conditions in the United…

Read More →
oven drawer

8 Oven Drawer Storage Mistakes You Need to STOP Making

Do you know what are the items that don’t belong in your oven drawer? Many…

Read More →
A sophisticated living room with charcoal-grey wall molding, an emerald velvet sofa, and a large brass chandelier.

12 Designer Secrets for a More Expensive-Looking Home

This detailed diagram shows the professional way to install decorative molding for an expensive-looking home…

Read More →
laundry and your bed sheets smell great

11 Amazing Ways to Make Your Laundry and Your Bed Sheets Smell Great

2. Add vinegar to your load as a fabric softener Your clothes won’t smell like…

Read More →
clean house

8 Things in Your House You Don’t Clean As Often As You Should

Cell phone As we all know, cell phones are just breeding grounds for bacteria and…

Read More →
A person pulling back old beige carpeting to reveal natural oak wood flooring in a sunlit room.

9 Homes Features That Feel Outdated To Younger Buyers

An asbestos test kit and safety mask are essential tools for prepping an older home…

Read More →
Benefits Of Growing Lemongrass

Here’s When You Should Water Your Grass (Best Timeframes)

Have you ever noticed the neighbors’ sprinklers running all hours of the day? If that’s…

Read More →

The American House

Inedit Agency S.R.L.
Bucharest, Romania

contact@theamericanhouse.com

Trust & Legal

  • Privacy Policy
  • Terms and Conditions
  • Do not sell my personal information
  • Subscribe
  • Unsubscribe
  • Contact
  • Request to Know
  • Request to Delete
  • CA Private Policy

Categories

  • DIY
  • Expert Tips
  • Garden
  • Tips & Tricks

© 2026 The American House. All rights reserved.