
Step-by-Step Instructions
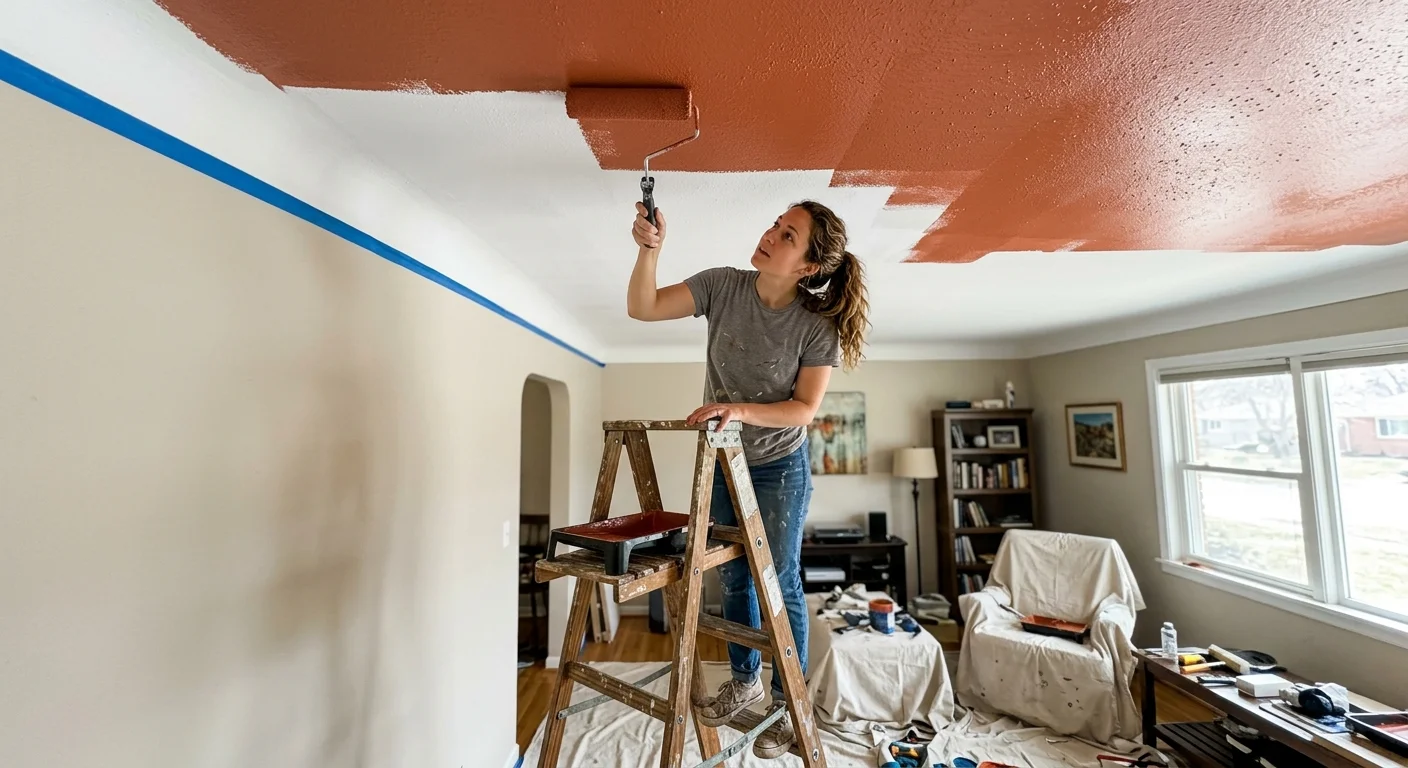
Phase one begins with ruthless preparation and rigorous safety checks. Start by turning off the electrical breaker that supplies power to the target room. Remove all ceiling light fixtures, ceiling fan blades, and smoke detector covers to ensure an unobstructed working surface. If removing a fixture proves too complicated, wrap it tightly in a plastic bag and secure the base with painter tape. Next, lay your heavy canvas drop cloths across the entire floor, overlapping the edges by at least six inches to prevent paint from seeping through to your hardwood or carpet. Apply a continuous strip of painter tape along the top edge of your walls or crown molding, pressing firmly along the edge with a flexible putty knife to seal out bleeding paint.
Phase two involves the critical process of cutting in. Open your paint can, stir it thoroughly for two full minutes to redistribute the color pigments, and pour a small amount into a handheld cut-in cup. Using your two-and-a-half-inch angled sash brush, paint a three-inch border around the entire perimeter of the ceiling. You must maintain a steady hand, working in manageable four-foot sections to ensure the paint remains wet as you transition to the rolling phase. If the cut-in border dries completely before you roll the main ceiling, you risk creating an ugly phenomenon called flashing, where a visible ring appears around the edge of the room.
Phase three requires physical endurance and methodical technique as you roll the main expanse of the ceiling. Attach your microfiber roller cover to the frame and screw it onto your extension pole. Pour your paint into a clean tray, loading the roller until it reaches full saturation without dripping. Starting in one corner, roll the paint onto the ceiling using a deliberate “W” pattern, filling in the gaps as you spread the material evenly across a three-by-three-foot section. You must maintain a wet edge at all times; never stop for a break in the middle of the ceiling.
Always roll parallel to the primary source of natural light—typically the largest window in the room. This technique ensures that any subtle roller overlaps cast minimal shadows, keeping the final finish looking perfectly flat and uniform. Avoid the temptation to press hard on the roller to squeeze out the very last drop of paint; excessive pressure causes streaking and damages the nap of the roller cover. Apply smooth, moderate pressure and reload the roller frequently. Allow the first coat to dry undisturbed for a minimum of two hours. Even if the coverage looks decent, you should always apply a second coat to achieve maximum depth, durability, and color accuracy.






Leave a Reply
You must be logged in to post a comment.