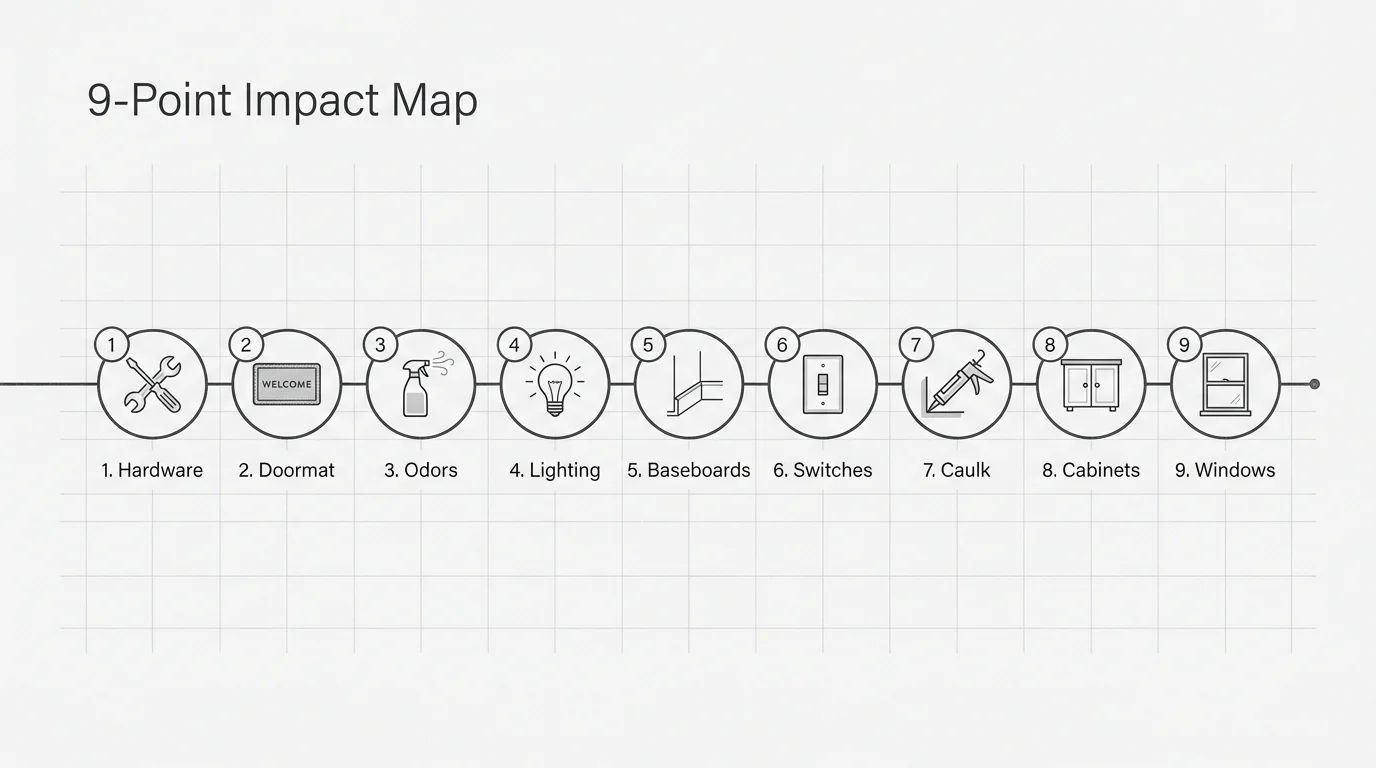
Step-by-Step Instructions
Addressing these nine distinct areas requires shifting between cleaning, tightening, and sealing. Move methodically from the exterior of your home inward to prevent tracking debris into freshly polished spaces.
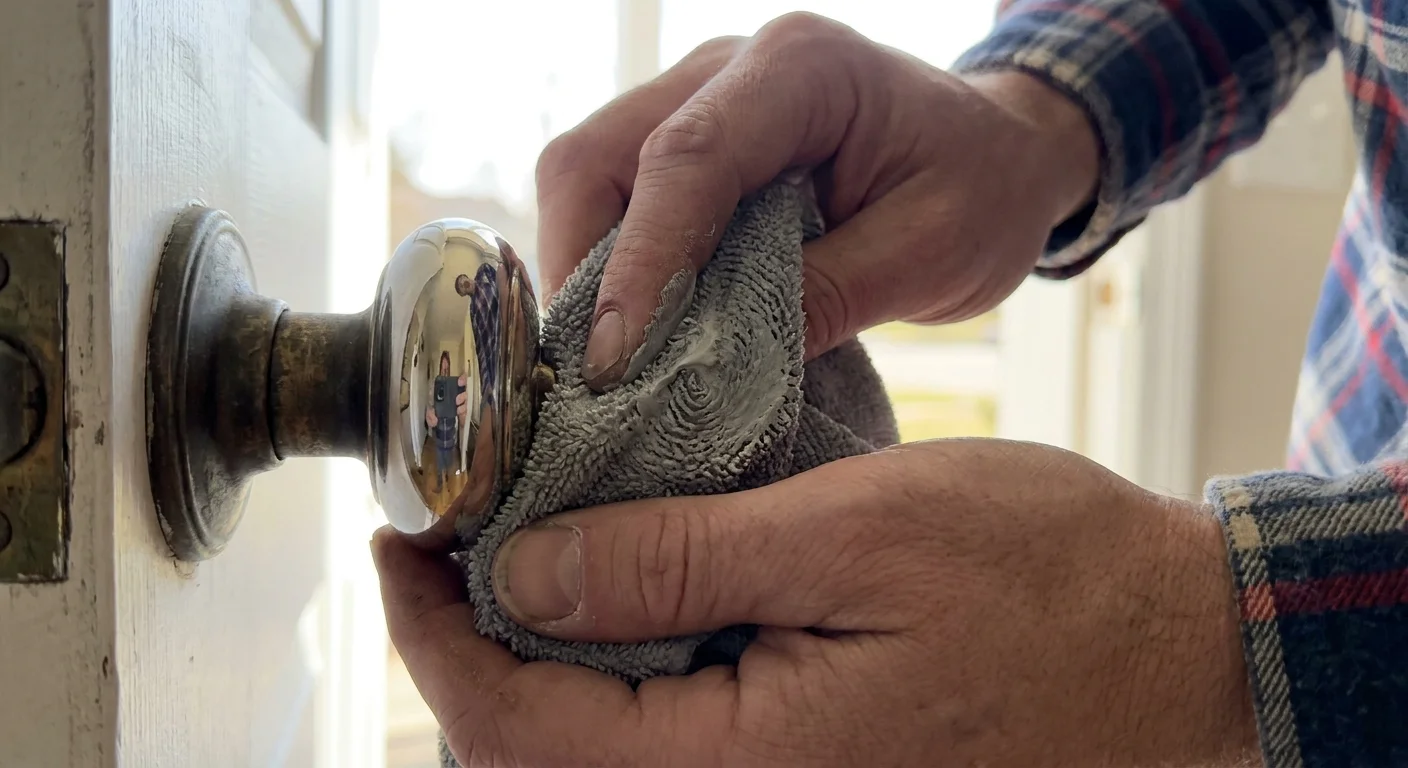
1. Revitalizing Front Door Hardware
Your front door handle is the first physical interaction a guest has with your property. Tarnished, loose, or sticky hardware immediately signals deferred maintenance. Begin by testing the mechanical action; if the thumb latch sticks, spray a dry graphite lubricant into the mechanism to restore smooth operation. Never use wet lubricants like WD-40 inside locks, as they attract dust and eventually seize the pins. Use a microfiber cloth and your metal polish to buff away oxidation from the handle, deadbolt, and kickplate. If the handle wiggles, locate the set screw on the interior collar and tighten it firmly with your screwdriver.
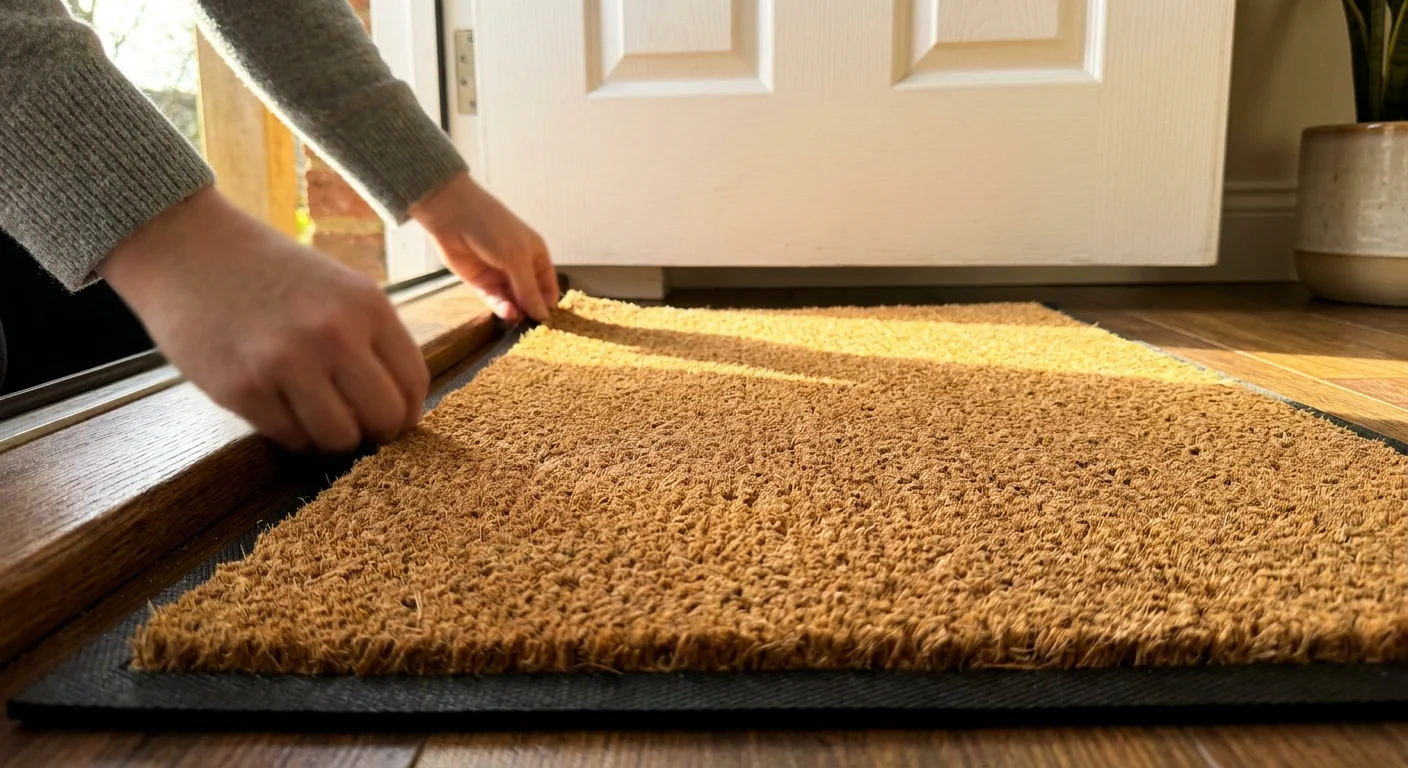
2. Upgrading the Doormat and Threshold
A worn, frayed doormat sets a depressing tone. Roll up your old mat and thoroughly sweep the entire porch area, paying special attention to the corners where spiderwebs and seasonal debris accumulate. Scrub the threshold plate with warm soapy water to remove embedded mud. Unroll your new, heavy-duty coir mat. For optimal visual balance, your mat must span at least 80 percent of the width of your door frame; undersized mats make entryways look disproportionate.
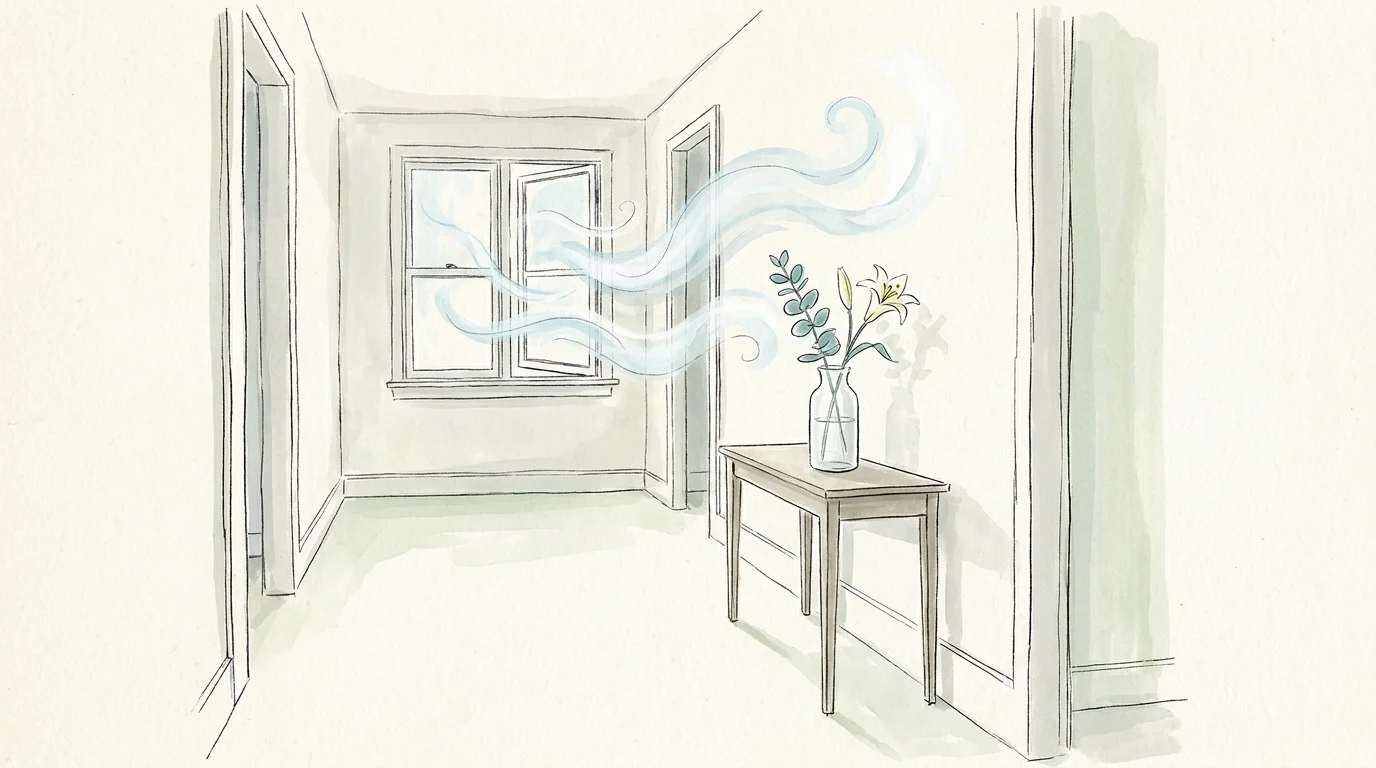
3. Neutralizing Entryway Odors
Homeowners quickly develop olfactory blindness to their own spaces. Guests, however, instantly detect pet dander, cooking oils, or musty basements. Masking these smells with heavy artificial plugins creates a cloying, chemical atmosphere. Instead, neutralize the source. Wash all entryway rugs and vacuum the upholstery. Place a decorative bowl filled with activated charcoal or baking soda discreetly on a high shelf near the door to absorb lingering airborne moisture and odors. Verify your HVAC filter is fresh, referring to the Environmental Protection Agency guidelines on indoor air quality to choose a filter that traps fine particulates effectively.
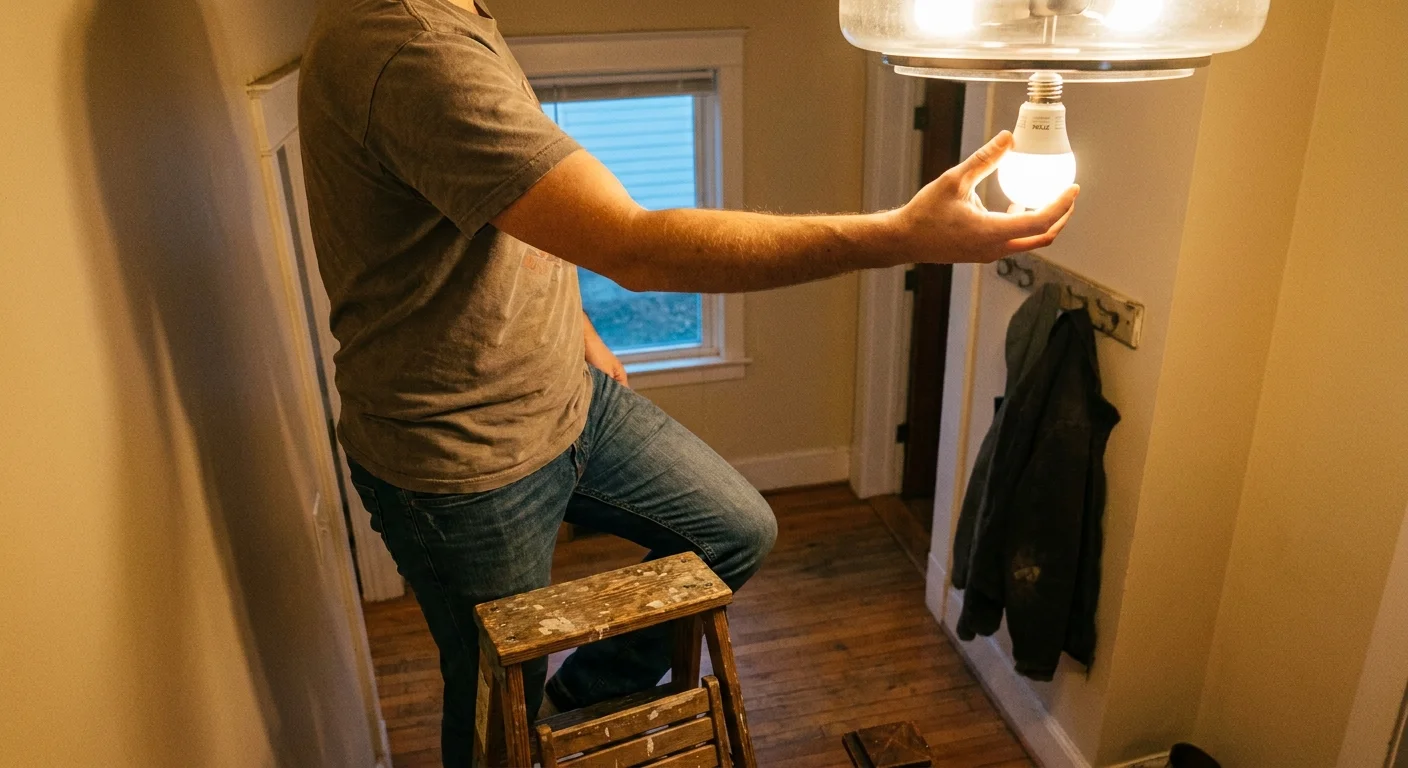
4. Calibrating Foyer Lighting
Harsh, blue-tinted lighting makes warm paint colors look institutional and casts unflattering shadows. Turn off the light switch and allow your existing bulbs to cool completely. Remove them and install your new 2700K warm-white LED bulbs. This specific color temperature mimics the welcoming glow of traditional incandescents while utilizing modern energy efficiency. Ensure all bulbs in multi-light fixtures match perfectly in both wattage and color temperature; mismatched bulbs confuse the eye and disrupt your decor.
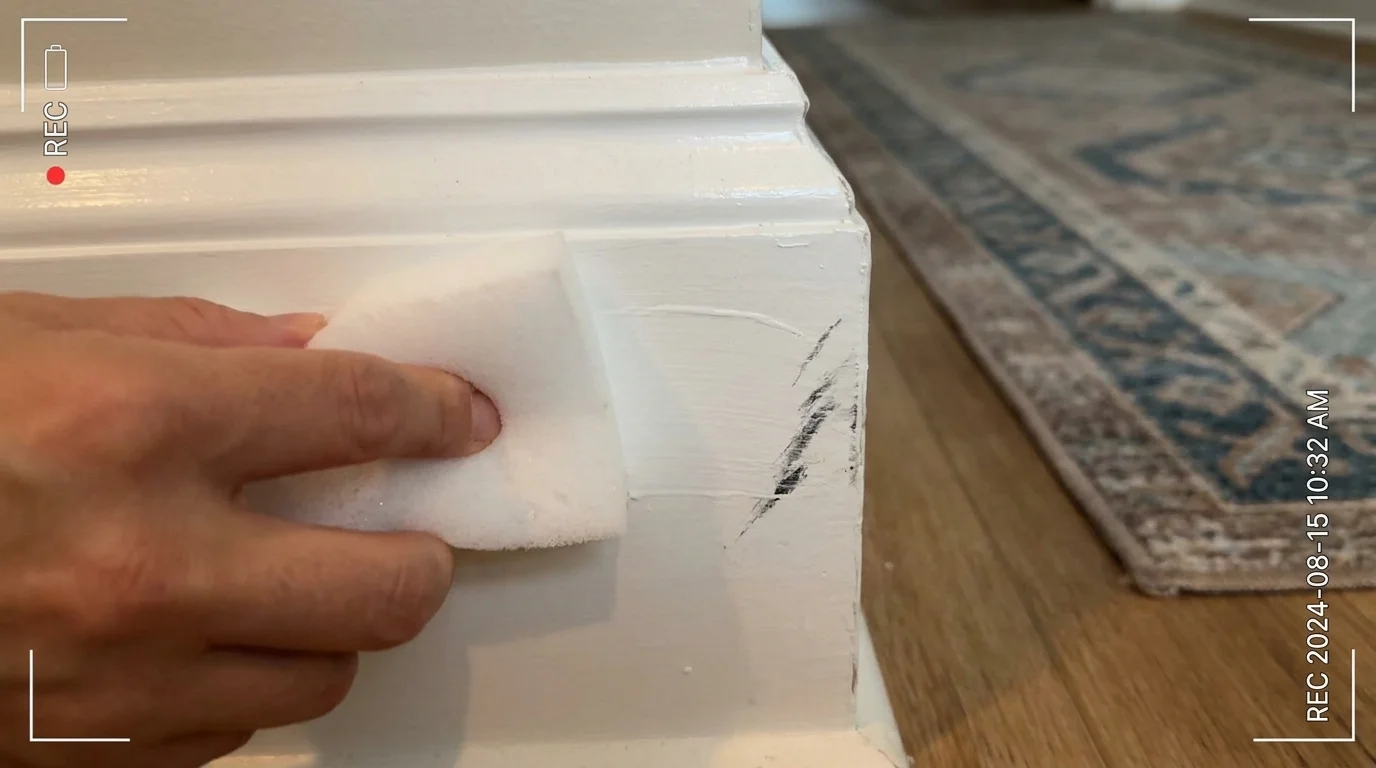
5. Erasing Baseboard Scuffs
Baseboards anchor a room visually, but they collect a heavy layer of dark dust and shoe scuffs that drag down the perceived cleanliness of your space. Lightly dampen a melamine foam sponge and gently rub out black rubber marks along the hallways and entryway baseboards. Use a dry dryer sheet to wipe down the top ledge of the trim; the antistatic properties of the sheet repel pet hair and dust for weeks, keeping your lines crisp.
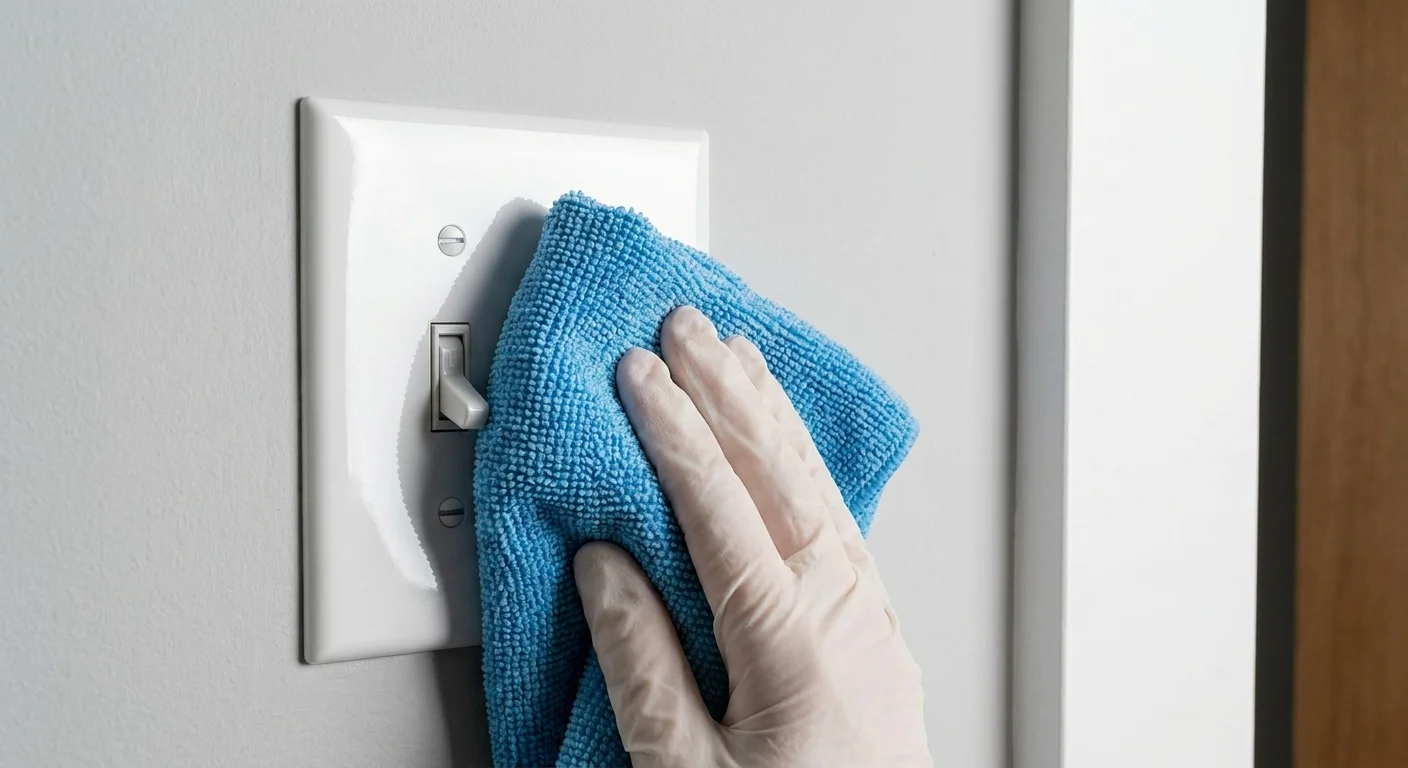
6. Sanitizing Switch Plates and Handles
Fingertips deposit natural oils that eventually form a dark, sticky halo around high-traffic light switches and interior door levers. Safety Warning: Never spray liquid cleaner directly onto an electrical outlet or switch plate. Instead, spray your degreaser onto a microfiber cloth until it is damp, then vigorously wipe down the plastic and metal surfaces. If a plastic switch plate is cracked, shut off the breaker to that room, unscrew the broken plate, and install a one-dollar replacement. This microscopic detail drastically improves a room’s polish.
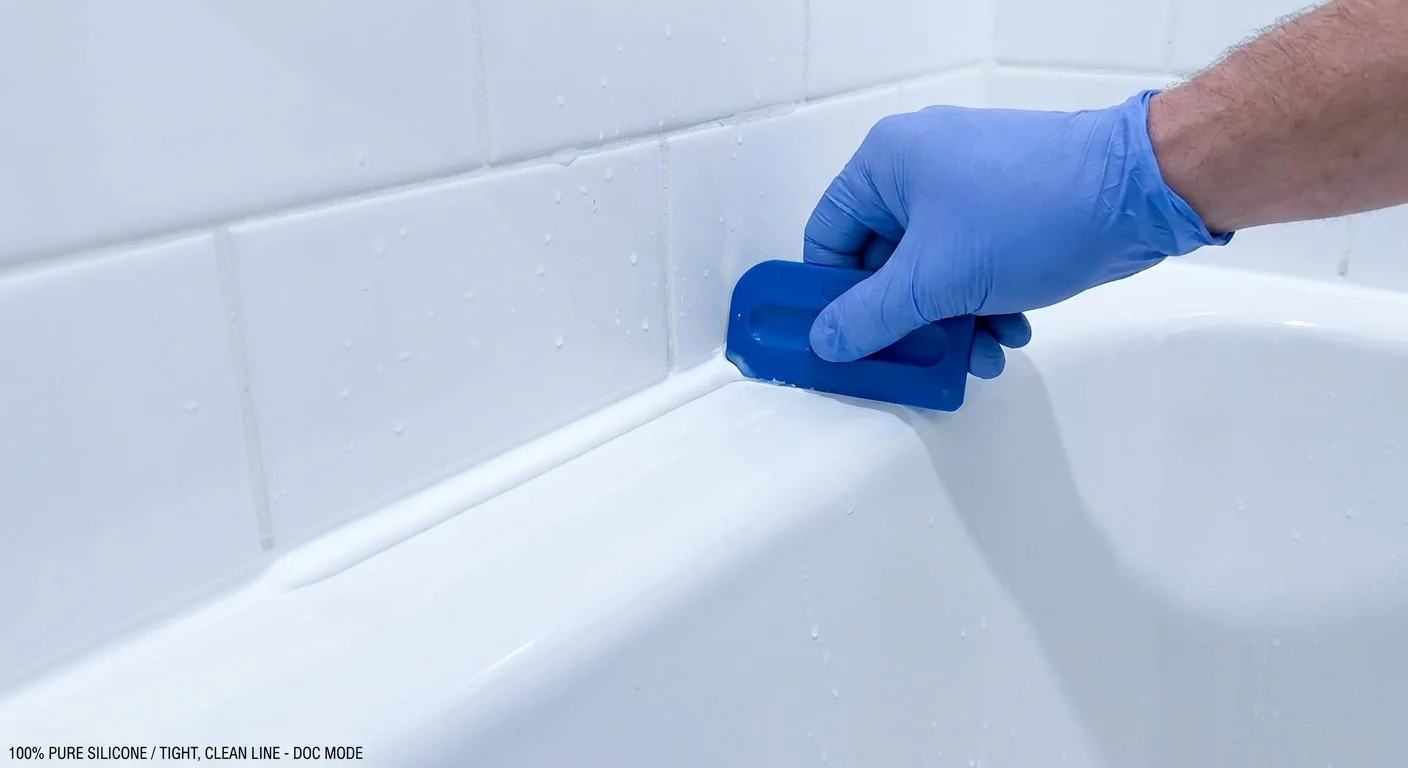
7. Replacing Bathroom Caulk
Crumbling, mold-speckled caulk around your guest bathroom sink or tub grosses out visitors and threatens your drywall with water rot. Use your utility knife to slice through the top and bottom edges of the old sealant, peeling it away in long strips. Clean the joint thoroughly with rubbing alcohol to remove soap scum, letting it dry completely. Apply a steady, continuous bead of 100-percent pure silicone caulk. Mist the fresh bead lightly with soapy water, then glide your plastic caulking tool along the seam to press the silicone into the gap and shear off the excess. Let it cure for 24 hours before allowing water exposure.

8. Aligning Cabinet Hardware
Crooked cabinet pulls in your kitchen or bathroom subtly throw off the geometric balance of the entire room. Open the cabinet doors and hold the front handle steady while you tighten the interior retaining screws. If a screw refuses to bite because the internal threads are stripped, dip the tip of the screw in liquid threadlocker before driving it back in. Ensure every handle sits perfectly plumb and level.
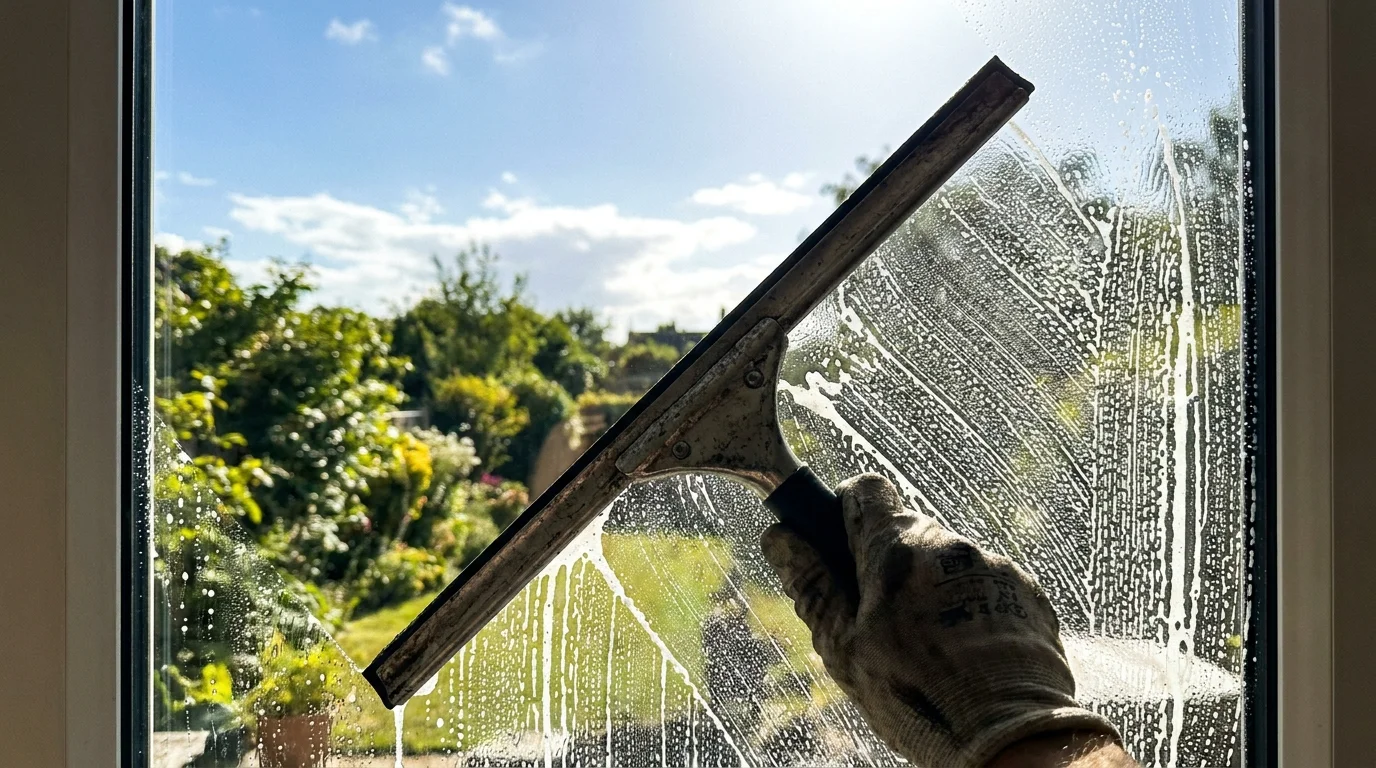
9. Clarifying Window Glass
Smudged entryway sidelights or foyer windows block natural sunlight and highlight dust. Choose an overcast day to clean your glass; direct sunlight evaporates liquid too quickly, baking streaks into the pane. Spray your glass cleaner generously and use a clean microfiber cloth to wipe in an S-pattern, starting at the top corner and dragging the dirt downward. Buff out any remaining haze with a dry, lint-free cloth.


Leave a Reply
You must be logged in to post a comment.