
Step-by-Step Instructions
Building resilient home wall upgrades requires a methodical approach. Skipping preparation steps inevitably leads to crooked lines, peeling trim, and frustration. Follow this structured workflow to ensure your project looks professionally installed and stands the test of time.
Phase 1: Demolition, Layout, and Marking
Begin by clearing the room and laying down protective drop cloths. If your design requires trim to run flush from the floor to the ceiling, you must pry off your existing baseboards. Score the top edge of the baseboard with a utility knife to break the caulk seal, then gently lever it away from the drywall using a rigid putty knife and a pry bar. Next, sweep your stud finder horizontally across the work area; mark the center of every vertical stud with a pencil. Project your laser level across the wall and trace your intended design directly onto the drywall. This visual map allows you to catch spacing errors before you cut any expensive wood.
Phase 2: Cutting and Adhesion
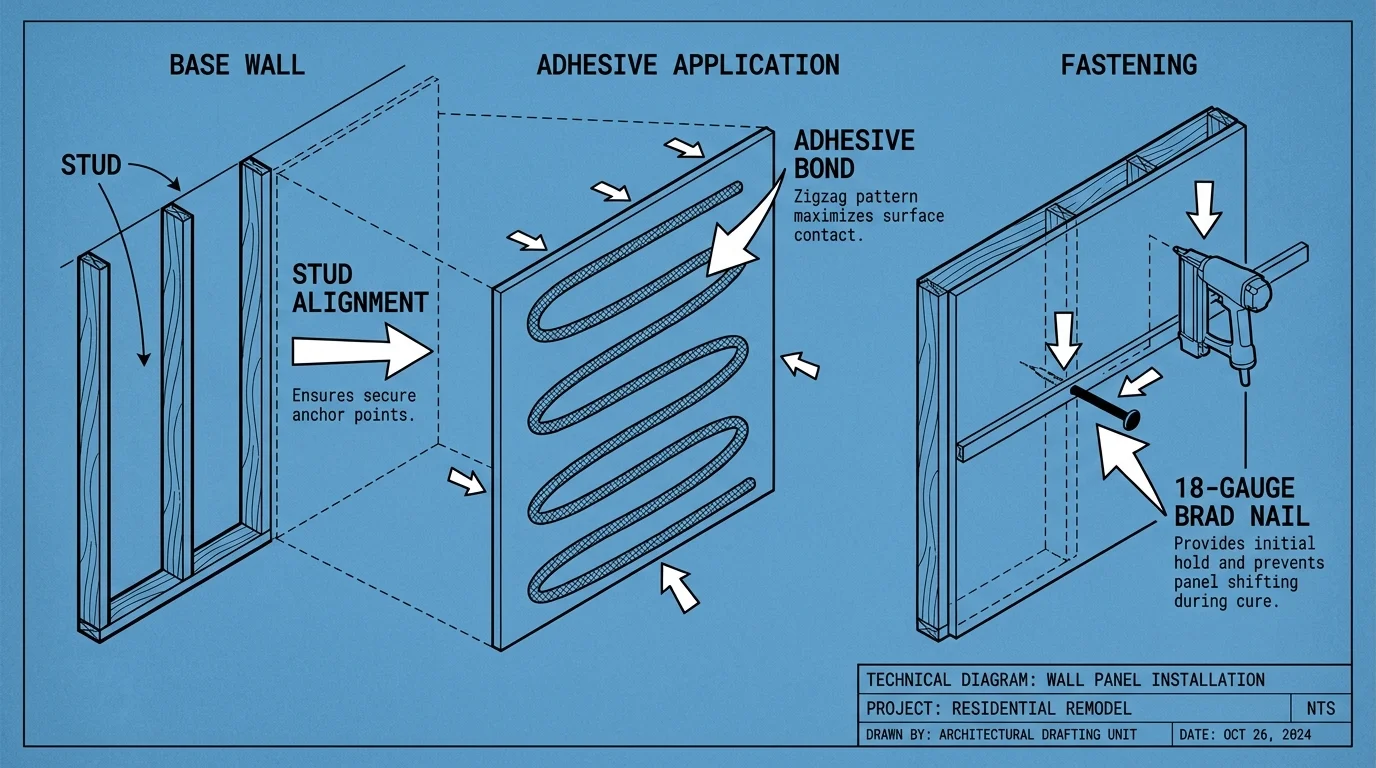
Measure twice and cut your longest horizontal pieces first. Apply a zig-zag bead of construction adhesive to the back of your board. Press the board firmly onto your layout line, verify it is perfectly level, and drive two 18-gauge brad nails through the board directly into every stud it crosses. The adhesive provides the long-term structural bond; the brad nails simply act as clamps holding the wood in place while the glue cures. For vertical pieces, measure the exact distance between your installed horizontal rails, as ceilings and floors rarely run perfectly parallel in standard homes. Wear high-impact safety glasses during this entire phase to meet basic Occupational Safety and Health Administration (OSHA) protection standards for operating nail guns.
Phase 3: The Flawless Finish
The distinction between amateur interior wall decor and high-end craftsmanship comes down to your finishing work. Overfill every nail hole with a shrinking wood filler. Once dry, sand the spots completely flat with 120-grit sandpaper. Next, run a thin bead of paintable acrylic latex caulk along every seam where the wood meets the drywall. Keep a small cup of water nearby; dip your finger in the water and glide it over the wet caulk to create a smooth, invisible transition. Let the caulk cure for a full 24 hours, apply a stain-blocking primer to any raw wood, and finish the wall with two coats of premium interior paint.








Leave a Reply
You must be logged in to post a comment.