Step-by-Step Instructions
Transforming your space requires a systematic approach. Tackle these core architectural and fixture upgrades one by one to steadily build a more expensive-looking home.
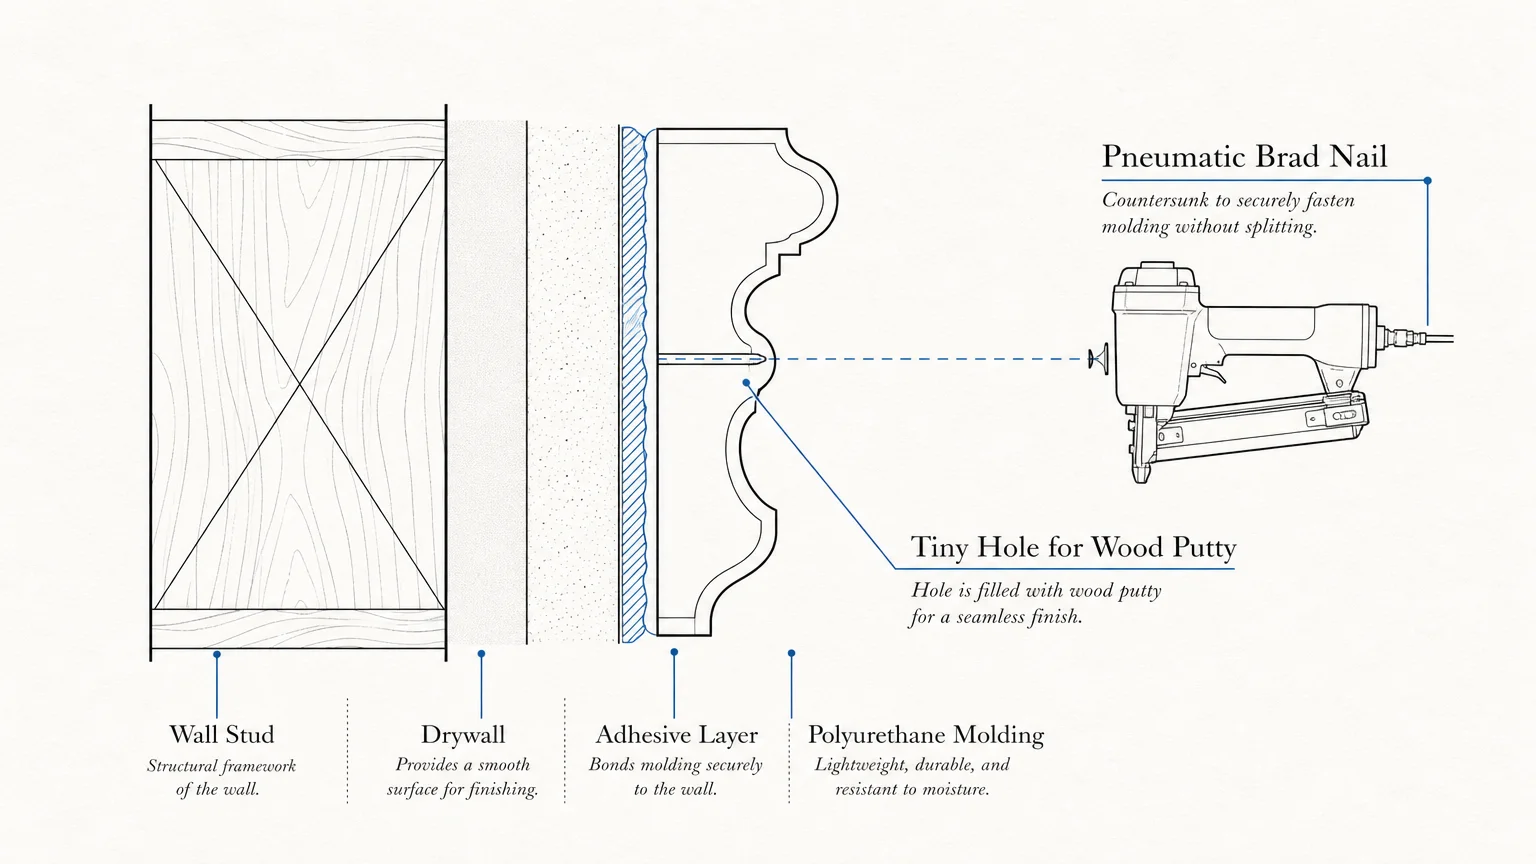
Secret 1: Install Crown Molding
Crown molding acts as a visual anchor, drawing the eye upward and making ceilings appear taller. Measure your room perimeter and cut your primed wood or MDF molding using your compound miter saw. Locate the wall studs using a stud finder and mark them with a pencil. Hold the molding firmly against the ceiling and wall junction, then fire brad nails through the molding into the studs. Fill the nail holes with wood filler, sand them smooth, and run a bead of paintable acrylic caulk along the top and bottom seams. Paint the molding a crisp white to contrast with your wall color.
Secret 2: Swap Out Builder-Grade Light Fixtures
Nothing gives away a cheap home faster than standard flush-mount dome lights. Turn off the power at your breaker box and verify the power is off using your non-contact voltage tester. Unscrew the old fixture and disconnect the black, white, and copper grounding wires. Connect your new, oversized chandelier or modern flush-mount fixture by matching the wire colors—black to black, white to white, and ground to the green screw. Secure the wires with wire nuts and wrap them in electrical tape. Mount the new fixture to the ceiling bracket. A larger, statement light fixture instantly elevates the room.
Secret 3: Install Dimmer Switches
Luxury hotels and high-end restaurants never rely on blazing, single-setting overhead lights. Dimmer switches allow you to control the mood of a room. With the power still off, remove your standard light switch. Connect the incoming hot wire, the outgoing wire to the light, and the ground wire to your new dimmer unit. Push the wires neatly back into the electrical box and screw the dimmer plate into the wall. Test the sliding mechanism to ensure a smooth transition from bright task lighting to a soft, moody glow.
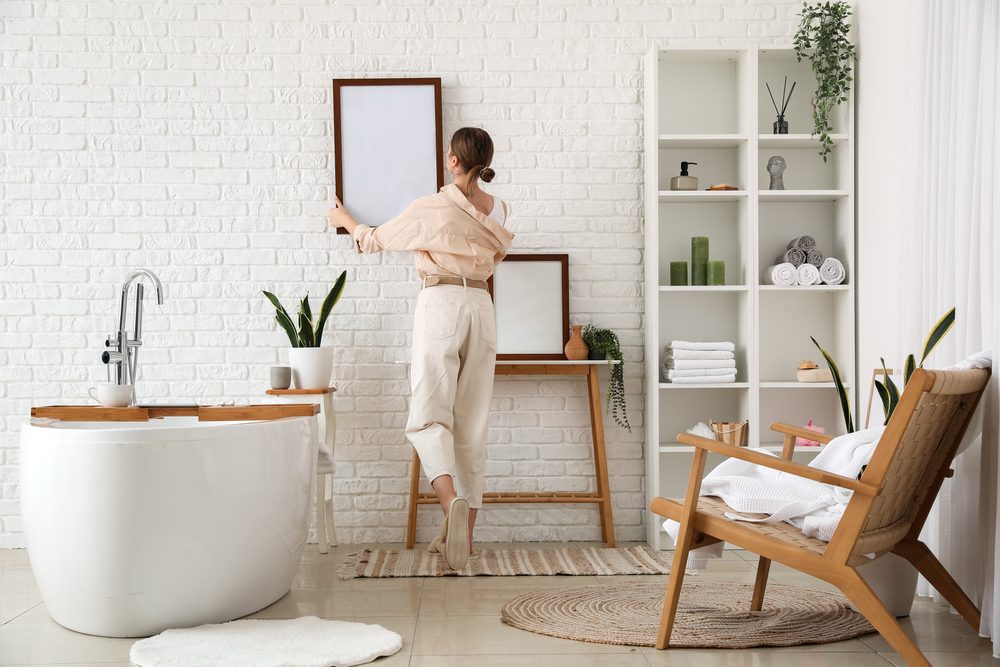
Secret 4: Frame Your Bathroom Mirrors
Large, unframed slabs of glass glued to bathroom walls look unfinished. You can build a custom frame directly over the existing glass. Measure the perimeter of your mirror and cut decorative baseboard or casing trim to size using 45-degree miter cuts. Paint the trim before installation to avoid getting paint on the mirror. Apply a generous amount of mirror-safe construction adhesive to the back of the wood pieces and press them directly onto the edges of the glass. Secure the corners with painter’s tape until the adhesive cures overnight.
Secret 5: Paint Interior Doors a Dark Color
Standard white hollow-core doors show scuffs easily and lack visual weight. Painting your interior doors a rich color—like charcoal gray, navy blue, or soft black—mimics the look of heavy, solid-wood doors. Remove the doorknobs and hinges. Sand the door lightly with 120-grit sandpaper to remove the existing glossy finish. Apply a coat of bonding primer, followed by two coats of a highly durable semi-gloss enamel paint. Use a foam roller to achieve a smooth, factory-like finish without brush strokes.
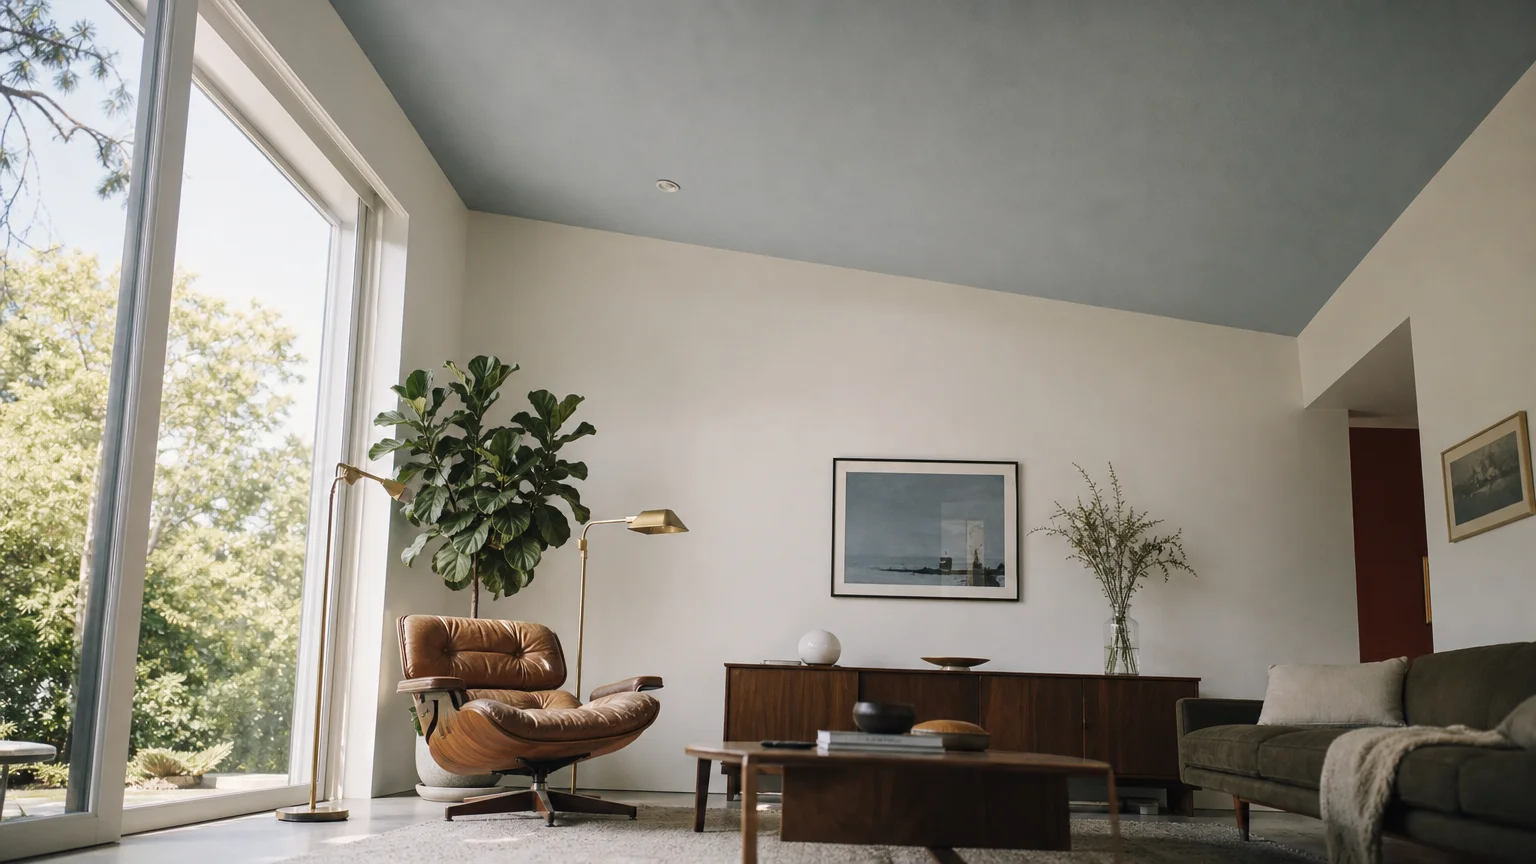
Secret 6: Hang Curtains High and Wide
Mounting curtain rods right above the window frame makes the window look small and the ceiling look low. Install your curtain rod brackets four to six inches above the top window casing, or even directly below the ceiling line. Extend the rod six to eight inches past the left and right edges of the window. When you hang your drapes, the fabric will rest against the wall rather than blocking the glass, tricking the brain into perceiving a massive, expansive window.
Secret 7: Upgrade Your Cabinet Hardware
Swap out flimsy, hollow cabinet knobs for heavy, solid-metal pulls. Unfasten your existing hardware with a screwdriver. If you are changing from a single knob to a wider handle pull, use your cabinet hardware template to drill a second hole in precise alignment. Choose finishes like unlacquered brass, polished nickel, or matte black for a sophisticated aesthetic. The sheer weight of solid hardware makes cheap cabinet doors feel expensive when you open them.
Secret 8: Add Ceiling Medallions
A ceiling medallion sits between your light fixture canopy and the ceiling drywall, adding a layer of traditional architectural detail. Purchase a lightweight polyurethane medallion. Turn off the power, lower the light fixture canopy, and slide the medallion over the electrical box. Apply construction adhesive to the back of the medallion and press it against the ceiling. Drive two drywall screws through it for extra security, fill the screw holes, and paint it to match your ceiling. Reattach the light canopy for a flawless, customized look.


Leave a Reply
You must be logged in to post a comment.