The American House

  • Home
  • DIY
  • Garden
  • Tips & Tricks

10 Home Repairs That Get Much More Expensive If You Wait

May 6, 2026 · Home
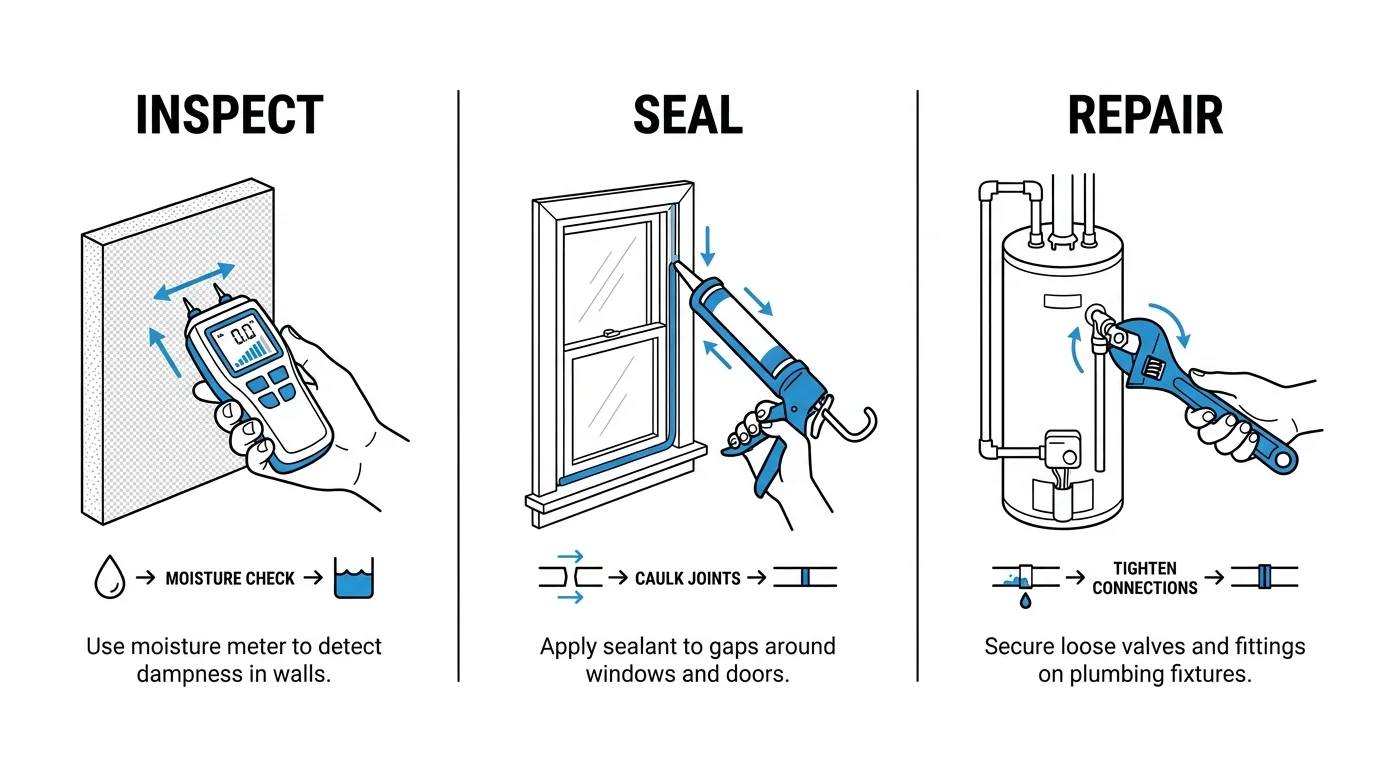
A three-panel diagram showing the steps of inspecting with a meter, sealing with caulk, and repairing a valve.
Follow these simple steps to inspect for moisture, seal window gaps, and repair leaky plumbing fixtures.

Step-by-Step Instructions

Walk through your property systematically, tackling these ten critical repairs that demand immediate attention. If you catch them early, you spend pennies on the dollar compared to professional remediation.
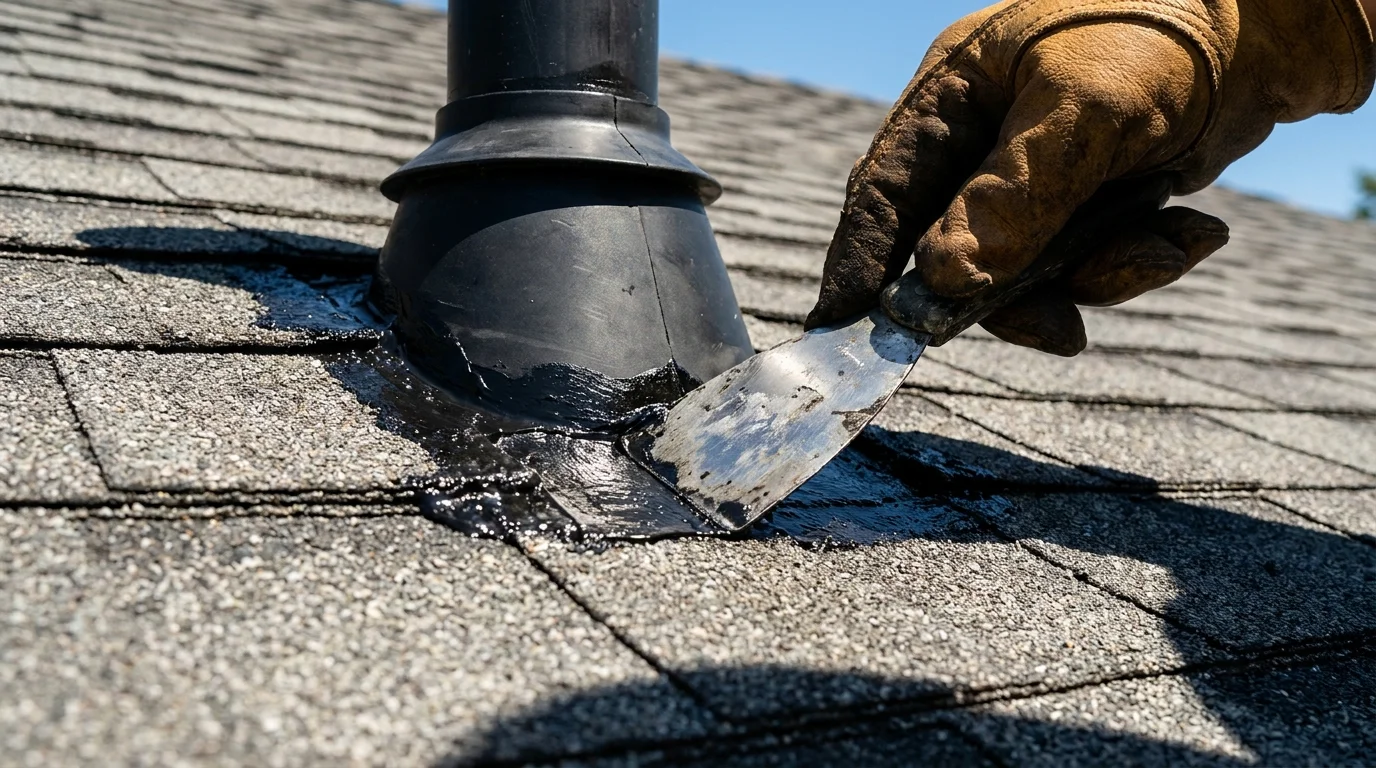
A gloved hand applying black roofing cement to seal the base of a plumbing vent pipe on an asphalt shingle roof.
A gloved hand applies sealant around a roof vent boot to prevent costly water damage and leaks.

1. Sealing Roof Flashing and Vent Boots

Sunlight aggressively degrades the rubber gaskets surrounding your rooftop plumbing vents. When these boots crack, rainwater runs directly down the exterior of the pipe, rotting your attic subfloor and staining your ceilings. Inspect your roof visually using binoculars; if you spot cracked rubber, safely access the roof and apply a generous layer of roofing cement around the base of the boot. Replacing the boot entirely costs about $15 in materials, whereas repairing a collapsed, water-logged ceiling easily exceeds $1,500.
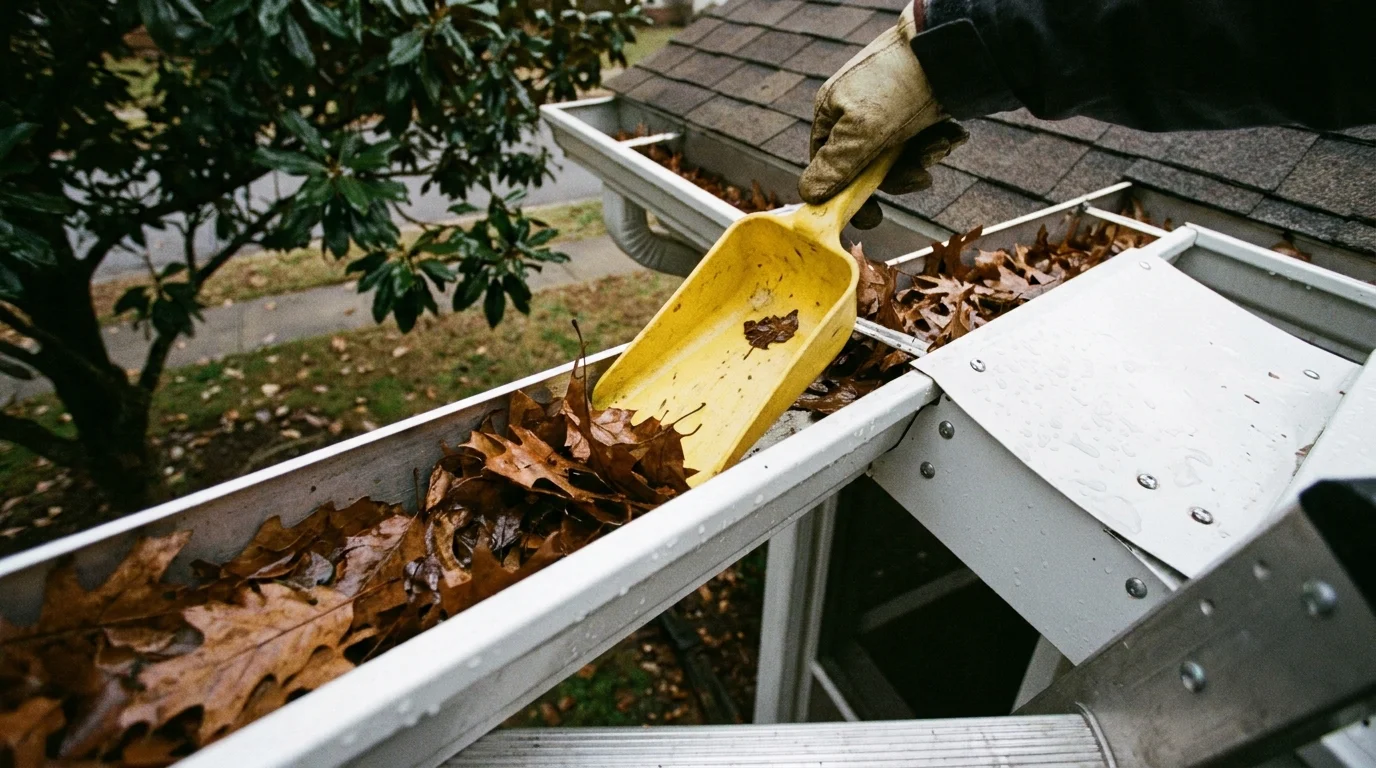
Looking down into a rain gutter being cleared of leaves with a plastic scoop.
A gloved hand uses a yellow scoop to clear leaves from gutters and prevent costly water damage.

2. Clearing Gutters and Extending Downspouts

Clogged gutters cause water to overflow and wash down your home’s exterior walls, rotting the wood fascia and saturating the soil directly against your foundation. Clean your gutters twice a year using a plastic gutter scoop to prevent scratching the metal finish. Just as importantly, check your downspout extensions. Water must discharge at least six feet away from the foundation wall. Purchase corrugated plastic extensions ($10 each) to redirect the flow and prevent thousands of dollars in basement waterproofing repairs.
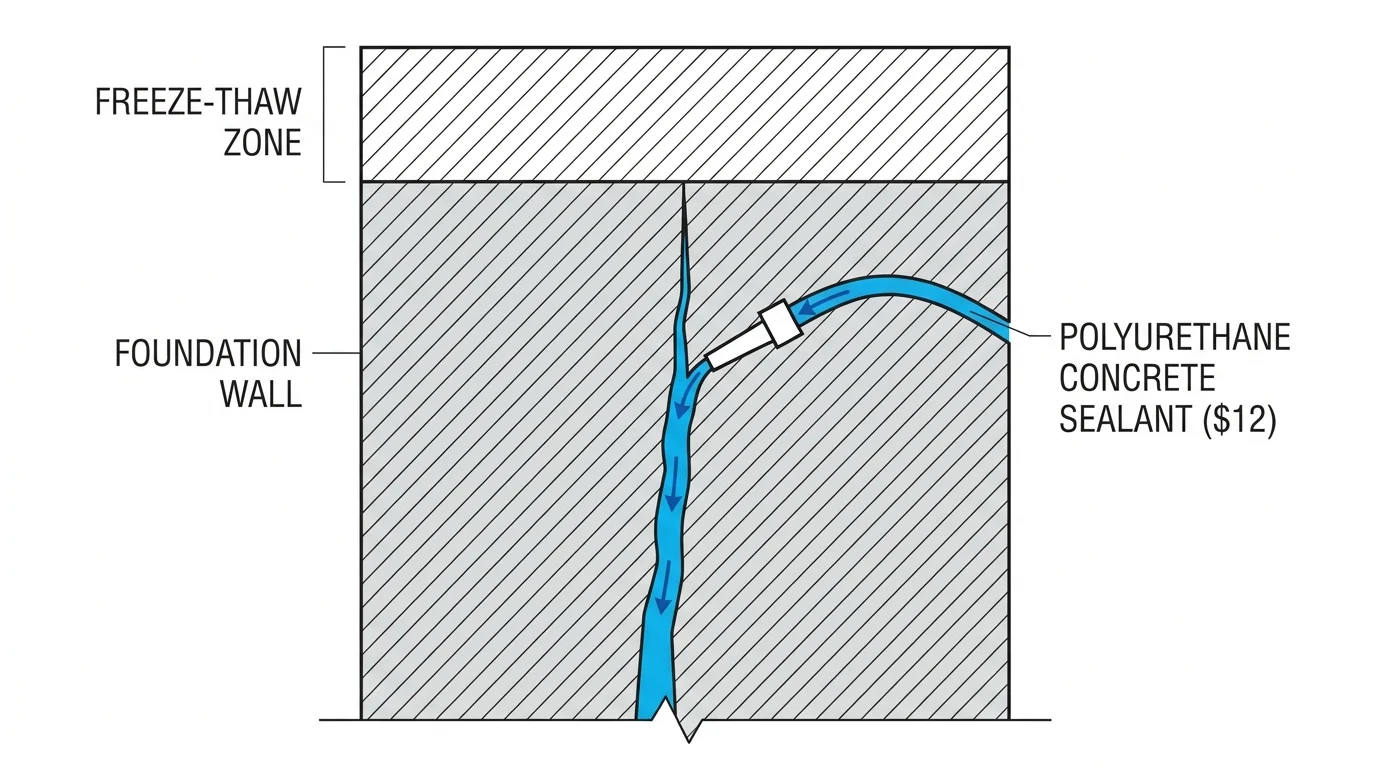
A cross-section diagram showing how polyurethane sealant fills a crack in a concrete foundation wall.
Stop costly structural damage by filling foundation cracks with polyurethane sealant before the next freeze-thaw cycle.

3. Filling Foundation Shrinkage Cracks

Concrete naturally shrinks and cracks over time, but leaving vertical hairline cracks exposed allows groundwater to seep into your basement. Use a wire brush to clean loose debris from the crack, then inject a polyurethane concrete sealant into the fissure. Polyurethane remains flexible, expanding and contracting with the seasonal temperature shifts. Note: If you observe horizontal cracks or gaps wider than a quarter inch, stop immediately and hire a structural engineer; these indicate severe structural failure.

An adjustable wrench tightening a leaking chrome pipe under a kitchen sink with a drip bucket underneath.
A hand uses a wrench to tighten a leaky pipe joint as water drips into a bucket.

4. Fixing Minor Plumbing Drips

A dripping faucet or a weeping supply valve beneath a bathroom sink seems harmless, but continuous moisture breeds mold and destroys cabinetry. The EPA WaterSense program notes that minor household leaks waste up to 10,000 gallons of water annually. Tighten loose slip-nut connections on sink traps by hand. For dripping supply valves, shut off the main water line, unscrew the valve, wrap the threads with fresh plumber’s tape, and reattach it firmly with an adjustable wrench.
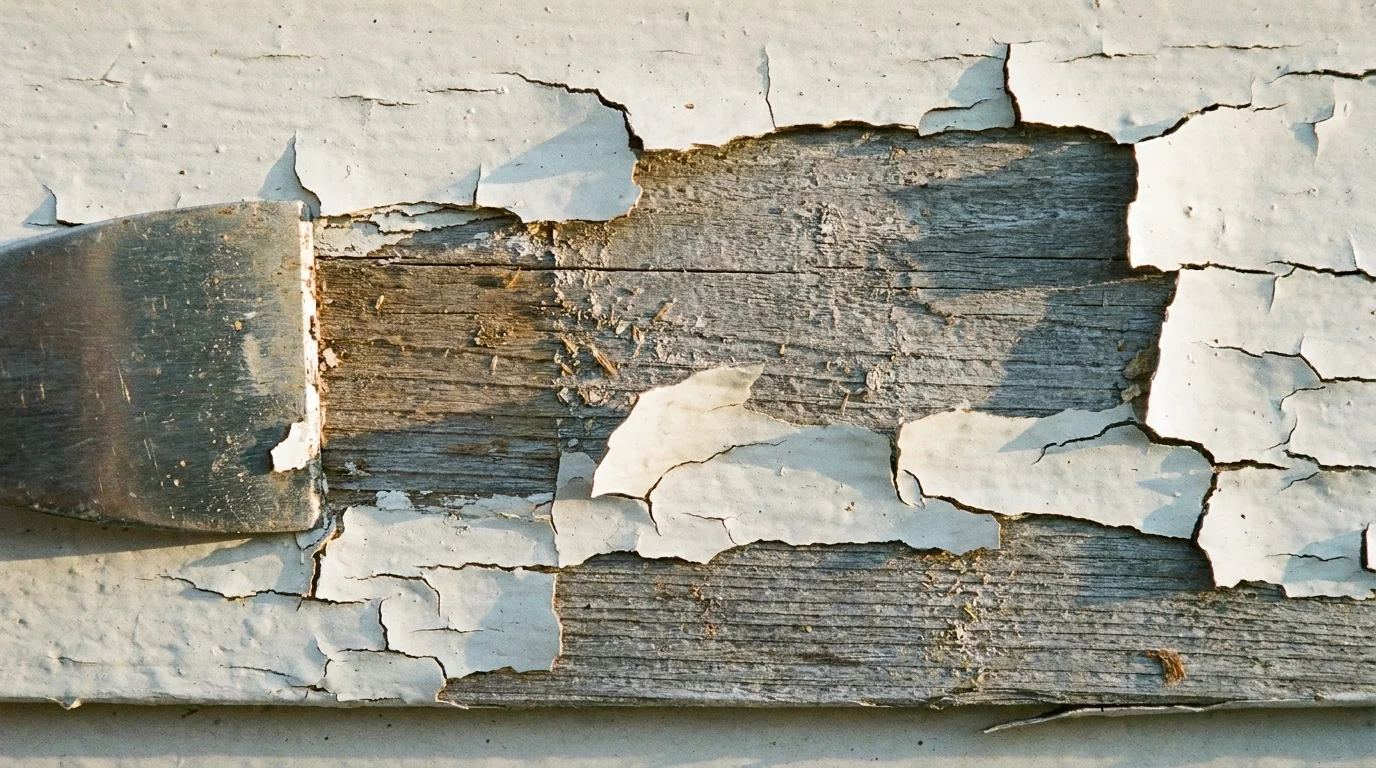
Macro shot of peeling white paint on wood siding, showing the weathered wood grain underneath.
A metal scraper peels back flaking white paint to reveal weathered wood that needs urgent protection.

5. Remedying Peeling Exterior Paint

Paint acts as your siding’s protective skin. Once it flakes away, bare wood absorbs moisture, leading to severe dry rot. Scrape away all loose, flaking paint using a carbide scraper. Sand the edges smooth, apply a high-quality oil-based bonding primer to the bare wood, and finish with a premium exterior acrylic latex paint. Replacing rotten wood siding costs upwards of $10,000, while a quart of primer and paint runs about $40.
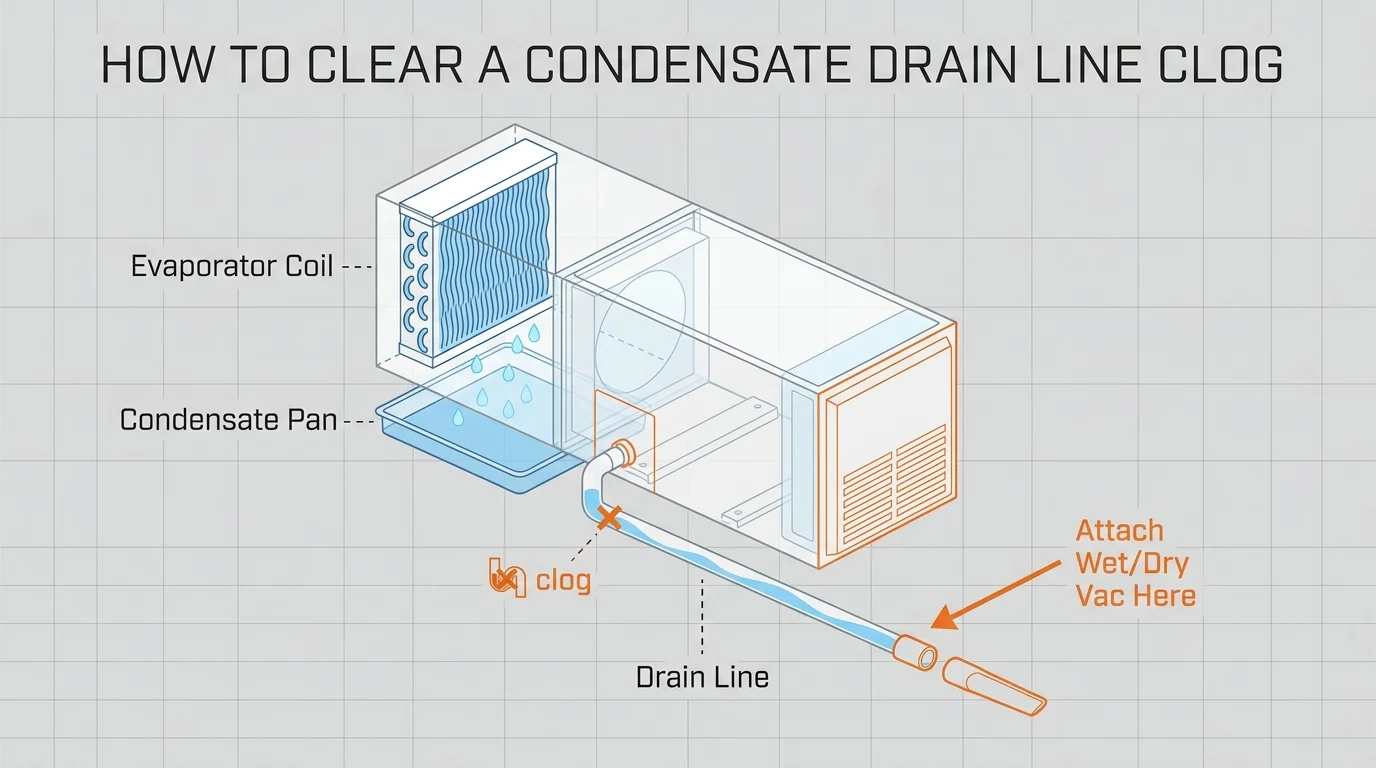
An exploded view diagram of an HVAC unit showing the path of the condensate drain line and where to clear clogs.
Clear a clogged HVAC condensate drain line with a wet/dry vacuum to avoid expensive water damage.

6. Clearing the HVAC Condensate Drain

Your air conditioner pulls massive amounts of humidity out of the air, producing condensation that drips into a drain pan and flows outside through a PVC pipe. Algae and sludge frequently clog this pipe, causing the pan to overflow into your attic or utility closet. Once a year, pour one cup of distilled white vinegar down the condensate drain access port to kill algae buildup. This one-minute chore prevents catastrophic water damage and expensive HVAC service calls.

A cross-section diagram of a water heater comparing a corroded anode rod to a new one, with a multimeter testing the unit.
Replacing a corroded anode rod with a new one prevents sediment buildup and expensive tank failure.

7. Replacing the Water Heater Anode Rod

Your water heater features a sacrificial magnesium or aluminum anode rod designed to attract corrosive elements in the water, rusting the rod instead of the tank’s steel lining. When the rod fully depletes, the water aggressively attacks the tank, leading to a sudden, catastrophic rupture. Turn off the water and power to the heater, drain a few gallons to relieve pressure, and use a 1-1/16 inch socket wrench to unscrew the hex head on top of the tank. Drop in a flexible replacement rod ($30) to double the lifespan of your $1,500 appliance.
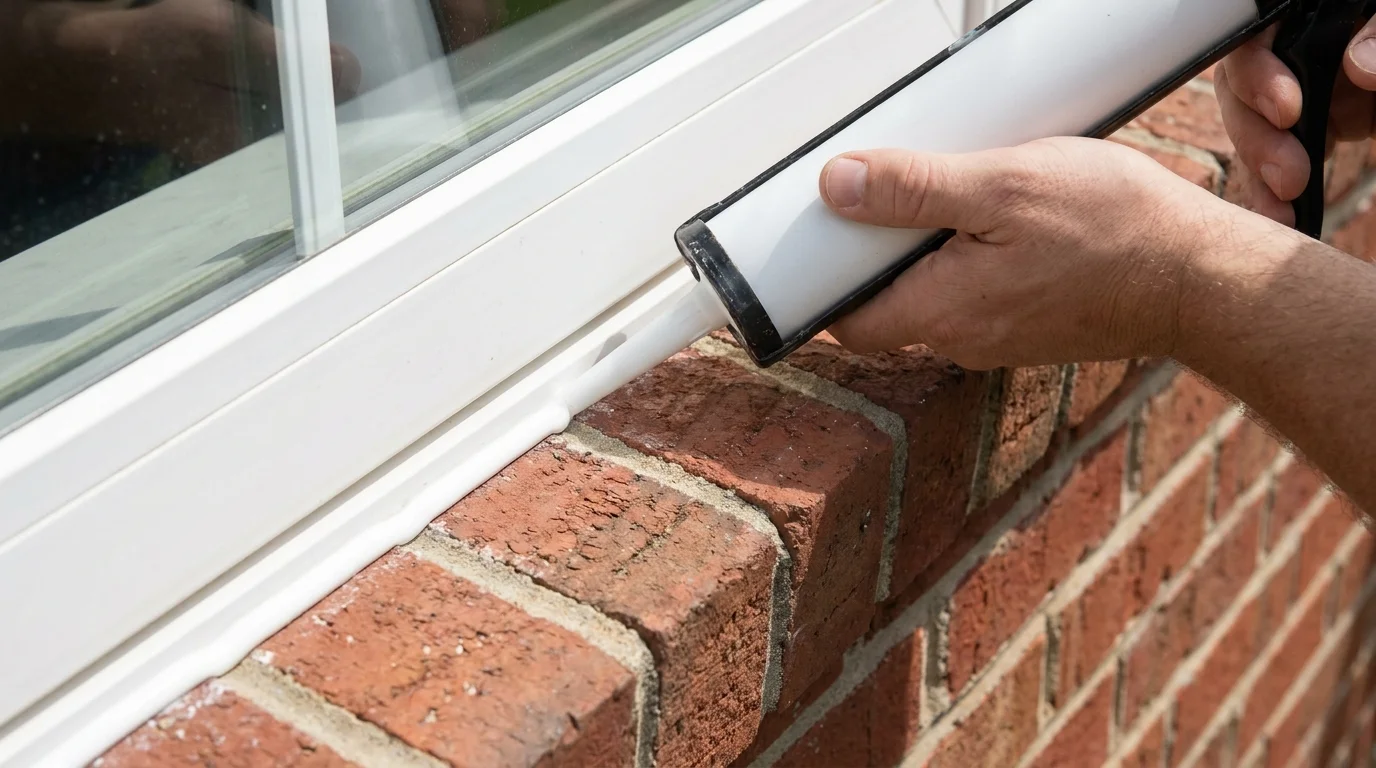
A steady hand applying a white bead of caulk to the joint between a window frame and a brick wall.
Applying fresh white caulk between window frames and brick prevents moisture from causing expensive structural damage.

8. Re-Caulking Windows and Doors

Drafty windows drive up utility bills, but failing caulk also permits rainwater to seep into the wall framing. Inspect the exterior perimeter of all windows and doors. If the existing caulk looks dry, cracked, or is pulling away from the siding, slice it out using a utility knife. Clean the joint thoroughly and apply a continuous bead of exterior-grade silicone caulk. Smooth the bead with a damp finger to ensure it fully bridges the gap between the window trim and the siding.

A close-up of a hand pressing into a soft, rotting spot on a weathered wooden deck board.
Pressing a thumb into weathered, mossy wood helps identify soft spots before they become expensive repairs.

9. Treating Spongy Deck Boards

Wooden decks take a beating from UV rays and standing water. Walk your deck slowly and use a screwdriver to probe any discolored or soft spots in the wood. If the screwdriver sinks easily into the timber, rot has set in. Remove the affected boards immediately to stop the fungus from spreading to the structural joists underneath. Apply copper naphthenate wood preservative to the exposed joists before installing replacement decking to ensure longevity.
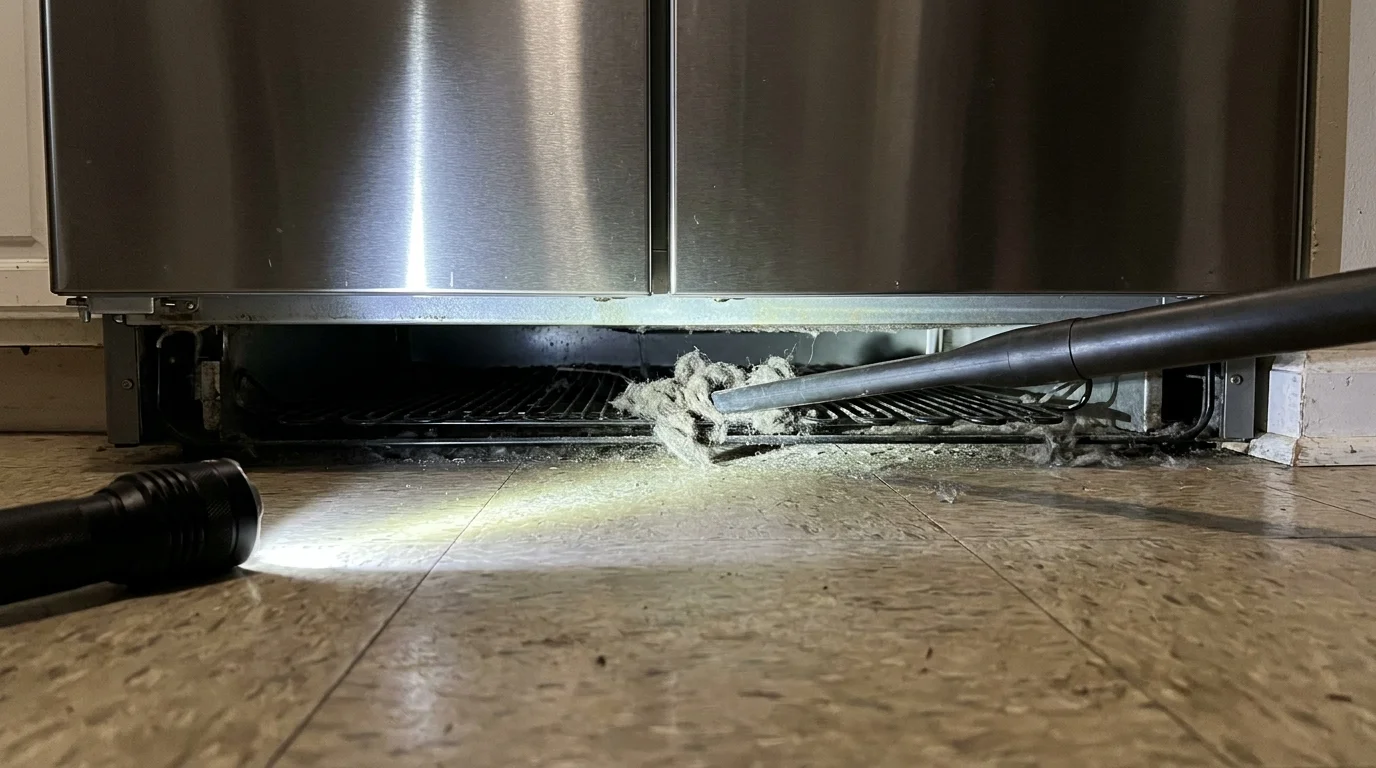
A vacuum cleaner attachment clearing dust from the condenser coils underneath a stainless steel refrigerator.
Clear thick dust from refrigerator coils with a vacuum and flashlight to prevent a costly appliance breakdown.

10. Cleaning Refrigerator Condenser Coils

Dust, lint, and pet hair rapidly blanket the condenser coils located at the back or beneath your refrigerator. This insulation layer traps heat, forcing the compressor to run continuously to maintain food-safe temperatures. The overworked compressor eventually burns out, demanding a costly replacement or forcing you to buy a new appliance entirely. Unplug the refrigerator, remove the base grille, and use a specialized coil brush ($10) combined with a vacuum attachment to clear the debris.


Pages: 1 2 3 4 5 6 7

Share this article

Facebook Twitter Pinterest LinkedIn Email

Leave a Reply Cancel reply

You must be logged in to post a comment.

Latest Posts

  • A stylized screenprint illustration of a cozy craftsman bungalow house nestled safely inside a giant pair of protective hands. The State-by-State Guide to Senior Property Tax Relief Programs Updated for 2026
  • A cozy living room corner featuring a rich sage green accent wall behind a cognac leather armchair and wooden side table. 10 Accent Colors That Will Still Look Right in a Decade
  • A sunlit living room corner featuring a dual-tone accent wall painted in sage green and terracotta peach behind a mid-century modern chair. 20 Color Combination That Works in North-Facing, East-Facing, and South-Facing Rooms
  • A close-up of bedroom bedding layers featuring terracotta linen, a green velvet throw, and a cream boucle pillow. 8 Bedroom Textile Combinations That's Been All Over Design Instagram This Year
  • The 7 Pantone 2027 ‘Sense-Abilities’ Palettes: Which One Belongs in Your Home? The 7 Pantone 2027 'Sense-Abilities' Palettes: Which One Belongs in Your Home?
  • A warm, sunlit living room featuring a matte dusty lilac wall that absorbs glare, styled with a cream boucle lounge chair. 7 Surprising Colors That Works in South-Facing Rooms When Nothing Else Does
  • A luxurious bathroom with glossy emerald green and midnight blue vertical tiles behind a warm oak wood vanity with brass fixtures. Bathroom Tiles in Deep Emerald and Midnight Blue: The Bathroom Trend of 2027
  • A luxurious modern living room featuring a dramatic floor-to-ceiling Calacatta marble fireplace accent wall with bold charcoal veining. 9 Statement Stone Feature Walls With Dramatic Veining Worth Copying
  • Ink and watercolor illustration of a cozy craftsman house protected by a warm glass dome, shielding it from cold autumn winds. The Little-Known Property Tax Freeze Programs available to Retirees
  • Low-angle shot of a living room with a pale blue-gray ceiling and low-profile furniture under bright natural light. 9 Ceiling Paint Colors That Make Rooms Feel Bigger

Related Articles

reasons your home isn't selling

5 Incredible Reasons Your Home Isn’t Selling

Do you know the reasons your home isn’t selling? Read on and find out! The…

Read More →
celebrity home items

Architectural Digest Home Tours: 7 Incredible Celebrity Home Items You’ll Find on Amazon

Did you know that there are plenty of celebrity home items you could find on…

Read More →
A couple taking a break from painting inside a sunlit, historic house, looking out a large window at a tree-lined street.

10 Towns Where Housing Costs Stay Low

This four-step infographic outlines how to target, diagnose, source, and customize essential home moisture repairs.…

Read More →
Benefits Of Growing Lemongrass

Here’s When You Should Water Your Grass (Best Timeframes)

Have you ever noticed the neighbors’ sprinklers running all hours of the day? If that’s…

Read More →
overdone kitchen trends

6 Overdone Kitchen Trends According to Designers

Closed-off cabinetry Just try to have this image in your mind for a couple of…

Read More →
expensive home

16 Ways to Make Your House Feel More Expensive

Add moldings We can’t deny the fact that adding moldings to your home is probably…

Read More →
home design trends, budget-friendly hacks

5 Great Budget-Friendly Hacks to Refresh Your Home in No Time

If you want to refresh your home without spending a fortune, you’ll love these budget-friendly…

Read More →
attic

How to Make Your Attic a Livable Place: 10 Amazing Tips

2. Add flooring to your attic Adding an extra layer will keep the space warmer…

Read More →
design trends

13 Design Trends That NEVER Had a Chance

3. Mason jar obsession We all know what a Mason jar is. We have seen…

Read More →

The American House

Inedit Agency S.R.L.
Bucharest, Romania

contact@theamericanhouse.com

Trust & Legal

  • Privacy Policy
  • Terms and Conditions
  • Do not sell my personal information
  • Subscribe
  • Unsubscribe
  • Contact
  • Request to Know
  • Request to Delete
  • CA Private Policy

Categories

  • DIY
  • Expert Tips
  • Garden
  • Tips & Tricks

© 2026 The American House. All rights reserved.