Step-by-Step Instructions
Executing your bathroom remodel demands a systematic approach. Rushing through the waterproofing or layout phases ruins the final aesthetic and jeopardizes your home’s structural integrity. Follow these chronological steps to achieve a flawless, professional-grade finish.
Phase One: Demolition and Substrate Repair. Remove the old drywall, tile, and flooring down to the framing and subfloor. Inspect the exposed wood for signs of water damage; replace any soft or darkened joists and studs immediately. Install your solid cement board or structural foam panels directly to the studs using specialized alkaline-resistant screws spaced exactly eight inches apart. Tape every seam with fiberglass mesh tape and bed the tape with a thin layer of mortar to create a continuous, unified surface. Sweep and vacuum the entire workspace to remove all debris and dust.
Phase Two: Comprehensive Waterproofing. Apply a liquid rubber waterproofing membrane or embed a sheet membrane system over every inch of the shower surround and the bathroom floor. If using a liquid membrane like RedGard, paint on two thick, contrasting coats, allowing the first coat to dry completely before applying the second in a perpendicular direction. Pay special attention to the corners, the shower pan seam, and the plumbing penetrations. Water always finds the weakest link; your waterproofing layer must form a continuous, impermeable envelope to protect your framing.
Phase Three: Layout and Dry Fitting. Never start setting tile against a crooked wall or without a master plan. Find the center point of your floor or main shower wall and snap clear chalk lines vertically and horizontally. Dry-lay a row of tiles along these lines to see where your cuts will fall at the edges of the room. Adjust your center lines to ensure you do not end up with tiny, awkward slivers of tile at the ceiling or floor joints. For large-format tile trends, plan for a one-third offset pattern rather than a standard fifty-percent brick lay to minimize the risk of noticeable bowing.
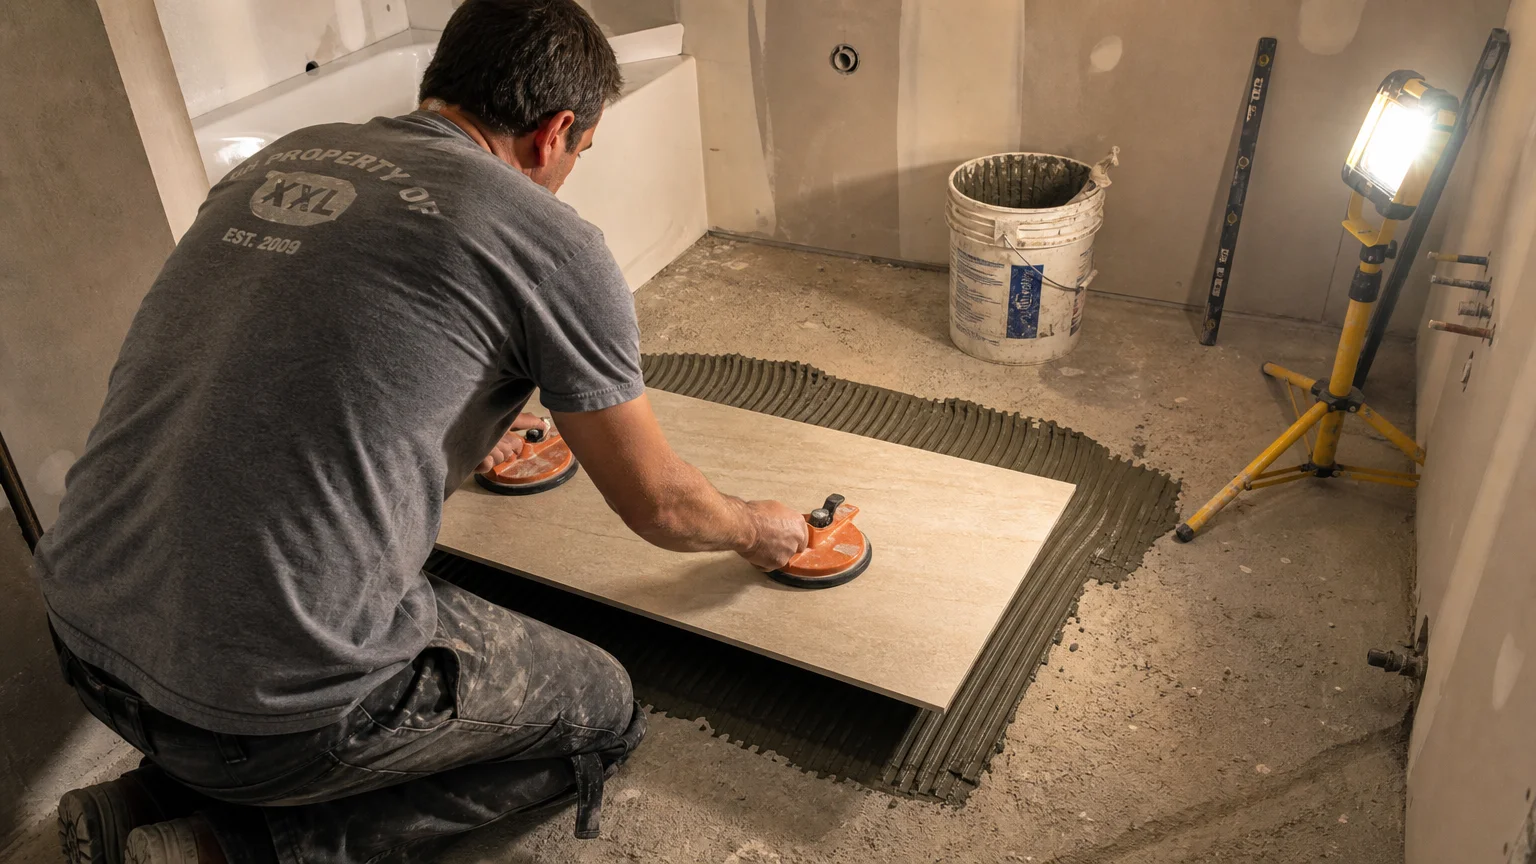
Phase Four: Mixing Mortar and Setting Tile. Mix your polymer-modified thin-set mortar with cold water until it reaches the consistency of thick peanut butter. Let the mixture slake—rest undisturbed—for exactly ten minutes to activate the chemical polymers, then remix it briefly. Use a 1/2-inch by 1/2-inch square-notched trowel to spread the mortar over a small section of the substrate. Back-butter the rear of each large tile with a flat layer of mortar to achieve 100 percent coverage. Press the tile firmly into the wall mortar, sliding it slightly perpendicular to the trowel ridges to collapse the air pockets. Insert your leveling clips and wedges at the corners, tightening them to pull adjacent tiles perfectly flush.
Phase Five: Grouting and Curing. Wait at least 24 to 48 hours for the thin-set to cure fully before removing the leveling wedges. Break the clips off cleanly by striking them parallel to the grout joint with a rubber mallet. Mix your high-performance grout according to the manufacturer’s exact specifications. Force the grout deep into the joints using a hard rubber float held at a 45-degree angle. Wait 15 to 30 minutes until the grout slightly hazes over, then wipe the tile faces clean using a barely damp sponge. Avoid using excess water, which weakens the grout structure and dilutes the color pigment.


Leave a Reply
You must be logged in to post a comment.